Sunday 28 February 2021

GoDaddy Review

Disclosure: This content is reader-supported, which means if you click on some of our links that we may earn a commission.

GoDaddy hosts millions of websites all over the world as a giant in the hosting and domain name selling game. Its long list of products offers just about anything you might need to get a website up and running on a shoestring budget, at least for the first year. 

After lots of research, comparison, and consideration, it’s safe to say GoDaddy satisfies most of your website needs, especially if it’s your first time building a site and you want affordable VPS hosting. 

Beyond that, and as with any other web hosting and domain name provider, there are solid pros and cons to its plans and packages. 

GoDaddy Compared to The Best Cheap Web Hosting

I curated a top list of affordable web hosting providers, so you know your options if you need to start a website on a budget. GoDaddy is one of the best choices if you want hosting that’s a step above shared hosting with its affordable VPS hosting plan. For the price that some hosting providers would charge for shared hosting, you can get VPS hosting through GoDaddy. 

But, if you’re trying to find a more robust web hosting solution for your web project, GoDaddy does start to get expensive quickly. That’s why I deem it a great option for starter sites that can do with either shared or dedicated hosting and that don’t need tons of server power to run well. 

You don’t have to make a hosting decision in a hurry, though. See all of my top picks to make a more informed decision. 

Who is GoDaddy Best For?

GoDaddy is great for beginner website owners that want an affordable and convenient start for their websites with generous storage. GoDaddy also does well with around-the-clock site security monitoring, but perks like SSL certificates are add-ons you’ll have to purchase as extras. 

This is why it’s a great hosting option for smaller and beginner websites working with a budget and don’t need too many robust website solutions. 

GoDaddy: The Pros and Cons

There’s no question GoDaddy is one of the biggest names out there as far as how recognizable it is. It also houses the most domains globally, with over 17 million domain names on its roster. 

Still, there are pros and cons to choosing GoDaddy as your web hosting provider. Here are the more prominent ones to take into account.

Pros

24/7 support: GoDaddy ensures it’s always within reach if you ever need a hand or run into trouble with your site. You can either reach them by phone or use its handy chat support option. 

Lots of storage: When you look through and compare GoDaddy’s hosting plans, it’s generous with its unmetered bandwidth feature for all tiers.  

Affordable .com domain: GoDaddy offers you the chance to snag a domain for only 99 cents  for the first year, which can save you money as you begin. 

Unlimited site hosting: Most GoDaddy plans let you host an unlimited number of websites except for its cheapest Economy plan. 

Convenience: Since you can manage your domain and website in one place, GoDaddy offers convenience in managing both from one dashboard. 

Cons

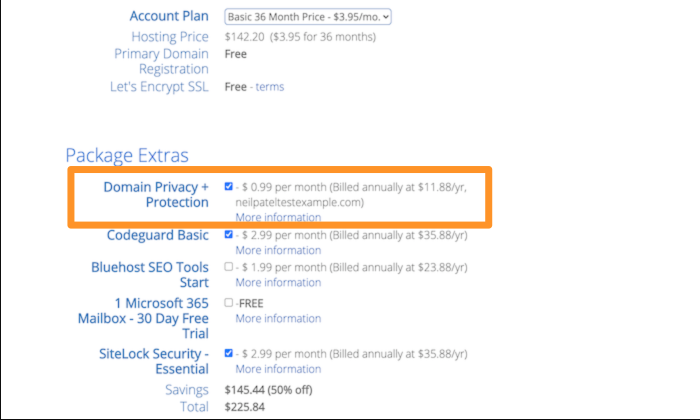
Constant upsells: GoDaddy is notorious when it comes to its upsells through every step of the checkout process. While it does honor the prices for each tier if that’s all you’re going for, it’s quick to suggest add-ons and extra features you might not need. 

Expensive renewal rate: This is one of the reasons why I think GoDaddy is great for beginner sites that just want to get their foot in the door with hosting. Once that initial year is up, GoDaddy’s renewal rates can start to get costly for what you get. 

Charges for add-ons: Other hosting providers throw in free first-year domain registration, for example, or include free SSL certification as part of its plans. GoDaddy does not always include these features depending on the plan you choose and can charge extra for them.  

Inconsistent customer support: Support for GoDaddy isn’t always top-notch as convenience and reliability are concerned. There is always the possibility of long wait times to be connected to the right person. 

GoDaddy Pricing

GoDaddy’s prices can be broken down into two main categories: Domain name purchases and hosting plans.

Domain Names

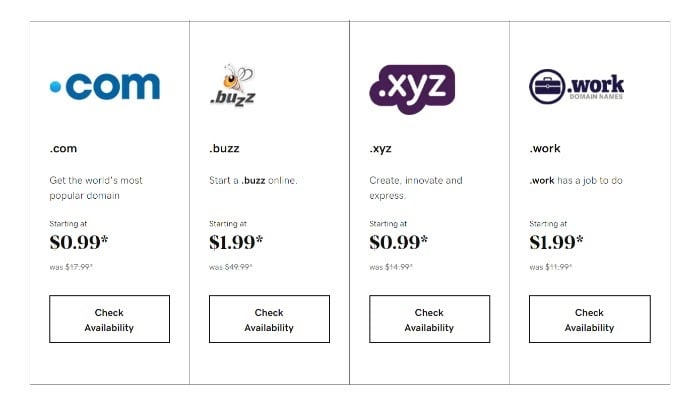
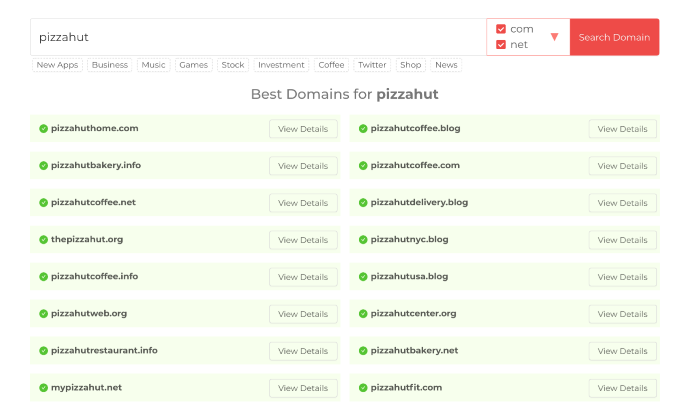
One of GoDaddy’s strengths is its huge list of domain name extensions. Its cheapest .com option, which is also one of the most popular extensions, is affordable for only 99 cents for the first year. 

If you happen to choose a hosting plan that doesn’t include a free domain name, a 99-cent .com extension isn’t a terrible price to pay. 

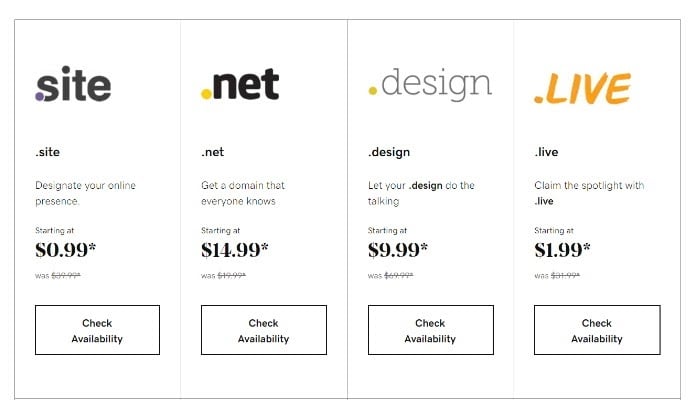
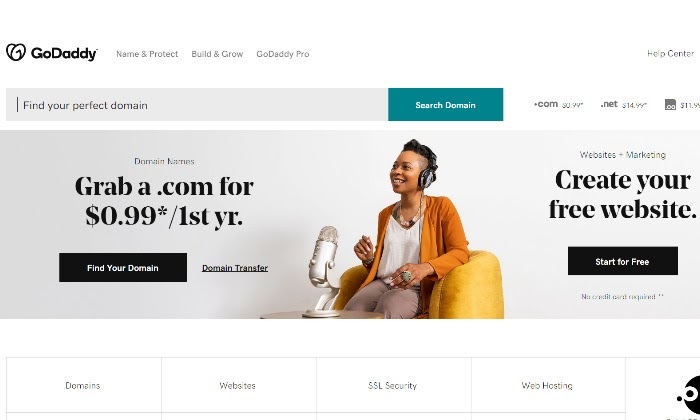
GoDaddy makes it easy to create, search for, or check on your domain name’s availability. GoDaddy offers some of the most affordable domain name plans out there as far as introductory pricing goes. 

Hosting Plans

Here’s a closer look at each of GoDaddy’s hosting plans:

Web Hosting

  • Economy – $5.99 a month
  • Deluxe – $7.99 a month
  • Ultimate – $12.99 a month
  • Maximum – $19.99 a month

WordPress Hosting

  • Basic – $6.99 a month
  • Deluxe – $9.99 a month
  • Ultimate – $12.99 a month
  • Ecommerce – $15.99 a month

WordPress Ecommerce Hosting – Starting at $15.99 a month

Business Hosting

  • Shared Hosting – $5.99 a month
  • Business Hosting – $19.99 a month
  • VPS Hosting – $4.99 a month

VPS Hosting

  • 1 vCPU – $4.99 a month
  • 2 vCPU – $19.99 a month
  • 4 vCPU – $39.99 a month
  • 8 v CPU – $69.99 a month

Dedicated Server

  • DS 32 – $129.99 a month
  • DS 64 – $169.99 a month
  • DS 128 – $299.99 a month
  • DS 256 – $399.99 a month

Windows Hosting – Starting at $5.99 a month

  • Economy – $5.99
  • Deluxe – $7.99
  • Ultimate – $12.99

Reseller Hosting – Starting at $39.99 a month 

  • Enhanced – $39.99
  • Grow – $49.99
  • Expand – $64.99
  • Established – $89.99

It’s safe to say GoDaddy offers a ton of hosting plans that cover anything you might need. A giant list of 27 different hosting plans leaves little to be desired. 

I highly recommend you spend the time carefully walking through each hosting option and its corresponding tier according to your site’s needs. 

If you know you’re going to be using WordPress as your CMS, then you’ll want to pay special attention to its WordPress solutions. They’re geared for SEO compatibility, speed, and ease of use once you sign up for a hosting account. 

I’d like to highlight GoDaddy’s VPS hosting plan, as it’s one of the most affordable on the market. Other big-name hosting providers don’t even come close to how affordable GoDaddy’s VPS hosting plans are. You can’t beat a $4.99 price point for a self-managed virtual private server plan. 

GoDaddy Offerings

GoDaddy hasn’t gotten as big as it has without offering an extensive list of website building and hosting options. Once you land on the homepage, it can be overwhelming and hard to know where to start. 

To simplify its long list of plans and tools, there are three main categories its product offerings fall under. Let’s take a closer look at each one and how they stack up. 

GoDaddy Name & Protect

GoDaddy Name & Protect offers some useful domain tools:

  • Domain name transfers
  • Domain name generator
  • Domain name search and WHOIS tools
  • SSL Certification
  • Website backup tools
  • Protect against malware and site attacks

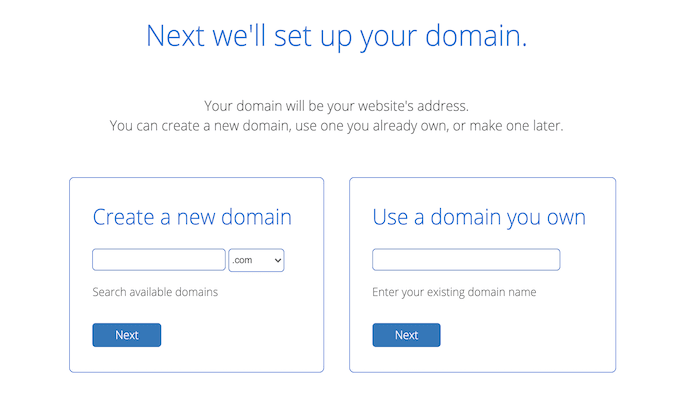
If you’re starting a website, you know you’ll need a domain name, and this is where GoDaddy shines. It’s the biggest repository of domain names, and it’s sure to have the domain name you’re looking for.

If you happen to want a domain name that’s taken, you can try out its domain brokerage services or try the domain name generator to come up with a new site name.  

Like any other reputable hosting provider, GoDaddy also offers SSL certification, website backup tools, and your standard protection against malicious cyber attacks. 

Because GoDaddy offers plenty of usable domain tools, it’s frequently rated as one of the most popular hosting providers out there. 

But the fun doesn’t stop there. GoDaddy also offers plenty of website building and growth tools. 

Go Daddy Build & Grow

GoDaddy’s Build & Grow product offerings include:

  • Website builder
  • Online store builder for ecommerce sites
  • An extensive array of hosting options
  • Email and Microsoft 365 tools
  • Second mobile phone number
  • Digital marketing suite
  • GoDaddy marketing services

If I were to list every single tool GoDaddy offered its customers, we’d be here forever. As a web host and domain name registrar, GoDaddy seems to have taken the route of going wide instead of going deep with its key features and offerings. 

This can either appeal to you as a customer or turn you off and onto other hosting providers. It all comes down to what you value in a web host and what you’re willing to invest or need to manage your site successfully. 

The most important feature in GoDaddy’s Build & Grow product offering is its buffet of web hosting options. Here’s a more in-depth look at each.

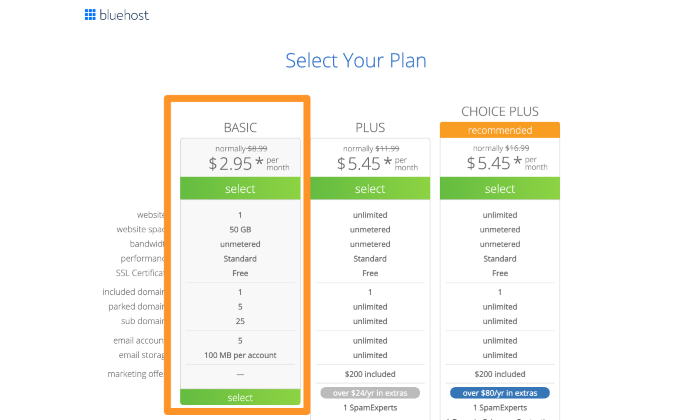
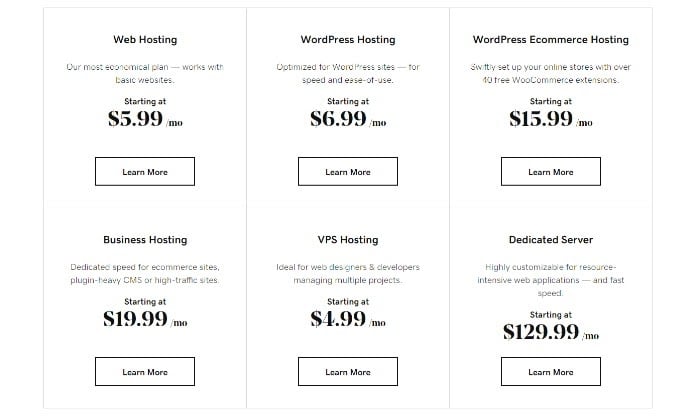
Web Hosting: GoDaddy’s most basic hosting plan starts at $5.99 a month. Not quite as cheap as other beginner-friendly hosts, but still considerably affordable and great for starter sites that want to build their online presence. 

WordPress Hosting: WordPress hosting is specifically optimized for WordPress users in terms of speed and accessibility. WordPress plans start at $6.99 for basic hosting perks, including 30 GB of storage along with a free domain, free business email, and free SSL certificate. This plan works for you if your site hoovers around the 25,000 visitor mark. With three additional WordPress tiers, the deal only gets sweeter the more you pay per month. 

WordPress Ecommerce Hosting: GoDaddy has solutions for ecommerce hosting as well, with plans starting at $15.99 a month along with free WooCommerce extensions. Once you sign up to one of its WooCommerce tiers, you’ll easily be able to download and install WordPress and WooCommerce together to get up and running in no time. 

Business Hosting: A business hosting plan comes with more dedicated resources, but with a simplified control panel, so you don’t need a full IT team to manage your site. Plans start at $5.99 a month for shared hosting, which you can eventually upgrade as your site grows.

VPS Hosting: GoDaddy’s self-managed virtual private hosting plan is definitely one of its redeeming offers because of how affordable it is for developers and system administrators that want a more hands-on approach to their websites with plenty of customizable options. Plans start at just $4.99 a month, and it comes with one CPU Core, one GB RAM, and 100 GB SSD Storage. This is a steal when compared to what other websites charge for similar VPS hosting packages. 

Windows Hosting: Yet another solid GoDaddy option for Windows fans that starts at just $5.99 a month and comes with a free domain, 100 GB of storage, and a free Office365 email for your first year. If you’re already using Windows products, this can be a great plan to integrate into what’s already working. 

Reseller Hosting: Are you a reseller looking for reliable hosting resale options? GoDaddy lets you use its servers to build your own hosting business, starting at just $39.99 a month. If you’re in a unique position where you need more hosting options, you’ll have to give them a call to strike a deal with its sales team. 

Dedicated Server: GoDaddy has over eight powerful dedicated server plans you can choose from, each with its own set of isolated resources at your disposal. This is perfect for system developers and agencies looking for fast and reliable server capabilities. 

Plans can start as low as $129.99 a month. If you’re a beginner building a website for the first time, plans like these aren’t necessary to successfully build and grow your site. But it’s still good to know you have the option of powerful dedicated servers if you were to need it in the future. 

GoDaddy doesn’t hold back in giving you plenty of customized web hosting options. But it’s up to you to decide which tiers are right for you according to your website goals. 

This is what makes GoDaddy so beginner-friendly. It caters to basic hosting needs as well as more advanced options with specific server needs.         

GoDaddy Pro

The GoDaddy Pro dashboard is where developers and resellers can manage client projects. A hub where you can manage all your tools, content, support, and discounts, as well as get in touch with GoDaddy support. 

Since I’m recommending GoDaddy as a great host provider for beginners, the GoDaddy Pro dashboard might not be a necessary tool for you if you aren’t a webmaster or reseller. But it’s a free option if you’re interested in signing up for it. And it’s another way to get in touch with support. 

The Best Cheap Web Hosting Provider

My team and I have created an in-depth review for the best cheap web hosting providers on the market you’ll want to read before making any real hosting decisions that you can see here. Here’s a quick recap:

  1. Hostinger — Best Web Hosting Plan Under $1
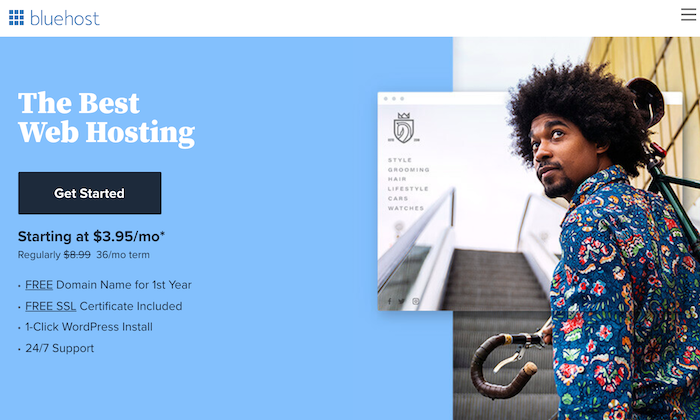
  2. Bluehost — The Best Value in Web Hosting
  3. A2 Hosting The Best Customer Service
  4. HostGator — The Best Cheap Cloud Hosting
  5. iPage — Best Cheap Web Hosting Features
  6. GoDaddy — The Best Cheap Hosting for Beginners

Overall, GoDaddy is a great cheap hosting provider for beginner websites who’d like affordable VPS hosting, especially in their first year. It’s a more budget-conscious option than others out there, and it offers plenty of add-ons you can choose to include in your plan, so you’re never left without the hosting tools you need to succeed.

Once you’ve made up your mind on a hosting plan, you can get started with GoDaddy here.

The post GoDaddy Review appeared first on Neil Patel.


from Blog – Neil Patel https://ift.tt/37QAs2b
via IFTTT

Saturday 27 February 2021

Best WordPress Cache Plugin

Disclosure: This content is reader-supported, which means if you click on some of our links that we may earn a commission.

Three seconds. 

That’s all your visitors give you when they come to your website. If your website takes any longer to upload, 40% of people will abandon it. 

What’s worse, a one-second delay in page response can cause a 7% reduction in conversions. You’ll end up losing 40% of your website traffic, out of which 80% of these people won’t return—ever.

I could continue talking about these scary loading time statistics, but the bottom line is your website needs to be fast if you want to boost your traffic and conversions. If you don’t work on improving loading times, you’ll end up losing hundreds of thousands of dollars every single year.

Luckily, there is a solution: Installing a WordPress cache plugin.

These plugins are designed to improve your website’s speed by instructing the server to store some files to disk or RAM, depending on the configuration. After that, the plugin remembers and duplicates the content it’s served in the past.

The result? Faster web page loading.

#1 – WP Rocket – The Best for Speed Optimization 

WP Rocket is a premium WordPress caching plugin that many agree is the best in the market. 

It’s simple and beginner-friendly, which helps users who aren’t familiar with the typical jargon associated with different caching options. It has been specially designed to boost your website’s speed and performance.

Instead of waiting for someone to request a page to save it to cache, WP Rocket builds the website cache automatically. It also turns on recommended WordPress caching settings like cache pre-loading, page cache, and gzip compression by itself.

Precisely why you see an instant boost in your website’s performance after installing this plugin.

You can also activate other features offered by WP Rocket, such as DNS prefetching, lazy loading images, minification, and CDN support. They can help improve your web page’s loading time while simultaneously reducing bounce rates.

Plugin Features 

  • Cache preloading (two methods)
  • Browser caching
  • GZIP compression
  • Database optimization
  • Minification and concatenation
  • Defer JavaScript loading
  • DNS prefetching
  • Lazy loading

Pricing 

WP Rocket offers three subscription plans:

  • Single – $49 annually for one website
  • Plus – $99 annually for three websites 
  • Infinite – $249 annually for unlimited websites

Learn more and get WP Rocket today.

#2 – Swift Performance – The Best for Multi-Site Compatibility

Swift Performance is a WordPress caching plugin with excellent performance-optimizing capabilities that transforms caching as you know it. Although it’s a relatively new WordPress plugin, it has gained tremendous popularity among users in a short span of time.

It has all the necessary features to take your website performance and speed to the next level without breaking a sweat. The plugin has a unique database optimizer that cleans duplicated metadata, expired transients, and spam comments.

Additionally, you can optimize the delivery of static resources via its minification feature that lets you combine or minify CSS and JavaScript—all with a single click. It’s compatible with bbPress, Cloudflare, WooCommerce, and Varnish, among several other platforms too. 

I also like its Async Execute feature that allows users to run scripts individually as they upload. It’s super helpful to improve speed sites, deliver a better user experience, and boost SEO scores. 

Swift Performance’s schedule database optimization is another time-saving feature—provided you use the pro version. Lastly, you can also enable/disable plugins on certain pages thanks to its plugin organizer.

Plugin Features

  • Page caching
  • Pre-set optimization templates that you can quickly apply
  • Code optimization, including minification and combination.
  • Browser caching
  • Database optimization
  • Plugin organizer to disable plugins on certain pages

Pricing

Swift Performance offers three subscription plans:

  • Single – $39.99 per year for one site
  • Multi – $99.99 per year for four sites
  • Developer – $199.99 per year for unlimited sites

#3 – W3 Total Cache – The Best for Experienced Developers

W3 Total Cache is hands down one of the best open-source WordPress caching plugins that offers an out-of-the-box and advanced caching mechanism. While it’s packed with features, it’s also slightly complicated, especially for users who lack technical skills.

The plugin is compatible with most hosting plans, including shared, dedicated, and VPS server hosting. Since it’s free, you can use all of its features after installing the plugin—no upsells for you to worry about. 

It can improve your server performance by caching every aspect of your site and integrating with several content delivery networks. 

Developers, in particular, like this plugin as it can offer up to 80% bandwidth savings thanks to its minification feature that reduces the size of your HTML, JavaScript, CSS, and feeds without compromising other website elements. 

What’s more, this cache plugin works for both mobile and desktop versions of your website. I‘d recommend W3 Total Cache for WordPress ecommerce sites as it has tons of features that make it useful for sites with SSL certificates—something that most ecommerce sites have.

Plugin Features

  • Minification
  • Opcode cache
  • Database cache
  • Object cache
  • Browser cache
  • CDN integration
  • Fragment cache

Pricing

W3 Total Cache is an open-source plugin, and it’s available free of charge.

#4 – WP Super Cache – The Best for Customization

When a plugin has more than two million active installations, you know the developers are doing something right. 

Developed by Automattic, the same people who gave you Jetpack, Akismet, and WordPress.com, WP Super Cache is as popular as a plugin can get, and not without reason. 

The plugin generates static HTML files from your dynamic WordPress content. Plus, it saves you a ton of bandwidth and decreases page load times since it makes the web server serve the lighter HTML files instead of the heavy PHP scripts.

You also get three caching modes with WP Super Cache: Simple, Expert, and WP-cache caching. 

Out of the three, the Expert mode is the fastest, but you have to modify the .htaccess file, which requires coding and web development experience. But if you do have the technical know-how, you can customize the plugin settings to make it more functional.

You can use the WP-cache caching mode to cache content for known website visitors. Due to this, the caching mode is ideal for websites whose users are typically logged in, can leave comments, or see customized content.

Don’t have web development experience? No worries, you can use the Simple mode, where all you need is a custom permalink. As the setting is easier to configure, you won’t have to change your .htaccess file.

Plugin Features

  • Page caching
  • Support for content delivery networks (CDN)
  • Caching for visitors using a mobile device
  • Browser caching
  • Scheduler to manage deletion and re-caching at given intervals
  • GZIP compression

Pricing

WP Super Cache is available free of cost.

#5 – WP Fastest Cache – The Best for Access to a Wide Range of Tools

According to the official WordPress directory, WP Fastest Cache is the highest-rated cache plugin. It has limited configuration settings, which makes it user-friendly and appropriate for beginners.

This plugin can create static HTML files from your dynamic WordPress site and also minify HTML and CSS files, which, in turn, reduces file sizes. What’s more, it combines these files to make your code cleaner and web pages leaner.

You can schedule to delete the CSS and JS files at a specific time later.

WP Fastest Cache implements WordPress broader caching effectively to reduce page load time for repeat visitors. It also combines several CSS files into one in a bid to reduce the number of HTTP round-trips. If needed, you can also disable emojis on your website.

The premium version of this WordPress cache plugin offers tons of unique features that boost your page speed by optimizing images, cleaning up databases, caching mobile devices, among several other features. You can purchase the premium version directly from your WordPress dashboard after installing the free plugin.

Plugin Features

  • Auto-deletion of cache files whenever a post or page is published
  • Supports CDN
  • Enable/Disable cache option for mobile devices and logged-in users
  • Block cache for specific page or post
  • Code minification
  • GZIP compression

Pricing

While there is a freemium version available, you can upgrade to the premium packages too. There are four subscription options:

  • Freemium 
  • Bronze – $49.99 per license
  • Silver – $125 per three licenses
  • Gold – $175 per five licenses 

What I Looked at to Find the Best WordPress Cache Plugin

I’m not going to sugarcoat it: Choosing the best WordPress caching plugin won’t be the most straightforward task on your list. 

In addition to similar-sounding names, you’ll find most of them offer similar features in different ways, which is why they may end up conflicting if you use two or more at once. The fact that caching is technical also means you practically need to be an expert to make the right choice.

I’ve already listed my top five picks for the best WordPress caching plugins, but I want you to know how I reached this decision. 

Let’s take a look at the factors worth considering when researching caching plugins for WordPress.

CDN Support

CDN stands for content delivery network, a network of data servers that renders cache data to web users from a server nearest to them.

Whenever there is an increase in traffic on your website, there is also a simultaneous increase in your web hosting server’s processing activity. This causes a decrease in your website’s page loading speed.

This is the exact point where CDN comes into the picture.

Hold on. Things are about to get a bit technical here.

If you’re using a CDN, then static data from your website will get cached on every server in the CDN. As a result, whenever a user requests a page on your website, they’ll receive a cached copy from a server nearest to the user, preventing any delay.

This is why you should ensure your prospective caching plugin supports the CDN you use. If not, you might end up losing visitors.

Browser Caching Ability 

Browser caching means saving your CSS, logo, and other resources that would typically download whenever a visitor opens your webpage. This feature lets you decide how much of your webpage would be cached on the user‘s device, which, in turn, makes you independent of the user’s browser cache settings.

Look for options that allow you to set the time period for which you want the downloaded content to be saved on the user‘s system. 

That said, I wouldn’t recommend setting the time for the content to be cached for more than six months as it may result in the user getting web pages that aren’t updated. 

Asset and Page Exclusion

While many WordPress websites are purely static content, some also include dynamic content. This can include a membership website, an ecommerce site with WooCommerce, a website selling courses, and so on.

The catch is that dynamic content doesn’t play well with browser caching and page caching. Therefore, it’s wiser to look for a caching plugin that enables you to exclude specific pages and assets from being cached to prevent glitches.

Customer Support

If you’re new to the world of caching, chances are you might be hearing most of the terms we explained above for the first time. 

That’s why you should make sure the plugin developers offer efficient customer support that can help you whenever you get stuck with the daunting caching setup. If you find that a premium caching plugin offers better support, I‘d recommend choosing that over a free option.

After all, your peace of mind should always have top priority.

Conclusion 

Site speed is incredibly important for your website’s success. So if you aren’t using a caching plugin now, you’re already a step behind your competitors.

Go over customer reviews and do thorough research before choosing a plugin for your website. I’ve done my best to include options that come packed with features and ensure optimal results, but you can always opt for other caching plugins that you think will deliver better results.

In the end, the aim is to get those loading times short and your website super fast.

The post Best WordPress Cache Plugin appeared first on Neil Patel.


from Blog – Neil Patel https://ift.tt/2MtIEhc
via IFTTT

Friday 26 February 2021

10 Successful Google Advertising Ideas

10 Successful Google Advertising Ideas

Coming up with Google advertising ideas is challenging. However, it’s well worth it to have a solid strategy.

With around 3.5 billion searches per day, Google gives you an incredible opportunity to get in front of the right audience. Of course, you first need to know what you’re doing. 

If you’ve been looking for ways to get the most out of your Google ad campaigns, this article is just for you. 

Before we get to strategy, let’s first understand what Google ads are. Google Ads (previously known as Google AdWords) is an advertising platform for PPC ads. With the right strategy, you can drive qualified traffic, connect with your target customers, and drive sales.

One of the platform’s best aspects is that it allows you to stick within your ad budget by setting your ads to stay within a certain daily, weekly, or monthly cap. You can also pause or completely stop the ads at any time. 

Sometimes in marketing, keeping a close eye on the budget can be a challenge. This flexibility allows you complete control over your budget.

If you’re not yet convinced about how effective the platform is, perhaps these numbers can give you more clarity:

  • 58 percent of Millennials say they purchased a product because of an online or social media ad.
  • 63 percent of users have clicked on a Google ad.
  • 43 percent of users bought a product after going online and seeing the ad.

It’s clear that Google ads can do wonders for your business and your bottom line.

The only questions now are: With so many marketers using the platform, how do you stand out in this virtual crowd? How do you create the right Google ads that get you in front of the right audience at the right time?

Let’s find out!

Tips for Generating Google Advertising Ideas

There are a lot of components involved in generating and executing successful Google advertising campaigns. Here are a couple of tips to set you on the right path:

Keyword Research

Keyword research is an essential element of your campaign. If you don’t get this part right, it will be challenging to achieve the results you’re looking for.

Below, we’ll talk more about keyword research for Google ads, but for now, it’s important to start generating some keyword ideas. To get started, you can use a tool like Ubersuggest

It’s a free keyword research tool that allows you to generate keyword ideas and look at some of your competitors and the keywords they’re using. 

ubersugget for google advertising ideas

Trend Forecasting

Predictions are an essential part of marketing. Before you start any campaign, it’s necessary to have some idea of what your success (or not) might look like.

Of course, the best way to predict this is with data.

Google Ads offers a keyword planner, which you can use to get forecasts for your chosen keywords. This planner can provide you with essential information, such as the number of clicks your ad might get every day, the average cost for those clicks, the number of impressions, the click-through-rate (CTR), and more.

With this information, you can start building a solid Google advertising campaign. 

Keyword research and trend forecasting are just a couple of essential steps to get started. Now, let’s get into the nitty-gritty, the strategies, and everything that can help make your campaign a success.

Top 10 Google Advertising Ideas

It’s time to get down to the good stuff: What are the Google advertising ideas that can help you reach your goals?

1. Write a Good Headline

John Caples once wrote: “If the headline is poor, the copy will not be read. And copy that is not read does not sell goods.”

There’s no denying the impact that a strong headline has on your audience. Of course, this is what convinces people to click on the ad!

Here are some basic pointers for writing strong headlines:

  • Understand your audience. Who are you speaking to? 
  • Include your main keyword.
  • Address a problem your audience is facing.
  • Highlight the biggest benefit in the headline.
  • Don’t overcomplicate things. Keep things simple.
  • Don’t be afraid to add some humor.

Creating a headline can be one of the challenging parts of the campaign. Sometimes, you just don’t know where or how to start. Consider following a strategy, like Melanie Duncan’s 4U formula, to create useful, urgent, unique, and ultra-specific headlines to help you get started.

2. Think About User Intent Before Diving into Google Advertising Ideas

When we research keywords, we tend to focus on the numbers. How much search volume does this keyword get per month? What’s the cost per click (CPC)? What about the paid difficulty?

While all these numbers are essential to consider, the most important element of a keyword strategy should be the user intent.

Why? Because user intent (sometimes referred to as “search intent”) gives you the “why” behind the keyword.

Why did your audience search for that particular keyword? Were they trying to purchase something, or were they just trying to get more information about it?

Understanding your audience’s intentions can help you discover which keywords are the best to target for higher ROI.

There are four different kinds of user intents:

  • Informational: This is when a user wants more information about a topic. For instance, “How many calories in a donut?”
  • Navigational: This is when a user wants to go to a particular web page. For instance, if you want to go to the Neil Patel blog, you type that into your Google search bar.
  • Commercial: This is when a user wants to research a particular product or service. This user will likely make a purchase in the near future, but right now, they are at the research phase. For instance, “New iPhone specs” or “iPhone vs. Samsung.”
  • Transactional: This is when a user wants to take action, like buy a product. For instance, “iPhone charger” or “cheapest flights from LA to Chicago.”

Understanding user intent will help you target the right keywords. If someone is searching for how many calories are in a donut, they want content related to that. If your product is a calorie calculator, that’s great! They’re likely to go to the calorie calculator because it helps them fulfill what they’re looking for at that time.

Paying attention to user intent can help you rank higher and attract more clicks because you’ll be giving your audience what they want.

3. Advertise Limited Offer Sales

Any offer with a ticking clock naturally encourages your audience to act faster and purchase the product or service. That’s why limited offer sales work so well. 

In a nutshell, a limited offer sale is any deal, discount, or reward you offer to consumers who make a purchase during a certain period. 

An excellent example of this is Black Friday Sales. Every year, Black Friday sales seem to hit a new record, with consumers spending more and more. 

That’s because consumers know they’ll have to wait a long time before they can get the product at the discounted price again, so they’re encouraged to make the purchase quickly.

For your Google ad campaign, if you offer seasonal sales for any of your products, you can create ads around these sales and have them go live when your sale launches. 

4. Track and Use Google Advertising Data for Iterating

One of the most important elements of any successful advertising campaign is your KPIs

Depending on your ad goals, there are a lot of important metrics you can track, including: 

  • number of clicks 
  • CTR
  • CPC
  • conversion rate

Tracking your KPIs helps you know if you’re on track to meeting your goals or not.

For instance, if you see that you’re getting great clicks on your ads, but your CTR is on the lower side, it can mean your headline and keywords are getting you in front of your audience’s eyes. However, something about the ad isn’t connecting.

It could be the copy. It could be the cost of the product or service. Maybe the headline doesn’t connect with the offer in the actual ad. 

Whatever the case, now’s the time to look into it and adjust what you need to.

5. Choose the Right Campaign Type for Your Google Ad

You can use one of five different types of Google ad campaigns for your Google advertising ideas. 

Search Ad Campaigns

These ads appear at the top of the Search Engine Results Pages (SERPs). 

For instance, if someone searches for “nursery furniture,” this is what the results look like:

Searching for nursery furniture under google advertising ideas strategy

Creating search ads is great because of what we highlighted earlier: The platform receives over 3.5 billion searches per day! This is the perfect place because many people (including your audience) are already searching for products you offer.

Video Ad Campaigns

Video ads show up before, after, and sometimes in between YouTube videos. Research has shown how effective video has become over the past few years. Creating a video ad campaign, which is different from a text ad, might help you stand out and grab your market’s attention.

Display Ad Campaigns

Display ads are a way of attracting the market of a particular social media platform, website, or other digital channels to your product or service. 

The best way to go about this is to find the website or brand that best connects with your audience. Display ads are great because these are a win-win situation for both you and the owner of the site or digital platform.

The website owner gets an agreed-upon commission (usually based on clicks or impressions), and you have the opportunity to advertise in front of an audience that connects to your brand. 

App Ad Campaigns

If you have an ad, perhaps Google app campaigns can be the right choice. Here, you can advertise your mobile app through Google Play, Google Search Network, Google Display Network, YouTube, and many more channels.

For app campaigns, you can run ads that encourage your target market to install your app on their devices, or if there’s a new upgrade or version to the app, you can encourage them to take a particular action.

Shopping Ad Campaigns

Lastly, there’s Google shopping ad campaigns. These ads include your product’s images and prices, and you can run them from Google Merchant Center. 

You’ll input information about the product, and Google creates your ad from this information.

Shopping ads make sense if you’re trying to market a particular product but not necessarily your brand as a whole. 

These are all examples of the different types of Google Ad campaigns. As you can see, it’s essential to understand your product and your market. From this, you’ll be able to know which campaign best suits your needs.

6. Perfect Your Landing Page

You’ve done all the hard work of creating a great headline, finding the right keywords, and bidding for them. 

While these steps may get you clicks, it’s what happens after your market has clicked that’s so important. As you know, they still need to buy into the product or service you’re selling.

Your landing page is essential because this is what your user sees as soon as they click on your ad. Ask yourself whether the landing page addresses your market’s pain points clearly. Besides just addressing, does it also solve your audience’s challenges?

There are many elements to creating a perfect landing page, including using testimonials, the right images, and shorter forms, to name a few.

For some inspiration, here are some examples of great landing pages:

TransferWise landing page for Google advertising ideas
Wistia landing page for Google advertising ideas

From the above examples, you’ll notice that the landing pages are all simple and clear, and the copy and graphics immediately grab your attention. These are crucial elements of a successful landing page.

7. Make Your Google Ads Specific

Earlier, we mentioned the importance of understanding user intent when doing your keyword research because this helps you target the right keywords.

Now we want to highlight the importance of specificity. Your keywords shouldn’t be too broad as this might cause Google to place your ad in front of the wrong market. 

Naturally, this would lead to fewer conversions.

For instance, “nursery furniture” may seem like a good keyword at first, but you can do better by getting more specific. 

Aim for clarity and specificity in your keywords. Instead of just “nursery furniture,” how about:

  • “nursery furniture for boys” 
  • “nursery furniture for girls” 
  • “nursery furniture in Florida”

It might take a while to get the right keywords, but that’s fine. Remember to keep reviewing which keywords are getting the most clicks and which aren’t. This can help you understand what you should focus on and what to add, remove, or tweak to get the high conversions you’re looking for. 

8. Target Your Google Ads

When trying to get the right Google advertising ideas, remember there are three keyword match types: exact, phrase, and broad matches.

Exact Match

Compared to the other keyword match types, exact match is extremely specific. Initially, if you used this match type, users could only see your ad if they typed in the same keyword phrase. Since then, Google made a few changes so that even if your user doesn’t enter the exact keyword phrase, your ads might still match. For this, the match might be with plurals, synonyms, or different variations of your chosen keyword.

Using the exact match type is great because users who type in your specific keyword are more likely to convert.

Phrase Match

Your ad appears for a phrase match if a user enters your key phrase in the exact order, but there can be other words before and after the phrase. This leaves you with the possibility of increasing traffic. 

However, if the key phrase is too broad, this could mean getting lots of clicks that don’t convert because the phrase wasn’t specific enough.

Broad Match

The broad match reaches more people because your ad appears when a user types in any word of your key phrase, in no particular order. Like with phrase matches, you might get lots of traffic and clicks to your ads, but because it’s not specific enough, there may be fewer conversions.

As you can see, there are pros and cons to all three phrases. To get the most out of your Google advertising campaign, use a combination of all three so that you get a lot of traffic and conversions.

9. Optimize Your Google Ads for Mobile

While creating your ads and coming up with creative Google advertising ideas, it’s important to keep in mind that many users are using their mobile devices for searches. 

Research shows that 61 percent of US Google visits happen via mobile devices. Most people are using their phones for searches, and it makes sense to keep these users in mind.

Optimizing your ads for mobile includes:

  • choosing responsive landing page designs
  • compressing images
  • making sure the loading speed is fast

These small details can make a huge impact on how your ads display in front of your audience and your overall conversion rate. 

10. Make Your Google Ads Available in Other Languages

It depends on the nature of your business, but if you have an international audience or you’re in a multi-lingual area, consider making your ads available in different languages to cater to your audience that may not speak or understand English very well.

This may seem like a little detail, but don’t forget that language is powerful and helps us communicate and connect. If you have a non-English speaking audience you’re trying to reach, help bridge the gap by making the Google ads available in their languages.

Conclusion

It takes a lot to generate great Google advertising ideas. While the process may be a lengthy one, it’s certainly worth it to see increased clicks and conversions.

The above tips can help get you on the right path, but don’t forget to A/B test your ads to see what your audience responds to.

Do you have any other Google advertising ideas you swear by?

The post 10 Successful Google Advertising Ideas appeared first on Neil Patel.


from Blog – Neil Patel https://ift.tt/3stvIay
via IFTTT

How To Build a WordPress Website

Disclosure: This content is reader-supported, which means if you click on some of our links that we may earn a commission.

WordPress has officially passed the 39% mark and powers over one-third of the entire web. 

It’s like the Oprah Winfrey of the web hosting world—reliable, has a loyal user base, an excellent reputation, and is super popular worldwide. Therefore, it makes perfect sense to build a website on WordPress.

Creating a website may seem scary if you aren’t a “techie“ type of person, but trust me when I tell you that times have changed. It’s now faster, cheaper, and easier than ever.

In this guide, I’ll tell you how to build a WordPress site in under 60 minutes. 

Ready?

Your Two-Minute Cheat Sheet

Don’t have enough time to go through the whole article? Here’s your quick cheat sheet.

Disclaimer: This is just the gist of the whole shebang. So, don’t go looking for too many details here. Those are further below.

While you have several web hosting provider options available, I recommend starting your WordPress website journey with Bluehost. It’s super dependable, offers fast loading times, and is good for your budget.

The first step is to set up your account with Bluehost. The whole thing is pretty simple and only involves choosing a subscription plan, registering your domain name, and finalizing the deal. That’s it!

Next, you have to install WordPress (Bluehost does it for you) and familiarize yourself with its UI. Then you’ll have to pick a theme for your website that suits your brand best and also makes things functional. My favorite is ThemeForest, but you can also stick to WordPress’s official directory. 

Make sure you set your permalink structure to make your links more readable and optimized for the SERPs. This is super important, so please don’t skip it. You can also install plugins to extend your website’s abilities, but it’s strictly optional.

Finally, all that’s left to do is create fantastic content that makes visitors flock to your website.

Voila! You now have a WordPress website that looks beautiful, has amazing content, and is ready to handle the traffic.

Let’s now see how the whole thing works in more detail.

Step 1: Choose a Domain Name

Your domain name is your identity on the internet. It’s how your audience will find you and identify your brand. Precisely why you should choose something that reflects your brand and is easier for people to type into their browser and find you.

You have complete freedom to choose your domain name, though. You can choose any name you want—provided it is available and not registered by other companies. 

Here are a few tips for selecting a great domain name for your website:

  • Make it brandable and unique-sounding
  • Make sure it’s memorable
  • Keep it short 
  • Keep it easy to spell, pronounce, and type 
  • Include niche-related words. For instance, if you plan on selling pizza, it would make sense to add pizza somewhere in the domain.

Think about it: Doesn’t www.pizzahut.com sound better than pizzasellingplace.com? Exactly.

You can use Domain Wheel, a free website name generator, to develop more ideas if you’re looking for some inspiration. Simply put in a keyword related to your niche, and the tool will give you tons of suggestions to inspire you.

Now that you have a prospective domain name, you have to check for its availability. Considering there are about 1.8 million websites online, staying original can be a little challenging, but it’s definitely worth the effort.

Since we all love free things, you can register your domain free of cost when subscribing to a web hosting service.

Speaking of domain registration…

Step 2: Choose a Web Hosting Provider and Register a Domain Name

There are hundreds of companies that sell web hosting services and tons of companies that allow you to register a new domain name. But wouldn’t it be more convenient to choose a company that offers you both services?

Case in point: Bluehost.

This web hosting provider is reliable, beginner-friendly, cheap, AND gives you a domain name for free—take it from someone who has created many websites for his clients in his career. 

Let’s also not forget that Bluehost is one of the few companies recommended on the official WordPress.org web page.

Sold on Bluehost? Great!

Here’s how to proceed next:

Visit Bluehost’s Website

Go to Bluehost in your web browser.

Select Your Hosting Plan

You’ll see three hosting plan options displayed on your screen:

  • Basic – Starting at $2.95 per month
  • Plus – Starting at $4.95 per month
  • Choice Plus – Starting at $5.45 per month

As you’re just launching your website, you can choose the cheapest plan—Basic—and get yourself a piece of the internet. Remember, you’ll get the $2.95 price tag only if you choose the three-year subscription plan.

Register Your Domain

Once you select your subscription plan, Bluehost will ask you to set up and register your domain.

You will see two options here:

  • Create a new domain
  • Use a domain you own

Select the Create a new domain option and enter your chosen name from Step 1. I’ll also recommend selecting a .com extension to add a more professional touch to your website.

Fill In Your Personal Information and Account Details

Next, you have to provide your personal data to set up your account.

When you scroll down, you’ll see the Package Extras section. Take care to check only those fields that you think are worthwhile for your website. 

For me, selecting Domain Privacy + Protection is a must as it conceals personal information like name, email, and phone number from appearing in public databases. After all, spending a few extra cents is nothing when it comes to security.

Once you’re done, click on Submit to finalize your purchase.

Step 3: Get Bluehost to Install WordPress for You

At this point, you have a hosting service provider and a domain name. Congratulations!

The only thing missing is WordPress.

Sure, you can install WordPress manually. But why should you do it if you can get Bluehost to do it for you—for free?

After completing the signup process, check your inbox for an email from Bluehost. It‘ll contain details showing you how to log in to your customer profile and start work on your site. 

Once you log in, Bluehost will show you an easy-to-use wizard that will guide you through the process of installing WordPress on your hosting set up.

Alternative Option:

You can also install WordPress by going to the My Sites section. Click on the Create Site button, and the installation will begin automatically. Enter your new site’s name and the username/password, and your WordPress website will be ready to go.

Step 4: Choose a Theme or Design for Your Website

One of the biggest USPs of WordPress is it supports themes. 

Themes are interchangeable designs that allow you to change how your WordPress website looks at the touch of a button. For example, this is what your website will look like by default:

You can change your website’s appearance by choosing another popular free theme (I chose Hestia). It’ll now look like this:

See why theme compatibility is WordPress’s biggest USP?

Choose a Theme You Like

There are hundreds—if not thousands—of WordPress themes out there. 

You can start by looking at the official directory at WordPress.org. But other than that, there are several other theme stores and marketplaces, such as ThemeForest. These are third-party sites that offer free and premium themes to alter the website’s presentation without changing the contents.

You can go through all the different sites and select a theme that you like best.

Install Your Chosen Theme

If you select a theme from the official directory at WordPress.org, all you have to do is hit Install right away. Here’s how to go about it:

Go to Appearance, followed by Themes, and then click on Add New. Enter the name of the theme you want to install in the search bar, and then click on the Install button under your desired theme.

After the installation, click on Activate to enable the thing on your website.

If you want to use a theme bought from a trusted third-party, the steps will differ slightly. 

Here’s how you can install a premium theme on your site:

  1. Start by downloading the .zip file of the new theme. 
  2. Log in to your WordPress dashboard, and go to Appearance, and then Themes.
  3. Click on the Add New option. You’ll then be directed to the WordPress theme dashboard. 
  4. Select the blue button at the top of the screen that says Upload Theme. Choose the .zip file from your computer after the prompt.

You’ll see a link to activate your team after a success message. That’s it!

While some themes are free, premium themes vary in price. There are options starting at $10 and ones going all the way up to $200. You can choose an option that fits your budget and preferences best.

Step 5: Install Plugins (Optional)

You can consider installing plugins to boost the functionality of your website. Think of them as applications for your mobile phone.

You can refer to our best WordPress plugins guide to zero down options, but you have free reign to choose the ones that appeal to you most. From optimization to website traffic analysis to security, you’ll find tons of options for every category.

That said, don’t go overboard when installing plugins. It ends up slowing down your website, which, in turn, might result in traffic loss. 

As they say, there is too much of a good thing.

Step 6: Configure Important Site Settings

Setting up permalinks is very, very important! Precisely why you should do this immediately after starting your WordPress website.

Permalink structure decides how your website links look. Think of it as a representation of your site structure. For NeilPatel.com, it looks something like this:

A good permalink structure tells your visitor exactly where they are on your website (in our example, they are in our blog section), while a bad structure does the opposite. Getting the permalink structure right is also crucial for boosting your SEO ranking.

There are many ways to do it wrong, which is why I’ve compiled a three-step guide to help you get it right:

  1. In your WordPress dashboard, click on Settings from the side menu and go to Permalinks.
  2. Under the Common Settings field, click on Custom Structure
  3. It makes zero sense to go for Numeric as it’ll only confuse your visitor. Plus, it doesn’t serve much for SEO purposes.
  4. Enter the tag string “/blog/%postname%/

Once you’re done, click on Save to save the changes.

Step 7: Set up Important Webpages and Promote Your Site

With your website ready, you can now focus on creating high-quality content that helps you boost your traffic and conversions. Start by creating essential webpages like About, Contact Form, Privacy Policy, Portfolio, and Store (if applicable).

Want more information and a step-by-step walkthrough? Head over to my guides on how to start a blog and how to make money from blogging.

I really cannot emphasize enough the importance of having optimized content on your website that is relevant to your niche. So make sure you do thorough research to get all the nitty-gritty right.

Conclusion 

That was all you needed to build a WordPress website. 

At the end of it all, you’ll have a domain name, a web hosting provider, and an up and running website. Keep experimenting in your niche, and you’ll soon establish a loyal fan base that values your opinion or love your products/service.

Have you launched your website yet? Who is your all-time favorite web hosting provider, if yes?

The post How To Build a WordPress Website appeared first on Neil Patel.


from Blog – Neil Patel https://ift.tt/3dOZiDt
via IFTTT