Friday 30 September 2022

Common UX Accessibility Mistakes Found on Websites

Common UX Accessibility Mistakes Found on Websites

Tim Berners-Lee, the inventor of the World Wide Web, says the web is for everyone. Unfortunately, that isn’t always the case.

Poor design decisions can present barriers for many different groups of people. In fact, research by WebAIM finds that across one million homepages, there were over 50,000,000 “distinct accessibility errors” at an average of just over 50 per page.

These errors don’t just make people feel marginalized; they stop hundreds of thousands of people from interacting with your brand or buying your product.

Few webmasters want to purposefully marginalize people or limit access to their site. That’s why it’s so important to understand the most common web accessibility issues and learn how to resolve them with clean design.

Let’s get started.

Why Is UX Accessibility Important?

Because the internet has become an essential part of the day-to-day lives of more than a billion people, site owners must take steps to make sure everyone can access it equally. It’s not just a matter of human rights, however. There is an obvious financial case for making your site accessible. Given that 61 million people in the United States have some form of disability, an inaccessible site could be harming your bottom line. Make your site accessible, and you potentially open the door to thousands of more customers.

Complying with UX accessibility design trends can bolster your company’s reputation. Making an effort to cater to a particular group of disadvantaged users proves your company cares about all of its customers. This added step may encourage potential customers to do more business with your brand going forward.

There’s also the small matter of legal compliance. While there’s debate about whether the 1990 Americans with Disabilities Act includes websites as well as physical stores, that hasn’t stopped thousands of lawsuits getting filed with federal courts each year. You may not be punished for a lack of ADA website compliance, but the threat of legal action is clear.

Ultimately, designing with UX accessibility doesn’t just improve the browsing experience for users with disabilities; it improves the user experience for everyone. Even users with perfect vision benefit from a better color contrast and more labels — and your SEO certainly benefits from things like added alt text and better link descriptions.

The 7 Most Common Web Accessibility Mistakes

Making your website more accessible is as much about avoiding common issues as it is about integrating new technology. Avoid the following seven mistakes, and you’ll go a long way to making your site more accessible than your competitors.

1: Missing Alt Text on Images

Alt text is an HTML attribute that describes what an image represents. From an accessibility perspective, alt text provides information for screen readers to accurately describe images to visually-impaired users. If you don’t provide alt text or your alt text isn’t very descriptive, then you aren’t making your site’s images available to everyone.

There’s a difference between empty alt text and missing alt text. Sometimes images can be for purely decorative purposes. Where this is the case, an empty alt tag can be used, which appears as alt=””. This is ignored by screen readers and doesn’t impact usability.

Often, alt text isn’t empty but missing completely. When a screen reader comes across a missing alt attribute, it will assume that the image is important and inject the file name. For images like graphs and infographics that are fundamental to a user’s understanding of a webpage, the file name won’t be sufficient. That’s why it’s essential to create alt text for all of your images.

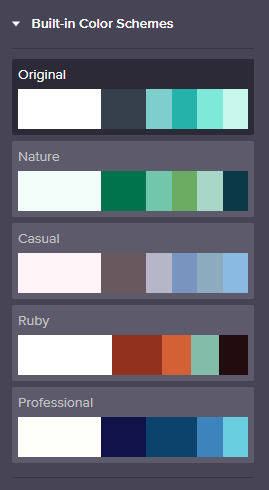
2: Weak Color Contrast

Have you ever tried to read a white font on a yellow background? Not easy, is it? But that could be how many users feel every time they visit your site. The truth is some people struggle to read text unless the color contrast between the font and the background is very stark. It’s why black font on a white background is such a popular choice.

The easiest way to improve color contrast is to avoid using similar colors for backgrounds and text. That means no orange font on a red background. Or green text on a blue background. Pay particular attention to design features like your website’s header or the submit button on forms, too. These features tend to incorporate brand colors and are more likely to cause contrast issues.

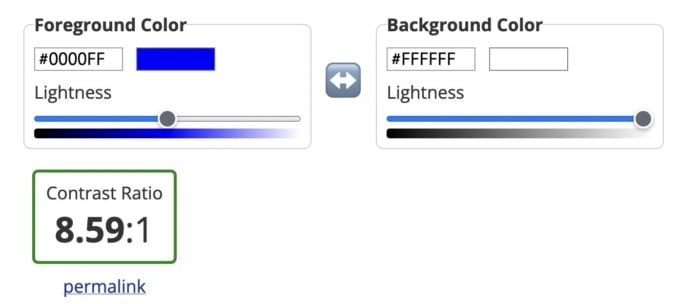
Alternatively, you can use a tool like the Contrast Checker from WebAIM to quantify your contrast ratio. The higher your ratio, the better the contrast and the more readable your website will be. The tool will tell you whether your colors pass or fail. As a rule, text and background colors should have a contrast ratio of at least 3:1 for large text and at least 4:1 for normal-sized text.

As you can see from the images below, dark blue text on a white background has a great contrast ratio.

Example of a good contrast ratio of colors with dark blue on white.

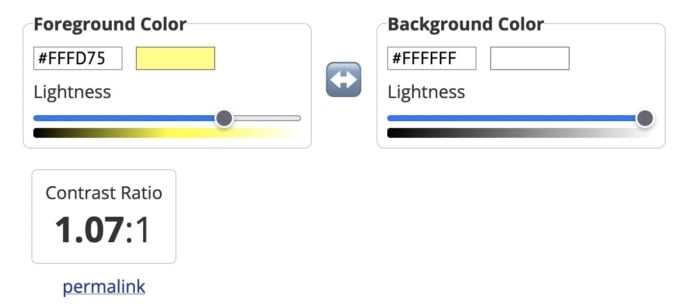
But yellow text on a white background has a terrible contrast ratio.

An example of bad color contrast with yellow on white.

3: Poor Link Text

Links are a vital part of a web page, both from a user experience perspective and for SEO. But you need to accurately describe them using link text to make them effective.

While those versed in SEO might never dream of missing a chance to add a keyword in an internal link, missing link text is surprisingly common. Logos, buttons, and icons are all guilty of having no text, which means screen readers will ignore them. That’s not great if you want users to click your CTA button.

Vague or ambiguous link text is also an issue. Not only does a phrase like “click here” offer no SEO value, but it can also hamper users accessing your site via a screen reader. Including the entire http:// link without any anchor text whatsoever is even worse. Neither version contains the information these users need.

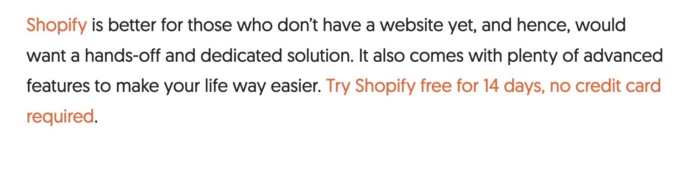
Instead, make sure the clickable text describes exactly what the user can find on the next page. In the example below, for instance, you know that by clicking the link, you’ll be directed to a page where you can get a 14-day free trial of Shopify.

The 14 day free trial for shopify.

Then there are navigation links. These can also create problems for screen readers if they are poorly coded. That’s because screen readers will not skip over them, meaning users will have to listen to your navigation menu every time they open a new page. Solve this by assigning ARIA roles to your navigation menus to indicate their purpose. This will help screen readers to avoid them where necessary.

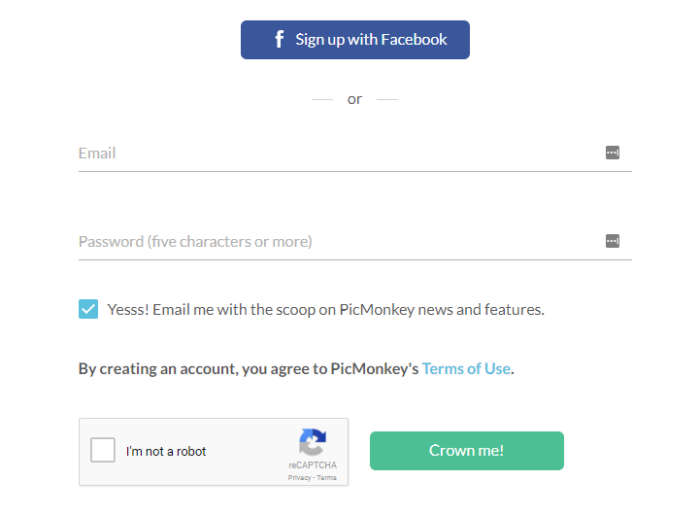
4: Missing Form Labels

I’m almost certain your website has at least one form on it, even if it’s only on your contact page. But does every field have a label telling users what information they need to input? If not, your forms aren’t accessible to everyone.

A "how can I help" form.

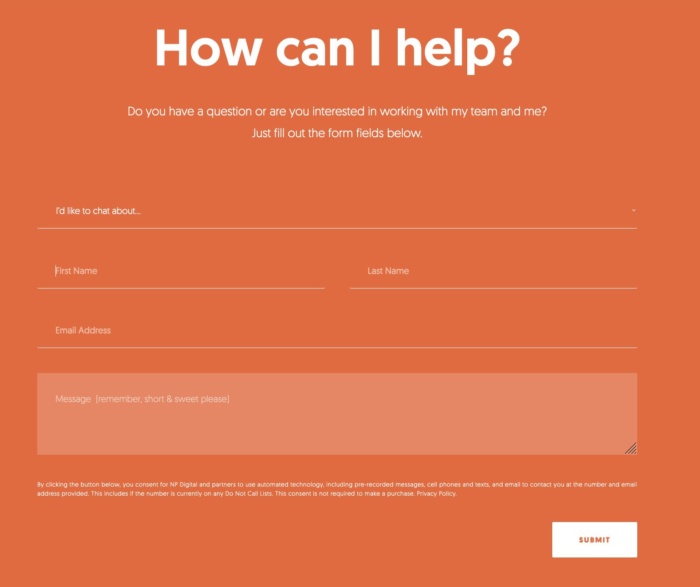
Just like with link text, form input fields need a label so screen readers and other accessibility devices can understand them and help users navigate them. A label isn’t just the placeholder text you can see in the form field, though. You also need to add a description in the form’s code. That’s because placeholder text is usually ignored by screen readers. It also doesn’t help that placeholder text usually lacks a strong color contrast.

Ideally, you’ll have a visible label inside a <label> element so everyone (users, screen readers, bots) can understand what’s meant to go in each field.

5: No Markup For Data Tables

Tables are something of a nightmare for screen readers and other accessibility devices. When screen readers come across a table, they tell the user that there is a table with a given amount of columns and rows and then proceed to list out all of the data. Unfortunately, that data may not be read in the correct order. Worse still, screen readers can’t read out tables where there is more than one set of row or column headers.

In truth, the best way to make tables accessible is to not have them at all. Of course, that’s not going to work for some websites. So, where tables are required, you need to make them as simple as possible and use the correct markup. ID, HEADERS, and SCOPE attributes should be used to correctly label each part of your table. You can also use table captions to provide additional information to users about how to best understand your table.

Another alternative is presenting your data as an image file, with appropriate alt text listing out the data. However, for complex tables, that may not be feasible.

6: Lack of Keyboard Accessibility For Screen Readers

Not everyone is going to use a mouse to navigate your website. Many visually-impaired people will use a keyboard or another accessibility device to move around your website. And that means you need to pay special attention when designing and creating the layout of your site.

Specifically, users must be able to navigate your website using the space bar and tab key. Simple sites built in semantically correct HTML may make this possible without any adjustment, but more complicated websites will need to code in digital landmarks that better allow keyboard users and screen readers to move about.

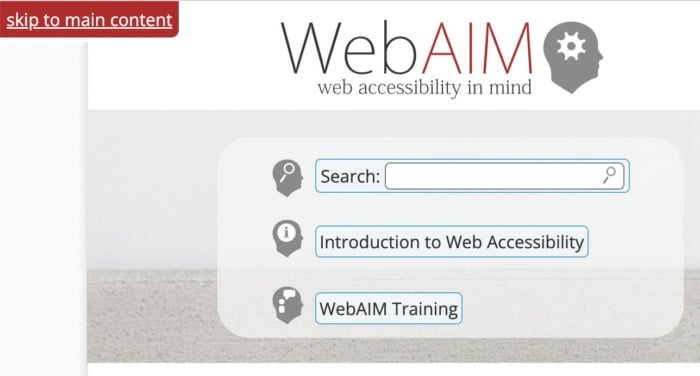
Adding skip-to-content links at the top of each page can also save your users from having to tab through every menu item every time they open a new page. These buttons, which appear when you push the tab key, allow users to navigate the site using the tab and spacebar keys to skip the navigation and head straight to the main content of the page.

WebAIM's search function.

7: Non-HTML Content WIthout Proper Markup</h3>

It’s easy to forget about non-HTML elements when optimizing your site for accessibility. But content like PDFs and Word documents can also be an issue. Out of the box, users cannot customize these documents to make them easier to read nor do they work well with assistive technologies. Accessibility issues are even worse when documents are produced as image-only PDFs.

One solution is to solve navigation mistakes by tagging these resources for navigation by screen readers. Another is to use Office’s built-in Accessibility Checker to improve the accessibility of these documents when you create them.

Interactive content like sliders, accordions, and drag-and-drop widgets can also affect accessibility. So, too, can dynamic content like pop-up boxes and confirmation messages. If the screen reader can’t understand when these pieces of content are loading, it won’t be able to tell users about them.

Once again, you can use ARIA attributes to resolve this issue. Tagging these interactive and dynamic elements with the correct ARIA attribute will notify screen readers that the page’s content has changed. Alternatively, you can design your site in a way that avoids the need for pop-ups and other forms of dynamic content. Static websites may not look as flashy, but they are much more accessible.

FAQs

What are the four significant categories of accessibility?

The Web Content Accessibility Guidelines are built upon the four principles of POUR: perceivable, operable, understandable and robust.

What is ADA compliance?

If your site is ADA-compliant, then it meets the recommendations set out in the Americans with Disabilities Act of 1990 and is accessible to someone with a disability. 

How do I make my website more accessible?

You can make your website more accessible by improving color contrast, adding alt text, or adding keyboard accessibility for screen readers.  

What is an example of website accessibility?

Allowing users to navigate your website using a keyboard instead of a mouse is an example of website accessibility. So is adding alt text to every image on your website.

Conclusion

Unfortunately, even the best designers and web entrepreneurs can create inaccessible websites. It’s why it’s so important to keep referring back to these mistakes whenever you build a website or create a new piece of content.

It’s more effort to include alt text on all images, add markup data to tables and improve the quality of your link text, but millions of users will thank you for it.

But don’t stop there. Next, learn how to create inclusive content and improve the overall user experience of your website.

What UX accessibility mistakes are you going to correct first?


from Neil Patel's Digital Marketing Blog https://ift.tt/UP4cFVB
via IFTTT

Thursday 29 September 2022

How Providing Video Transcripts Boosts Your SEO

How Providing Video Transcripts Boosts Your SEO

Chances are, you already know the SEO basics.

Researching keywords, optimizing your website, measuring the results, and tweaking your strategy are the fundamentals everyone should take to heart if they want to increase their leads and enhance their conversion rates.

However, we aren’t discussing any of that today.

Instead, I’ll explain how to use video transcripts to boost your SEO efforts.

This method is proven to enhance your search engine optimization, but it’s all the more vital today.

Most surveyed marketers realize how essential using video marketing is. In fact, according to research, 86 percent of businesses use video marketing, and 92 percent state that it’s an ‘important part’ of their marketing strategy.

A chart showing how many marketers think that video is important in a marketing strategy.

However, if you want to get the most out of your videos, you can take it a step further and use video transcripts to maximize your SEO.

That’s not all, though.

There’s another reason video transcripts are so essential, and that’s accessibility, but more about that later. For now, let’s just focus on SEO.

Video Transcripts and SEO

Video transcripts are a valuable tool for SEO, and there are several ways that they contribute to your site’s visibility.

  • First, transcripts make your video content accessible to a wider audience, including those who are d/Deaf or hard of hearing or prefer to watch videos with the sound down. This can help you attract more viewers and get more engagement on your site.
  • Looking for a way to get your videos indexed by search engines? Then add transcripts. They enable search engines to crawl your video content and give context to the information you’re sharing. You can see your indexed videos in GSC’s new video indexing report as well.
  • You can use transcriptions for internal link-building opportunities on your website. Do you have content complimenting your transcriptions and giving the visitor extra value? Then link to it and keep your visitor on your site for longer.
  • Transcripts provide valuable keywords and phrases that you can use to optimize your videos and improve your ranking in search results.
  • Finally, evidence suggests that captions can enhance video view times by around 12 percent, according to Facebook internal testing. In addition, closed captions give search engines crawlable content, increasing the chances of your content getting indexed.

Additionally, you can use transcripts as part of your overall SEO/content strategy. For instance, you can use them to create various forms of written and visual content, including:

  • blog posts and eBooks
  • individual quotes for social media
  • graphics
  • infographics

How To Start Transcribing Your Videos

So we’ve established that video transcriptions can be an SEO boon for you. But how do you get started?

One method open to everyone is manual transcription: just typing up the content word-for-word yourself. Of course, this is the most affordable option, but also the most time-consuming. You don’t just need to type it; you need to edit and format it to perfection.

Now, I can understand if the manual option doesn’t appeal to you, but other methods are available to you, like:

Mobile apps: There are now many mobile apps that can be used for transcription purposes. Some of the best mobile apps for transcriptions include Otter and Trint.

Use Google’s automatic captioning: YouTube’s speech recognition software creates automatic closed captions for YouTube long-form content, live videos, and Shorts.

Speech narration and dictation software: You can use software like Dragon Naturally Speaking to dictate transcripts, but you’d still have to edit, proofread, and format the completed piece.

Free transcription tools: Descript and oTranscribe are just two of the resources that allow you to do transcriptions. Descript also has paid options.

Google’s doc’s voice commands: If you have Chrome, you can use Google’s free voice typing. To use it, open a document, go to docs, select ‘voice typing’ and wait for the microphone icon to appear. Click the icon, and you’re ready to start dictating. To finish the transcription, click the ‘microphone’ icon again.

Speech-to-text application programming interfaces (APIs): Amazon Transcribe and Deepgram are two examples, but there are many more to choose from. Deepgram gives you a free $150 in credits when you sign up, and new users to Amazon Transcribe get 60 minutes free a month for the first year.

Use captioning: By 2050, the World Health Organization predicts that almost 2.5 billion people will likely experience hearing loss, while 700 million may need hearing rehabilitation. Providing closed captions is a simple way to make video content accessible, and you can add them automatically to your YouTube content.

Best Tools for Video Transcriptions

Transcription services have come a long way since they first emerged. Over the years, the quality of transcription services has improved drastically, and as I highlighted above, you’ve got plenty of methods to choose from.

Here are a few to consider, many with a free trial if you want to give them a spin.

Rev

The SEO tool Rev.

Rev is a popular transcription service that offers high-quality, accurate transcriptions of audio and video files and a simple pricing structure of $1.50 a minute.

It couldn’t be much easier to use. Simply go to the audio and video transcription option and click the ‘upload your files’ button. Next, upload or drag and drop your files, or paste the URL. Then sign in/register, and pay.

Sonix

The SEO Tool Sonix.

Sonix is a transcription service that helps you convert your audio and video files into text. It provides three packages, including standard, premium, and enterprise.

The standard package starts at $10 an hour and is suitable for shorter projects. Premium is $5 an hour plus $22 per month per user and is best suited for teams. For Enterprise pricing, you need to speak to the Sonix team.

Features include 35 languages, automated subtitles, an SEO-friendly media player, and secure storage.

Scribie

The SEO tool Scribie.

Scribie is a transcription service offering fast, accurate, affordable transcripts. The company has a team of transcribers who are experts in different fields, such as medical, legal, and academic transcription.

The company has 40k transcribers and converts transcriptions from audio to text. Pricing starts at .10 cents per word for automated or .80 for manual transcriptions.

You can also choose from three pricing packages: pay-as-you-go, Pro and Enterprise. Pro is $9 monthly, and yearly subscriptions are available too. For Enterprise subscription pricing, contact sales.

A few more worth a mention include:

  • TranscribeMe: This transcription service offers high-quality transcripts at an affordable price. They also provide a free trial so that users can test out their services before committing to a purchase.
  • Adobe Premiere Pro’s “transcription” feature: This feature allows you to create a written video transcript right in the app.
  • Trint.com: Trint is a web-based platform that uses AI to transcribe your videos. It offers three paid plans, monthly and annual subscription options, and a free seven-day trial.

Best Practices for Using Your Video Transcripts To Boost SEO

Creating transcripts is not just complementing your video, but also providing additional content that is beneficial for SEO purposes.

Here are some tips for using your transcripts to optimize your videos for SEO:

1. Make sure the keywords and phrases you include are relevant to the topic of your video. For example, if your website is about aging well, you could include ‘tips for aging well’ or ‘advice for aging well’

2. Use a variety of keywords and phrases throughout the transcript. Keyword stuffing, the practice of adding excessive keywords without proper context, must be avoided at all costs.

3. Place keywords at the beginning of sentences and paragraphs whenever possible.

4. Check the accuracy of the transcript against the audio track to ensure accuracy.

Video Transcriptions and Accessibility

Away from SEO, there’s another reason why you’d want to use transcriptions and closed captions with your video.

It stands to reason that the more people can access your content, the wider you can spread your message. Providing transcripts helps the millions of people who have hearing problems or are registered as d/Deaf. 61 million people in the U.S. have some form of disability, so it’s important to use all accessibility measures to open doors for those people.

The Americans with Disabilities Act (ADA) means websites must be accessible. Providing transcripts helps achieve ADA compliance.

While there is some debate on the exact nature of legal requirements, there can be consequences. Therefore, if you’re unsure, get some clarification from an expert familiar with the laws.

FAQs

How Can I Transcribe My Videos?

There are several free and paid options available. As well as software, you could use transcription agencies; however, this may be a more expensive option. On the other end of the spectrum, you have manually transcribing them yourself, but this can be extremely time-consuming.

What Are the Best Video Transcription Tools?

It all depends on what you’re looking for and the volume of content you need transcribing. For example, if you’ve got a lot of content to transcribe, a subscription may work out cheaper. Alternatively, if you’re looking for the occasional transcription, then pay-as-you-go services may be better for you. Take advantage of some free trials and see which option works for you. Then, look at whether the tool is within your budget and offers value to your overall SEO efforts.

Conclusion

Sold on transcripts for your videos yet?

Providing video transcripts can help boost your SEO in several ways, such as helping the search engines index your site, increasing your ranking, and providing link-building opportunities.

However, video transcripts do far more than give your site a valuable SEO boost: they also provide greater accessibility for people with hearing loss and for people who may prefer to watch content with the volume turned down when they’re in public.

By using video transcripts, you can get the most out of your online video content by using it as part of your overall SEO strategy to get your content out to more people.

Do you use video transcripts for SEO? How do they help you and your visitors?


from Neil Patel's Digital Marketing Blog https://ift.tt/bQuicSz
via IFTTT

Wednesday 28 September 2022

Programmatic Advertising for Beginners

Programmatic Advertising for Beginners

I’m going to go ahead and say it: programmatic advertising is the future. Although it’s a relatively new concept compared with other forms of marketing, spending on programmatic advertising is growing yearly.

Omnichannel marketing, audio and in-game advertising, voice-activated advertising, and 5G are just some of the factors fueling its growth, and they’re going to take programmatic advertising into 2023 and beyond.

Now, enough about the future. What if you’re not so familiar with this type of marketing? How does programmatic advertising work? How are others using it? More importantly, is it right for your business?

In this article, I discuss all of that and more, starting with the basics.

What Is Programmatic Advertising?

Programmatic advertising is the automated buying and selling of digital advertising space over the internet.

Here’s how it works.

Two main platforms are involved: a supply-side platform and a demand-side platform.

By using programmatic technology, ad space gets bought and sold in real-time through automated auctions on a demand-side platform (DSP). This process happens instantaneously, with the winning ad displayed on the publisher’s website or app. This means that ads can be bought and sold more efficiently and at a lower cost.

When targeting ads, marketers first identify their target audience and then set parameters, such as geographic location, age, gender, interests, etc. They also specify how much they want to pay for each ad view or click.

If you’d like a deeper dive into this topic, here’s a detailed article on programmatic buying for PPC.

A supply-side platform (SSP) is an automated platform that enables the sale of ad space to businesses.

A graphic showing how programmatic advertising works.

It is hugely popular, with top brands like Lacoste, Aldi, and Turner Sports using it, and global programmatic advertising spend is set to exceed $700 billion a year by 2026.

What Makes It Successful?

Why the growing popularity?

Aside from the ease of automation, programmatic advertising allows for better targeting of specific audiences. The golden rule with this type of marketing is it only does well if you target the right prospects with your ads.

Programmatic advertising relies on data, meaning marketers can direct their ads to people based on their interests, location, internet searches, or even what they’ve bought before. All this makes the ads more relevant to the individual, and likely results in more clicks and conversions.

For instance, if you’re selling health foods in California, you’d want to target fitness enthusiasts in the area.

Publishers also benefit from programmatic advertising because it allows them to sell ad space more efficiently. They can target specific buyers interested in their content and sell ad space on an impression-by-impression basis.

Second, programmatic advertising is efficient and effective. For many marketers, programmatic advertising is an ideal hands-off approach to buying ads; it allows advertisers to buy ad space in real-time, which means they can get their ads in front of the right people quickly and at a lower cost than traditional methods.

Third, programmatic advertising is constantly evolving. Marketers can use it to target not only consumers, but also businesses. As new technologies emerge, programmatic advertising is likely to grow and adapt, becoming even more effective.

However, perhaps the main reason behind programmatic advertising’s success is simple: it gets results.

For example, when Grapeseedmedia.com worked with Lights.com, the campaign created a Return on Advertising Spend (ROAS) of 316 percent, a Cost Per Acquisition (CPA) of $26, 179 newsletter signups, and a 25 cents cost per page visit. This is four times the industry benchmark.

Another case study shows how a campaign for Grand-Hyatt achieved revenues of $1, 647,787 during the nine months it worked with the agency. In addition, by using display advertising, Facebook, and Google, the agency gained:

  • A 1,017 percent ROAS.
  • Over 3,000 Facebook page likes
  • A $275 average daily rate, which is $12 higher than the overall average
  • Along with 2.5 times more room nights from the Hyatt.com website.

The strategy behind the campaign included:

  • Showing messages to people actively searching and engaging with Google’s search results.
  • Focusing on users depending on their travel patterns to New York by analyzing data from Hertz and American Airlines, among others.
  • Targeting audiences in the trip planning phase of the customer journey

Now, let’s look at the different types of programmatic advertising available.

What Are the Different Types of Programmatic Advertising?

There are three types of programmatic advertising and four main formats available:

Open Auctions: Otherwise known as real-time bidding (RTB). This process is where ad inventory is bought and sold via a DSP or SSP.

Private Auctions: These are sometimes called ‘closed deals’ and are only open to invited bidders.

Preferred deals: Rather than auctioning ads, these provide programmatic advertising at a fixed price to a buyer.

Typically, programmatic advertising comes in four formats: display, video, banner, and in-app ads.

  • Video advertising is ideal for grabbing people’s attention through imagery, narratives, and sound.
  • Banner ads consist of a graphical image or animation placed on a web page, along with a URL to direct visitors to a website.
  • Native advertising is a form of online advertising that matches the form and function of the platform on which it appears. Native ads are less intrusive than banner ads and other online advertising, and can appear in various formats, including in-feed content, search results, and recommendations.
  • In-app ads are a type of advertising shown within an app. This can include banner ads, interstitial ads (full-screen ads), video ads, and native ads. In-app ads can be a great way to monetize an app and generate revenue.

Is Programmatic Advertising the Right Fit for Your Business?

You’ve read all about the benefits, but how do you know if programmatic advertising is the right fit for your business? That depends on a few factors, such as your target audience and marketing goals.

Below are some reasons why you might want to consider using programmatic advertising:

Volume targeting: if you’re looking to reach a large audience quickly and easily, programmatic advertising may be a good fit for you. Through automation, programmatic platforms allow you to focus on specific audiences according to interests and behaviors to reach more people in less time.

Managing your budget: As programmatic advertising lets you target specific groups, it can be budget-friendly. However, depending on the size of your business, the advice is to spend no more than 6-20 percent of your overall marketing.

Suggesting marketing budget for programmatic advertising.
  • What are your goals? Programmatic advertising can help you achieve various marketing goals, such as increasing brand awareness, generating leads, or driving sales.
  • What type of media do you want to use? Programmatic advertising offers you a variety of media types, including digital and in-app ads.
  • You need to be comfortable with the idea of automation and trusting algorithms to make decisions about where your ads should run.

Additionally, there are occasions when programmatic advertising may not be for you. If view-through-conversions aren’t of value to you and you haven’t tried display advertising before, then programmatic advertising may not be the ideal match.

How Much Does It Cost?

Programmatic advertising uses cost per mile (CPM), meaning you’re charged per 1,000 impressions.

However, other factors impact the cost of programmatic advertising. These depend on several factors, such as the type of system used (real-time bidding or private exchange), the amount of competition for ad space, and the quality of the ad space.

In addition, prices depend on:

  • Targeting
  • Industry devices
  • Ad format (video, display, etc.)
The factors that impact pricing in programmatic advertising.

Another benefit to consider is how programmatic advertising avoids the risk of overpaying for ads, which could save you money long-term.

Usually, costs can vary from 0.50 – $2.00 per impression, which is more affordable than traditional advertising.

How Do You Integrate Programmatic Into Your Existing Ad Plans?

Suppose you’re looking to introduce programmatic advertising into your marketing mix. In that case, you can do a few things to help get your campaigns off to a flying start, like:

Defining your objectives: What do you want to achieve with your programmatic advertising? Do you want to increase brand awareness, drive increased website traffic, generate more leads, or improve your ROI? Once you know your objectives, you can start setting specific goals and determine how to measure them.

Set realistic goals: It’s important to set achievable goals; otherwise, you’ll only be setting yourself up for disappointment. Be sure to consider factors like budget and available resources when setting your goals.

Decide on your Key Performance Indicators (KPIs): KPIs measure if you’re on target regarding your business goals. For example, if you were working on SEO, featured snippets might be a desired KPI. Everyone wants something different from their programmatic advertising campaigns. Therefore, the KPIs you choose stem from what you’re hoping to achieve and what success means to you. Some key performance indicators to keep an eye on include:

  • click-through rate (CTR), which is a metric that measures how often people who see your ad click on it. A high CTR means that your ad is relevant and interesting to your audience.
  • cost per click (CPC): CPC is an important metric for measuring the success of online advertising campaigns. By understanding how much each click costs, advertisers can better assess the ROI of their campaigns and make necessary adjustments to ensure they are getting the most bang for their buck.
  • conversion rate, or the percentage of people that make a purchase when they visit your website.
  • cost per acquisition, which is the cost of acquiring a new customer through an ad campaign.

Decide on the type of ads to use: You can select from In-app ads for getting more downloads, banner ads for brand awareness and retargeting, video advertising for engagement, and native advertising for brand awareness and engagement in a user-friendly format.

Sign up for a DSP: Examples include Amazon DSP, MediaMath, or RocketFuel. However, there are plenty more, and it’s best to do your own comprehensive research before you decide which platform is right for you.

Create your budget: Some networks have pre-determined budgets, while with others, you work to your budget. There are a lot of different resources out there on how to optimize your budget.

Decide who to target: This is when it gets personal. Ideal customers are identified by many factors, including interests, buying behaviors, location, languages, operating systems, and plenty of other factors.

Choose your SSP: Turn to options like Google Ads Platform, AdSuite, or OpenX to get you started in your search.

Next, upload your creatives and set up your ad markups.

Use the above only as a guide, and follow the step-by-step instructions for your chosen platforms.

Once you’ve launched, analyze your data and keep tweaking until you get the results you’re looking for.

Finally, I’ve got another article for you if you’re looking for more ways to implement programmatic advertising.

Programmatic Advertising Success Stories

Now you see the potential of programmatic advertising, here’s a look at some success stories.

Agency Pubmatic worked with a Chinese mobile app games developer with an audience of 40 million. The developers sought a suitable in-app monetization solution to improve the overall customer experience and scale demand.

Pubmatic’s solution was an Openwrap SDK, which allows advertisers to optimize their in-apps earnings. The result was:

  • A 10.6 percent daily average fill rate lift
  • A 16.4 percent daily ARPU lift
  • A 14 percent eCPM lift

For another example, World of Warcraft is one of the most popular online video games with a turnover of $6.9 billion. However, that doesn’t mean its makers, Blizzard, didn’t want to reach out to new audiences. It wanted an advertising campaign that would:

  • Improve brand awareness and drive qualified traffic.
  • Enhance awareness for upgrades and game launches.
  • Develop a healthy return on ad spend.
  • Increase traffic away from usual sources like Google, YouTube, and Facebook.

To achieve this, Advent Technology used in-app advertising in the form of rewarded video advertising. It also:

  • Created a full-funnel retargeting solution.
  • Allowed Blizzard to own the data.
  • Used retargeted strategies to enhance re-engagement.

The campaign led to an 8.6 percent click-through rate, compared to YouTube’s average of 0.33 percent for audible and viewable on complete (AVOC).

FAQs

What is Next for Programmatic Advertising?

In the fast-approaching cookieless society, we’re likely to see more focus on customer engagement through impactful and engaging creative media based on quality over quantity, with more emphasis on engagement-driven metrics. Artificial intelligence is also likely to play a role in programmatic advertising in the future.

How Does Programmatic Advertising Work?

Programmatic advertising is a type of online advertising that uses computerized systems to purchase ad space in real-time. Advertisers bid on ad space through an auction system, with the highest bidder winning the ad spot.

What is Programmatic Display Advertising?

Programmatic display advertising is a type of online advertising that uses programmatic technology to purchase ad space and target audiences.

When Did Programmatic Advertising Start?

It may sound like a new development, but programmatic advertising has been with us since 1994. The first banner ad was for AT&T’s ‘You Will’ advertising campaign.

Conclusion

If you’re looking for an effective and efficient way to reach potential customers, then programmatic advertising could be your answer.

Not only is programmatic advertising affordable and it can deliver you a high ROI, it automates buying digital ad space, saving you much-needed time.

Programmatic advertising also lets you target your ideal customers with precision, while delivering ads in real-time, potentially saving you money.

However, this type of advertising may not be suitable for everyone, especially if you haven’t started with regular digital marketing and don’t have a lot of data to go with.

Do you use programmatic advertising? How does it compare with other methods?


from Neil Patel's Digital Marketing Blog https://ift.tt/3k0qYiL
via IFTTT

Tuesday 27 September 2022

What Are Twitter Carousel Ads?

There’s no doubt that PPC ads work, but what if you want to take your advertising to the next level? Well, you can with Twitter carousel ads.

In 2020, Twitter Carousel Ads made their debut. More recently, Twitter announced multi-destination functionality for advertisers that want added flexibility and the capability to target different groups with unique URLs and headlines.

However, let’s not get too carried away, because I’m here to explain all the basics today. I’m also going to discuss the best practices, give you tips for creating Twitter carousel ads, and show examples, all to improve your chances of success with the format.

Ready? Let’s get started with the fundamentals.

A Quick Explanation of Carousel Advertising

Twitter carousel ads are a newer form of advertising that allows businesses to showcase multiple images and videos in a single ad.

Marketers can use these ads to tell a story or highlight a product or service, while users can swipe through the edge-to-edge images. Advertisers can also use carousels to direct visitors to landing pages and apps and combine images and videos for greater versatility.

You create Twitter carousel ads like regular PPC ads on the platform, and you can target them to specific users based on interests, demographics, and behaviors.

Carousel ads offer businesses an easy tool to increase engagement and connect with more customers on Twitter, helping increase brand awareness, drive website clicks and conversions, and generate leads.

Why Use Carousel Ads on Twitter?

The possibilities are endless when it comes to using carousel ads on Twitter. You can also use Twitter carousel ads for:

  • Sharing short stories, customer testimonials, or even behind-the-scenes footage.
  • Promoting a sale or new product or simply introducing your company to potential customers.
  • Highlighting multiple features/products/services and promoting multiple offers.
  • Showing off multiple products or images in one ad.

Additionally, suppose you’re looking for a new way to grab attention. In that case, this is another reason why you should use Twitter carousel ads. This model offers many advantages, including:

More precise marketing: Everyone who uses Twitter knows that the character limit is 280 characters, which doesn’t always give advertisers enough space to sell their products adequately. However, adding multiple images and videos means advertisers can convey more information in a single Tweet and provide a unique URL/headline to encourage the type of customer you’re looking for.

More installs and click-throughs: When Twitter tested its carousel ads, it found it boosted average click-through rate by 15 percent and installs per impressions an average of 24 percent compared with its regular single asset ads. With Twitter’s multi-destination website carousel ads, beta testing showed a 20 percent increase in click-through rates compared with single-asset ads and a 25 percent increase in click-through rates for ‘campaigns that optimize for site visit conversions relative to single-asset ads.’

Access to analytics: Twitter offers analytics and metrics, so you have a clear illustration of how your carousels are performing, and then you can adjust your campaigns according to the data.

Ease of use: You can create Twitter carousel ads by following step-by-step instructions and adding your media.

Engagement: The carousel’s design allows users to swipe seamlessly across images for added engagement.

Achieve your objectives: Do you want more app downloads and video views or to create awareness? Well, you can set your campaigns to achieve all of these things and more.

How To Set Up a Twitter Carousel Ad

Even if you’re new to the world of marketing and you don’t know how to advertise on Twitter, it’s simple to get going with this ad format. Just follow these steps:

To set up Twitter carousel ads, begin by navigating to ‘Ads Manager.’ From there, select ‘creatives,’ and ‘Tweet composer.’ Then:

  • Add your text using the Tweet composer.
The Tweet Composer page.
  • Next, go to ‘add media.’ You can upload any creatives (images and video) with a maximum of six of your images, or choose from the Twitter stock library. For this step, ensure you follow Twitter’s media guidelines:
Twitter media guidelines.
  • If you want to tweet your carousel organically, uncheck the ‘promoted only’ box.
  • Now, customize the ad destination. For the same headlines/URL on a carousel, choose the ‘Apply this headline and URL to the entire carousel.’ Alternatively, select the ‘Customize a destination’ and select a unique headline/URL for your individual media assets.
  • Publish your Tweet by pressing the black button on the right side of the page. Alternatively, you can go to the drop-down menu and choose ‘Schedule’

Finally, there’s Twitter carousel ads printable templates available if you want to brainstorm and practice before hitting ‘Tweet.’ You can download this from the ‘Twitter media guidelines’ page above.

Twitter Carousel Ad Examples

Comic book app Comico specializes in content like comics and manga; one of its main forms of income is in-app purchases. The Japan-based company uses Twitter carousel ads to share teasers of its most popular content.

By posting teasers on Twitter, Comico engages social media users and encourages them to click through and read the rest of the story.

Here’s an example of one of its posts.

An example carousel ad from Comico on Twitter.

Twitter’s carousel ads are also perfect for showcasing items. Hyundai is just one company using this format to highlight its latest vehicles with design reveals to intrigue prospects, display videos, and news.

Here’s an example from Hyundai’s Twitter feed:

A Hyundai ad.

Hyundai combines its ads with engaging, enticing text and a URL to get people to click through to its website.

Skincare brand CeraVe is no stranger to Twitter advertising, using takeovers, which offer a mass reach, allowing your brand to build brand awareness and promote tweets.

However, CeraVe used Twitter carousel ads to detail the stories of four nursing staff. When CeraVe used these ads in combination with its other advertising, it achieved a 59 percent increased engagement and +19 percent higher impressions than Twitter’s usual internal benchmarks.

CeraVe Twitter ad Twitter Carousel ads

Best Practices for Twitter Carousel Ads

When creating a carousel ad, there are a few best practices to follow to ensure that it’s effective.

First, check that all your carousel’s images are high quality and relevant to your product or message. Also, use a strong headline and call to action for each image. For instance, to spur people into action, you can offer a discount, use the word ‘free’, or create a sense of urgency with time-limited deadlines.

You can also do the same with headlines. Don’t forget to stress the uniqueness, use power words, and include ‘you’ to personalize your tweets.

Second, make sure that your carousel is well-designed. The images should be easy to navigate, and the text should be easy to read.

Third, make sure that your targeting is accurate. Only target likely users of your product or service.

Finally, test and optimize your carousel ad campaign regularly. Try different images and copy, and see which combinations work best for you.

Here are some more best practices for Twitter carousel ads:

  • Include visual storytelling. Like every good story, each carousel should incorporate a narrative with a beginning, middle, and end. The difference here is that you are doing this purely with visuals.
  • Target your audience according to the funnel stage. For example, if consumers click through to product pages, add product images, or appeal to prospects with general top-of-the-funnel images to build product/service awareness.
  • Highlight the benefits and ensure your product is clear and visible.
  • Customize your headlines and URLs to different landing pages and headlines using Twitter’s multi-destination carousels.
  • Don’t just rely on images. Include solid and captivating headlines, detailed descriptions, and compelling CTAs to spur leads into action.

FAQs

Can You Do Carousel Ads on Twitter?

Yes, Twitter started carousel ads in 2020 and introduced multi-destination Twitter carousel ads in 2021.

What is Carousel Advertising?

A carousel ad contains several images or videos that rotate (or “carousel”) as you scroll through them.

Can You do Organic Carousel Ads on Twitter?

Organic carousel ads are possible on Twitter. Just deselect the ‘promoted only’ box in the Tweet composer.

What Makes a Good Carousel Ad?

Relevance and A/B testing should be at the top of your list. However, you also want attention-grabbing imagery with a clear call to action, and detailed descriptions that detail the features and benefits.

Conclusion

Twitter carousel ads are a great way to showcase various products or images in a single ad. This type of ad is especially effective for e-commerce businesses or companies with multiple products. You can use carousel ads to tell a story, highlight different features of a product, or show off different products in a collection.

They are eye-catching and allow a lot of information to be conveyed in a small amount of space. In addition, Twitter carousel ads are interactive, which makes them more engaging for users.

When used effectively, carousel ads are a powerful tool in a marketing campaign and offer greater click-throughs and engagement.

Do you use carousel ads? How are they working for you?


from Neil Patel's Digital Marketing Blog https://ift.tt/frlyH0v
via IFTTT

Monday 26 September 2022

Best Image Editing Tools to Create Killer Rich Media

I’m just going to say it: Visual marketing is the wave of the future.

There’s no denying the power images have on gaining traffic, shares, and rankings.

In fact, if you have at least one image on your blog post, you are much more likely to rank on the top page of Google.

Images should be the lifeblood of your content marketing strategy.

Great content without any images likely won’t get many shares, much buzz, or any viral promotion.

But that’s easier said than done, right?

Making images that are visually pleasing can be time-consuming.

We don’t all have the creativity or design skills to do it, either.

Heck, I surely don’t have the creativity to produce diverse designs from scratch.

But I know I need the visuals if I want my content to be viewed and shared.

Without visuals, I’d probably drive 50% less traffic.

So I make it a priority.

In every blog post I write, I try to include a visual with every 100 words.

That number can be tough to hit when I can’t think of creative designs, but thankfully, there are a ton of free (or crazy cheap) image editing tools that make you look like a professional.

And that means you can shave time off your day with just a few minutes of image editing.

Thankfully, almost all of them are easy to use even if you have little-to-no experience with graphic design.

Here are six image editing tools that make you look like a pro and will drive your social shares through the roof.

1. VistaCreate

VistaCreate is an all-in-one online platform for designing literally anything a marketer or small business owner may need — no design skills necessary.

vista create home page

You can use it to create posts and stories for socials, make email designs, ads, presentations, and even print materials.

The editor offers thousands of premade templates that already look great, so you can just quickly customize a design and use it right away.

vistacreate templates screen

And unlike other graphic design platforms, ALL their templates are free.

In addition to templates, you access a huge library of royalty-free stock photos, videos, vectors, objects, animations, fonts, and music tracks.

With all these tools, you can make videos and animated visuals in addition to static designs.

If you want to publish your design right away, you can post it directly from VistaCreate to your Facebook and Instagram business accounts, and Pinterest. Handy, right?

I like that most of their tools are free, so that you can create a cool design on a budget.

To start creating, log in or sign up to VistaCreate.

So I’ve talked a bit about what VistaCreate can do for you, but let’s show it in action. Here’s a real-life look at me putting this great tool to use.

To begin, I decided to create an Instagram video story for an event I’ll be speaking at.

So, I chose a template first.

vistacreate choosing a template screen

I changed the colors, added objects and my photo, and used the Background Remover to erase the background in one click.

screenshot of vistacreate background remover

Next, I applied a black-and-white filter to make my photo match the style of the conference.

screenshot of vistacreate image filter

It’s pretty cool!

Next, I animated my photo and objects.

Gif of Vistacreate being used to create an instagram story.

I added all the information about the event and tried different styles to see which color scheme worked best.

Graphic of instagram stories in VistaCreate.

After that, I’m ready to post!

VistaCreate also has a resize feature that allows you to make one design and resize it for different platforms in just a few clicks:

Resizing Instagram stories in Vistacreate.

Speaking of branded designs, you can build a brand kit in VistaCreate and use it to create a cohesive look for your branding.

Add your business’s colors, fonts, and a logo to your brand kit — and apply it to a template to create your on-brand design.

Having a brand kit is very convenient, especially if you work with many different companies and want to simplify your workflow.

vistacreate brand kit screenshot

If you work for a new company that doesn’t have a logo, you can create one right from the Brand Kit page using the Logomaker tool.

Click on “Create a logo from scratch”, select an industry, type in your company name — and the Logomaker will offer tons of logo designs.

vistacreate logo maker in action

On top of that, I like that VistaCreate works for both digital and print, so that you can make business cards, flyers, posters, postcards, and other printables in one place.

If you live in the US, you can even use VistaPrint (both companies are part of the Vista family) to have your designs printed and delivered to your door.

For now, you can use them to print posters, flyers, and business cards, with more formats coming soon.

In short, VistaCreate covers all the needs marketers might have — creating branded content for social media and ads, making a brand kit with a logo, and designing print collateral.

You can access it on both desktop and mobile, with the app available for Android and iOS.

2. PicMonkey

PicMonkey is another helpful tool to use for image editing.

If you aren’t a graphic designer but want crystal clear images with high production value, PicMonkey is one of your best bets.

Use PicMonkey as an image editing tool.

PicMonkey has a slew of diverse features.

For example, you can edit existing images that you have on Facebook, your computer, or anywhere else:

PicMonkey is an image editing tool that allows you to edit existing images.

You can also touch up specific photos with new effects.

Also, you can easily start a new design from scratch or with a preset template.

To get started, click “Start a free trial” and create your free account:

Start a free trial with PicMonkey, an image editing tool.

You can set up your new account with an email or by signing up directly with Facebook:

Sign up with the image editing tool, PicMonkey, using your Facebook account.

Once you’ve created a free trial account, you should be directed back to the dashboard to edit content:

Edit content using the image editing tool, PicMonkey.

One of the best benefits of PicMonkey is the actual photo editing ability.

For example, other platforms focus more on social media and content marketing images.

But PicMonkey allows you to use diverse filters that you’d find in an expensive application like Photoshop.

For example, you can edit things like filters, sharpening, and blurring:

Edit filters, sharpening, and blurring with the image editing tool, PicMonkey.

You can even tap into more advanced photo editing tools like curves and levels:

Use advanced editing tools in PicMonkey, an image editing tool, to edit curves and levels.

On top of that, you can touch up real-life photos of yourself or your company—if stock photos are not ideal—using awesome image editing tools:

Touch up real photos of yourself or your company using PicMonkey.

Want to add a spray tan? Who doesn’t?

The portrait photo editing tools are great and allow you to perfect any headshot for your social media or team photo for your website.

On top of that, you can add tons of cool overlays to your content.

Add overlays to your content using the image editing tool PicMonkey.

For example, if you wanted to add emojis in your picture, simply click the “PicMoji” option and click any emoji to instantly add it:

Add emojis to your pictures using PicMonkey.

You can also pick from a bunch of different existing themes and templates if you are lacking inspiration or creativity:

Use different themes or templates on the image editing tool PicMonkey.

PicMonkey is similar to other tools but lacks the diverse template and preset options some offer.

What it lacks in templates, though, it makes up for in diverse image editing capabilities.

The ability to edit things like curves and levels or touch up portrait-style photos really stands out.

PicMonkey is a great tool for the everyday person who needs detailed image editing but doesn’t want to get bogged down by advanced, technical programs.

If you want to create a beautiful photo in just a few minutes that is less focused on text and templates, this is your go-to tool.

3. Snappa

I’m also a big fan of Snappa for image editing.

See Snappa's homepage to learn more about them as an image editing tool.

Snappa is similar to other tools in that it has countless high-quality templates to start from.

But my favorite features are the countless free stock photos and high-quality icons:

Snapp has high quality stock photos and icons that they offer for free.

They are some of the best free icons I have ever seen.

One of the best features Snappa has to offer is the social media scheduling tool:

Snappa has its own social media scheduling tool.

You can share your graphics directly from Snappa in seconds, saving you the time it takes to download and schedule on a different tool.

You can even use the tool to resize existing images, which is a lifesaver when it comes to repurposing content for different platforms:

Use the image editing tool, Snappa, to resize images.

To start creating your graphics in just a few minutes, click “Create My Graphic Now” on the homepage:

Create your own graphics on the image editing tool, Snappa.

Sign up for a free account and head to your dashboard to get started.

Here, you can start to create an image based on custom dimensions:

Use custom dimensions to create your own graphic on Snappa.

Or simply choose from common template sizes meant for various platforms:

Snappa has common dimension templates that match different social media platforms.

One of my favorite uses for Snappa is the diverse selection they have for social media and PPC ads:

The image editing tool, Snappa, has a diverse selection of social media and pay per click ads.

It’s probably the one of the best image editing tools with the most options when it comes to creating high-quality ads in just minutes.

You don’t need to pay a designer outrageous prices for a few banner ads anymore.

Snappa allows you to do it in minutes.

Got a new idea for an ad on Facebook? Don’t wait 48 hours for your designer to make it.

Once you’ve picked out your desired template size, you can choose from a bunch of free options:

Choose from free options on Snappa's website to edit your images.

These templates are awesome and easy to work with.

After selecting your template, you can customize just about everything on it.

You can add high-quality background images or icons for free:

Edit background images with the image editing tool Snappa.

But the best part about Snappa’s editing tool is the free, high-quality icons.

These icons are what you’d expect from a professional graphic designer and they are all available for your use:

Snappa has the essential icons needed to edit images.

They have just about anything you can think of, from social media to emoji-style icons.

If you have a particular icon graphic in mind, you can simply search in the bar above to narrow down your results:

Use the search tool to look for specific icons you have in mind with Snappa.

And the free, professional-quality stock photos are endless:

Use the image editing tool Snappa for high quality stock images.

Snappa is an awesome tool if you love to use icons or stock photos in your work.

If you like instant social scheduling, Snappa has that, too.

Simply hit “Share” in the top-right corner and you can connect social media accounts and even send content to Buffer for scheduling:

Share your images with Snappa, an image editing tool.

Take advantage of the diverse, free offerings from Snappa if you want images that make you look like a professional designer.

4. Piktochart

Beyond just basic image editing tools for social media, Google Ads, or Facebook Ads, Piktochart is centered around infographics.

The image editing tool Piktochart is great for creating infographics.

Piktochart is one of my favorite free tools for making infographics.

Usually, infographics take quite a bit of time to create.

They are a laborious process that can require professional designers and lots of money.

But you don’t need any of that.

Piktochart is extremely simple and easy to use, and I’ve used it countless times to make infographics on QuickSprout.

To get started, click the “Start For Free” button on the homepage:

Start a free trial with Piktochart.

Once you’ve created an account, it should instantly direct you to the dashboard.

From here, you can choose between three types of graphics:

Choose between three types of graphics when editing images on Piktochart.

You can create printable graphics, presentations, and infographics.

My personal favorite use of Piktochart is for the infographic templates.

There are tons of totally free templates to take advantage of:

Choose from free templates on Piktochart.

If you want to inspect one and get a preview, simply click on the template to get a sneak peek:

Preview an infographic template that you are considering using.

If you like the design, click “Use Template” at the top:

Select "use template" when you've decided which template you want on Piktochart.

From here, you can select between multiple color schemes to fit your company branding:

Choose between Piktochart's different color themes when editing your image.

On top of that, Piktochart offers really high-quality graphics just like Snappa:

Piktochart offers high quality graphics for image editing.

You can pick from thousands of icons related to almost anything you can think of.

They also have a diverse stock photo library:

Choose between quality stock photos when editing your image on Piktochart.

Piktochart is one of my favorite infographic tools because they have some of the best free options on the market.

And they don’t try to trick you into buying anything.

What you see is what you get.

If you want a high-quality infographic editing tool, this is your best bet.

5. Pixlr

Now that we’ve covered some of the best image editing tools on the market, it’s time for one of my all-time favorites.

This tool isn’t for the faint of heart, though.

It’s meant for more experienced users who want deep customization options and who have a basic background in graphic design.

If you don’t have experience developing graphics out of a blank canvas, you might find this tool a bit frustrating.

Pixlr’s photo editor resembles Photoshop almost exactly. It has just about every editing feature you’d find in a paid tool.

Pixlr is a free image editing tool that resembles other high quality, expensive applications.

It’s a completely free tool with incredible customization options you’d expect in a high-quality, expensive application.

To get started, head to Pixlr and create a new image from scratch or open an existing one from a URL or your computer.

If you aren’t comfortable with creating designs from scratch, then Pixlr probably won’t be your go-to tool.

It requires some design elements and skills that are above the level of Snappa.

If you create a new image, you can select the dimensions to your liking:

Select your image dimensions when creating a new image on Pixlr.

From here, you start to edit a blank canvas just like you would in Adobe’s Photoshop:

Edit on a blank canvas with Pixlr.

The greatest strengths of this tool come in the form of detailed filters, layers, and adjustments.

For example, you can use it to edit an awesome image or create a new blog graphic with various options:

Create custom graphics using Pixlr.

It’s definitely not the easiest tool on the market to use, but if you are looking for a completely free tool with more customization options, Pixlr is a great one.

You can build graphics from the ground up or simply stitch them together like you would in Photoshop.

Go ahead and give it a try today!

6. Luminar AI

From Skylum, we have the first photo editor powered solely by artificial intelligence: Luminar AI.

Its goal is to take some of the stress out of photo editing by automating the process.

Bridging the gap between basic image editing tools and pro software like Photoshop, this software offers the right in-between gear. Best of all, you need no experience to use it.

Luminar AI is a great image editing tool that fits in between basic image editing tools and pro software like Photoshop.

Once you choose an image to work on, you can start making additions and enhancements.

Navigate through the templates and editing features. The specialty features of Luminar are Face AI, Landscape, and Portrait Bokeh. The software will even walk you through the process with editing suggestions it curates.

The AI portrait, or Face AI, is meant to make enhancements from shine removal to face slimming to color correcting. Highlight your muse’s smile and give them flawless skin for that “wow” level Luminar helps you strive towards.

Luminar AI offers AI portrait, or Face AI, to enhance photos.
An image of a woman smiling is being edited with skin, lip, and slim face enhancement on Luminar AI.

This is the creative influence that makes Luminar stand out from other AI editing software.

In the section that has more advanced tools, you will see options that help you replace a background or get the perfect bokeh effect. The cool thing is: This can all be done on the same photo.

With Landscape EnhanceAI, a custom brightness map is used to intelligently balance both light and color across the entire image to make it shine.

A portrait image of a dock, boat, water, and mountains and trees in the background is being enhanced using Landscape Enhance AI on Luminar AI.

Lighting is everything with photo editing. The Bokeh Effect is tough to master, getting the proper balance of light just right. Luminar AI puts you in control and makes suggestions for proper focus and blur for an aesthetically pleasing edit.

Acheive the perfect bokeh effect when editing images on Luminar AI.

When you first start using the software, it can be a bit of a chore to learn. After some time, though, you’ll remember which features are your favorite.

No matter your experience with editing, Luminar allows you to make quick edits at the push of a button. This is especially great for those of you who don’t like sitting in front of your computer too long.

One other thing about this software I like besides its ease of use: While it may be a Photoshop competitor, Luminar can be used as a Photoshop plugin.

That’s right. You can have the best of both worlds with all the aspects of each tool.

So, all around, I say it’s a tool most of you will be a fan of.

Frequently Asked Questions

What is image editing?

Image editing is the process of enhancing digital or analog photographs using various methods, devices, or programs. Photo and image editing might be different when creating graphics versus editing a picture. Scanners, digital cameras, and other image-capturing tools may produce good yet imperfect images that need further editing attention.

What are image editing tools?

An image editing tool is software that enables the editing and conversion of images to varying graphic formats. Everyone knows Photoshop as one of the most popular image editing tools, but there are many others with similar capabilities. Some specialize in removing backgrounds or are a beginner-friendly version of capabilities found within Photoshop. If you want to make an infographic, try Piktochart. Maybe you want some AI guidance when editing, try Luminar AI instead. Think of your needs or what you want to learn and let that drive your starting point for your editing journey.

How should I choose an image editing tool?

Think about the functionality you need to perform the task at hand. Maybe you need to crop, rotate, or straighten an image. Perhaps you need to correct a smile or the shading of colors of an image. You might need to create an infographic. Read up on the handy tools I mentioned in this post and choose the one that’s best to get your job done.

What are some features I need to have when editing images?

Some standard features of a basic image editor include:

  • Crop and rotation
  • Lighting adjustment (exposure, brightness, contrast, saturation, etc.)
  • Focus and sharpness correction
  • Blemish corrections
  • Red-eye adjustment

Along with some of these basic features, items you want to have especially for editing images include adding layers to create different amounts of transparency and adding elements like blur or vignette to create specific appearances.

What is photo editing?

This post-production technique of digital photography involves using photo editing tools to alter images to your desired outcome. It is the digital photography equivalent of a darkroom, where photographs are edited after they’re taken.

How to learn photo editing?

Start with photo editing tutorials to learn your style. YouTube is always a great place to start, but the software you use likely offers a tour of its features – use them to your advantage. You can avoid the need for a lot of editing by adjusting your camera’s settings as well. A higher-quality camera helps, too. With many of the tools like I’ve mentioned, the software provides step-by-step instructions telling you how to use the product in real time of your editing process. If you’re still unsure how to get started, read our complete guide on designing stunning visuals as a beginner.

How to calibrate monitor for photo editing?

This will depend on whether you have a Mac or PC

For PC: Go to Start > Control Panel > Appearance and Personalization > Display > Calibrate Display Color. Then open the software that will walk you through and give you a general screen calibration. You can also find it by searching for “Calibrate Display Color” in your Windows search box.

For Mac: With the glossy glass, it’s a bit more difficult, but setting your white point to 5500 will give your screen a warm and fairly accurate display.

What’s the difference between a photo editing tool and image editing tool?

Photo editing tools are exclusively used for manipulating images captured with a camera. Image editing tools can do this as well, but also have the capacity to work on static graphics, or potentially combine the two.

Conclusion

Content marketing should always include visuals.

You can’t just stick a bunch of text up on a page and expect your audience to read and digest every word.

It’s just not going to happen.

Videos and images are a great way to grab their attention and get your message across.

And, like I said, Google likes them, too. A recent study on Google rankings found that images can even help you rank better.

Images should always be a focus in your content marketing and social media strategies.

They are great for driving shares and clicks that plain text just can’t make happen.

But how do you create images when you have no graphic design experience?

Thankfully for us, there are tons of free tools online that have templates and drag-and-drop style design.

These tools are amazing for creating designs in a fraction of the time without the need to learn graphic design skills.

Most of these tools have thousands of free themes, icons, and tools for you to use!

Start by using VistaCreate.

It’s one of the most popular image editing tools on the market. It’s great for fast, easy designs for almost anything you can think of.

Try PicMonkey for diverse portrait editing and more advanced tools with an easy interface.

Snappa is excellent if you want high-quality icons and integrated social publishing.

Pixlr is the most advanced of the tools, but offers incredible Photoshop-quality features for free.

Luminar brings a new concept to photo editing tools with AI capabilities.

Even a beginning designer will look like a pro with these tools.

What are your favorite image editing tools to use for content marketing and social media?


from Neil Patel's Digital Marketing Blog https://ift.tt/4LSlbtc
via IFTTT