Thursday 30 September 2021

The Best Ecommerce Website Builder

BigCommerce store builder for Best Ecommerce Website Builders

Disclosure: This content is reader-supported, which means if you click on some of our links that we may earn a commission.

Every great online store starts from the same place—with an ecommerce website builder. These tools make it easy for anyone to launch an ecommerce business by building a website from scratch.

So if you’re interested in selling products or services on the web, you’ll need to find an ecommerce builder to create your online store.

You don’t have to have any web design experience whatsoever to get started. To find an option that suits your goals, check out recommendations below.

You’ll find in-depth reviews of the eight best ecommerce website builders, followed by a brief buyers guide to help you narrow in on the best one.

#1 – Wix Review — The Best Drag-and-Drop Ecommerce Builder

Wix is one of the best overall site builders on the market today. The platform can be used to create any website—including ecommerce sites. 

More than 160 million people across the globe have used Wix to create a website from scratch. There’s no code to write, no technology to master. If you know what you want, you can build it in Wix.

Start with one of Wix’s beautiful online store templates. These have been used by thousands of businesses to get their products and deals in front of customers. From there, you can customize the look and feel of your site to match your brand using the simple drag-and-drop ecommerce website builder.

Wix product page for Best Ecommerce Website Builders

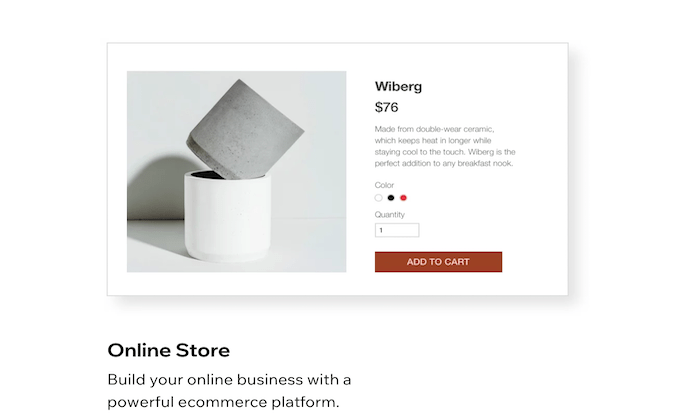
Wix is a great option for beginners. Anyone can use this platform to build an ecommerce site, regardless of technical skill level. Here’s what makes Wix so great:

  • Intuitive drag-and-drop site builder
  • 500+ stunning templates
  • Optimized for SEO
  • App marketplace for custom functions
  • Advanced design features like video backgrounds, animations, and scroll effects
  • Mobile-optimized ecommerce site
  • Custom domain, free hosting, and free SSL certificate
  • Supports multiple payment methods
  • Product pages and store manager tools
  • $300 in advertising vouchers
  • 24/7 customer care
  • Unlimited products

Ecommerce plans from Wix start at $23. But I recommend starting with the Business Unlimited plan, at a minimum. It’s just $4 more per month and comes with enhanced features. 

You can start building your Wix site for free to try out the drag-and-drop builder. Then take advantage of a 14-day free trial to access premium features. 

#2 – BigCommerce Review — The Best for Large Ecommerce Sites

BigCommerce is another industry leader in the ecommerce world. For more than a decade, this platform has served ecommerce sites in 120+ countries.

Over $25 billion in merchant sales have been powered by BigCommerce. It’s a great option for people who don’t want to hit annoying limits about what their site can and can’t do.

BigCommerce store builder for Best Ecommerce Website Builders

This platform is great for wholesalers, international ecommerce sites, B2B sellers, and multi-channel sales. For selling at scale, look no further than BigCommerce.

  • Easy to use and secure platform
  • Powerful ecommerce analytics and customer insights
  • Drag-and-drop building tools with no coding required
  • WordPress integration
  • Custom checkout capabilities with checkout API and SDK
  • Built-in Javascript, HTML, and CSS for full theme customization
  • Optimized for mobile and SEO
  • Built-in faceted search
  • Cross-channel sales support (brick & mortar, social, marketplaces, etc.)
  • Multiple currency support
  • Global CDN
  • Cross-border fulfillment
  • Built-in payment processing

Overall, BigCommerce is my top recommendation for large ecommerce websites. If you want to sell online without restrictions, this will be a top option to consider. 

Plans start at $29.95 per month. Try BigCommerce free for 15 days

#3 – Squarespace Review — The Best for Beautiful Ecommerce Designs

Squarespace is another all-in-one website builder that can be used to create any type of website. 

But unlike other traditional site builders out there, Squarespace is optimized for businesses. With the exception of the personal plan, all Squarespace subscriptions come with built-in ecommerce functionality.

Squarespace store example for Best Ecommerce Website Builders

Squarespace is a popular choice for creative professionals who want to showcase their portfolios and sell online. It comes with features like:

  • Award-winning design templates
  • Built-in tax tools
  • Supports sales for subscriptions and digital content 
  • Discount codes and gift cards
  • Secured checkout process from any device
  • Abandoned cart recovery tools
  • Ecommerce integrations for shipping and payment processing
  • 24/7 customer support

You’ll need to connect your own payment processor to run an online store with Squarespace. Ecommerce plans start at $18 per month. Upgrade to the Basic Commerce plan ($26 per month) to avoid 3% transaction fees.

If creating a visually appealing ecommerce site with stunning designs is your top priority, Squarespace should definitely be on your shortlist. 

#4 – Square Online Review — The Best for Small Businesses with Physical Retail Space

Square is best known for its payment processing and POS solutions. But the platform also provides business owners with the ability to create a free online store.

If you’re a brick and mortar retailer that’s currently selling with Square POS, you can easily expand your online presence by building an ecommerce site using Square Online.

Square Online store example for Best Ecommerce Website Builders

Let’s take a closer look at some of the features and benefits that you’ll get with Square Online:

  • Fast setup with no coding required
  • Built-in payment processing
  • Automatic sync with your Square POS system
  • Supports in-house and on-demand delivery
  • Instagram integration
  • Inventory management tools
  • Accept gift cards, Google Pay, and Apple Pay

Launching an ecommerce site with Square Online is free; you’ll only pay the transactional fees (starting at 2.9% + $0.30). For advanced features, paid plans start at $12 per month.  Try it for free.

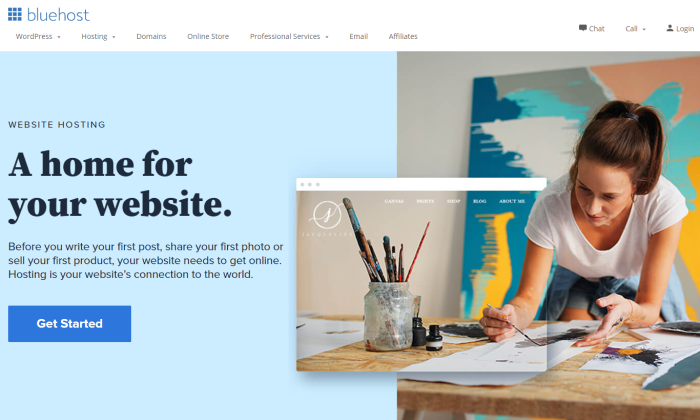
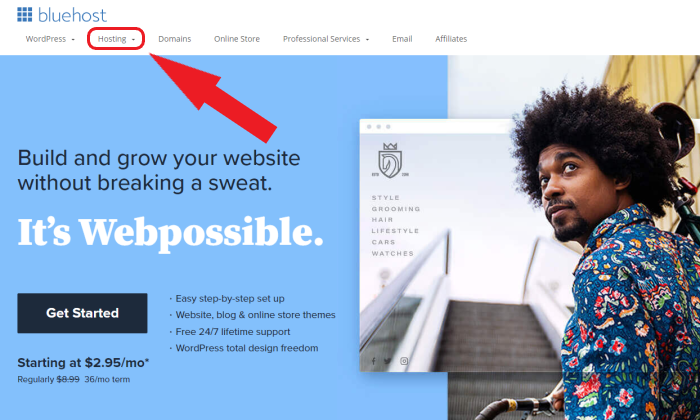
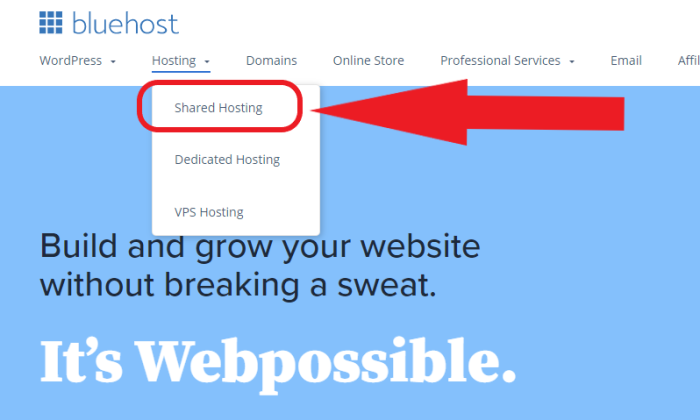
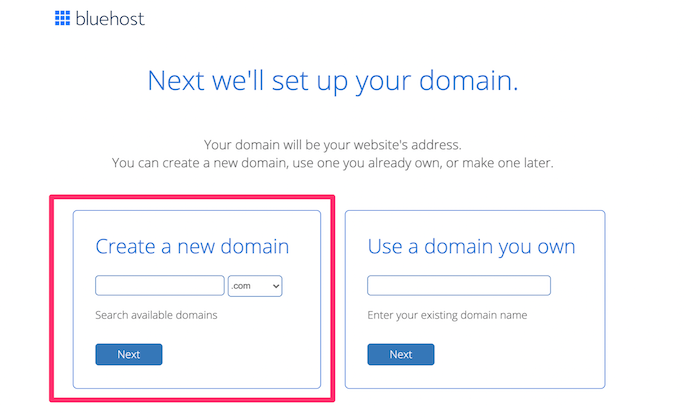
#5 – Bluehost Review — The Best Turnkey WooCommerce Store Builder

It can be a hassle to get a WooCommerce store up and working brilliantly.

From managing the WordPress plugins—both WooCommerce itself and the companion plugins needed to power up WooCommerce for your needs—to conducting regular updates, health checks, backups and so on, building a WooCommerce store can be daunting.

Bluehost is here to help.

Bluehost main page for Best Ecommerce Website Builders

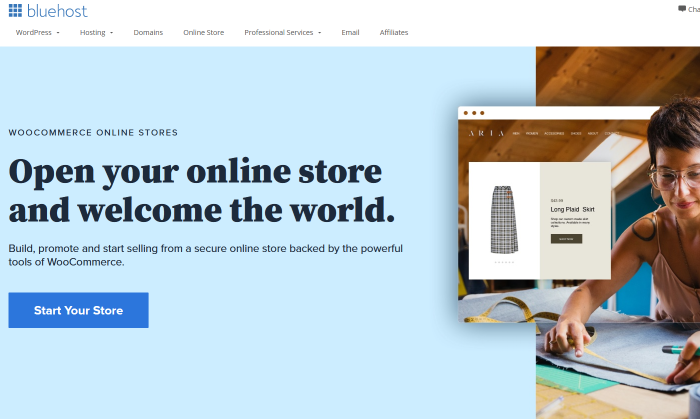
With their specialized WooCommerce Online Stores offering, Bluehost has made setting up a WooCommerce store a breeze.

It starts with Bluehost’s Online Store Creation Experience, a tool that will guide you gently through initial store creation and product uploads.

I love this because Bluehost has long been one of WordPress’ recommended hosting providers. They get WordPress, so who better to trust with maximizing the best ecommerce store plugin for it?

And remember what I said above about companion plugins?

Well, Bluehost has picked out the top ones your web store will need and included them at no charge to you.

That’s a big deal since it would cost you $80 each to install and utilize USPS shipping, FedEx shipping, and UPS shipping, for just one example. Right off the bat, you get the three major shipping providers and Bluehost saves you $240.

And that’s just three of the many plugins included.

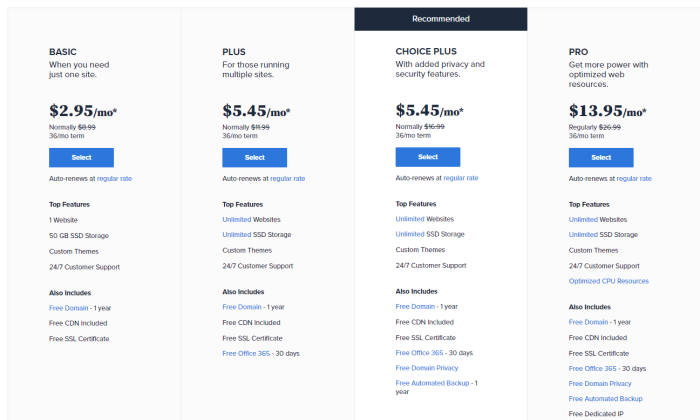
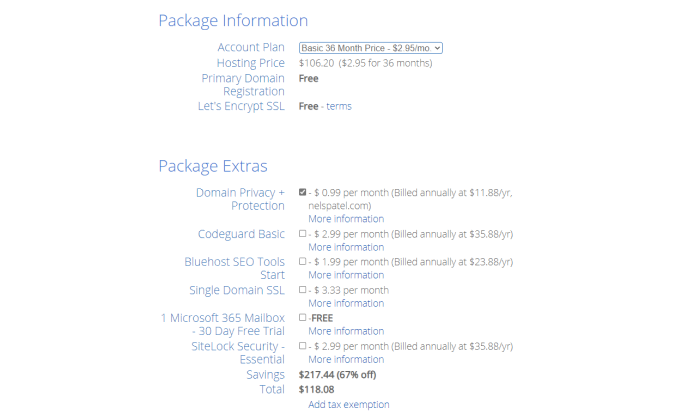
Bluehost is generous with included features beyond that, as well. In the basic package, you’re allowed unlimited products and access to traffic analytics, 24/7 support, easy payment processing, manual order creation, and much more.

Plus, you get a free year of CodeGuard Basic for regularly backing up your site.

All of this comes at a good price of $12.95/month if you agree to a 36-month commitment. But if you’re serious about running an ecommerce store, I’d expect you want to be around for at least three years.

Upgrade to Premium—which starts at $24.95/month for the same 36-month term—and you’ll also get the ability to sell subscriptions, customize your products on a deeper level, and book appointments online.

Plus, they’ll give you CodeGuard basic completely for free, as well as domain privacy and protection.

In essence, Bluehost is taking so much work, research, and upkeep off your hands, there’s no question that this is one of the easiest ways to build and maintain an ecommerce store on your WordPress site.

Get started with Bluehost Online Stores, powered by WooCommerce, today.

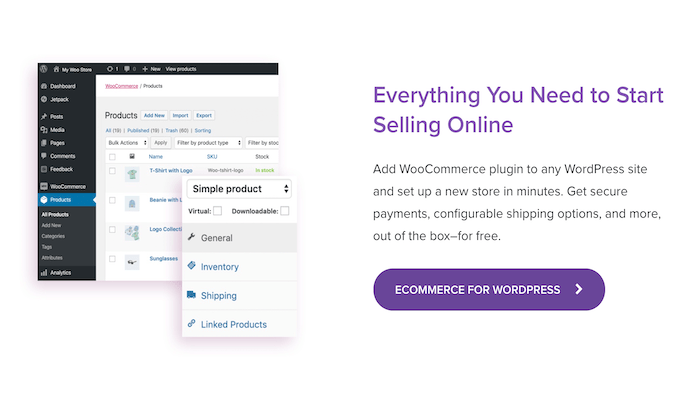
#6 – WooCommerce Review — The Best Ecommerce WordPress Plugin

If you currently have a WordPress website and need to add shopping cart functionality to it, WooCommerce will be the best option for you. 

This plugin is built specifically for WordPress, and it’s one of the most popular WordPress plugins on the market today.

WooCommerce web store for Best Ecommerce Website Builders

What makes WooCommerce so great? Let’s take a closer look:

  • Fully customizable with features that can extend its functionality
  • Flexible and open-source
  • 140+ gateways and payment integrations
  • Ability to manage orders on the go
  • Supports physical products, digital products, and subscriptions
  • Hundreds of free and paid extensions
  • Fully scalable
  • Developer-friendly with REST API

To get started with WooCommerce, you’ll need to have an existing WordPress site. That means you’ll have to handle the domain registration and hosting on your own as well. 

The WooCommerce plugin is free to install.

#7 – Shopify Review — The Best Out-of-the-Box Ecommerce Functions

Shopify is king in the ecommerce space. Trusted by 1+ million websites in 175 countries, it’s one of the most popular ecommerce platforms available on the market today.

More than $200 billion in online sales have been facilitated via Shopify.

Shopify online store for Best Ecommerce Website Builders

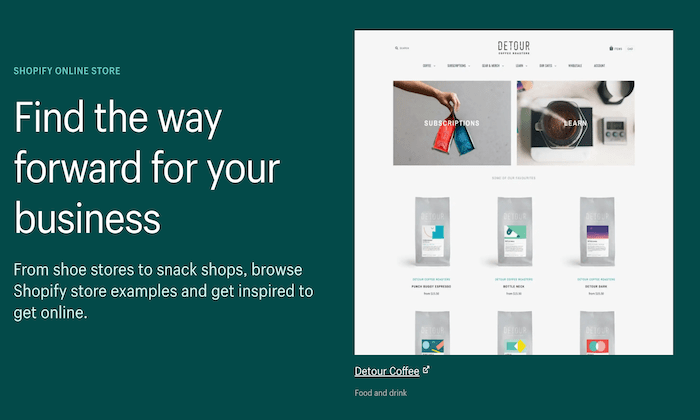
The platform is extremely versatile. Whether you’re starting a new ecommerce business from scratch or expanding your physical presence to an online store, Shopify can accommodate your needs. It comes with everything you need to build your website and start selling online:

  • Industry-specific templates
  • Supports multiple sales channels (point-of-sale, social media, online marketplaces, etc.)
  • Drag-and-drop store builder
  • 70+ templates
  • Custom domains
  • Secure checkout
  • Gift cards
  • 24/7 support
  • Unlimited products
  • Built-in payment processing
  • Shipping discounts
  • Marketing tools
  • Business insights

Regardless of your business size or industry, Shopify’s ecommerce platform is versatile enough to support your site.

Plans start at just $29 per month. You can try Shopify for free with a 14-day trial

#8 – Shift4Shop (formerly 3DCart) Review — The Best Developer-Friendly Ecommerce Software

If you have unique needs and you’re working with a developer or designer, Shift4Shop (formerly 3DCart) might be the solution for you.

Shift4Shop isn’t quite as popular as some of the other ecommerce website builders on our list. But with that said, it’s not for everyone.

Shift4Shop example store for Best Ecommerce Website Builders

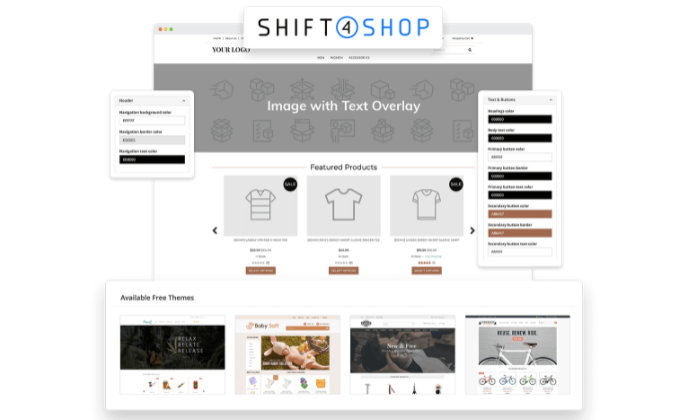
While Shift4Shop does have drag-and-drop building tools to accommodate beginners, the software is powerful enough to support the needs of developers and design experts. So it can essentially be as simple or complex as you want it to be.

Other top features and noteworthy highlights of Shift4Shop include:

  • 200+ built-in features
  • 200+ ways to accept payments
  • 50+ free themes
  • Simple and versatile shipping setups
  • Robust security
  • Supports dropshipping
  • Supports subscriptions, tickets, events, and print-on-demand sales
  • Powerful CMS
  • Optimized for SEO

All plans come with secure hosting, unlimited orders, 24/7 support, and no transaction fees.

If you use Shift4Shop for your payment processing, the entire platform is free to use. Whereas some ecommerce website builders cost hundreds of dollars a month, Shift4Shop doesn’t cost a thing more than the transaction fees, which you would still be paying on a platform that cost money.

The potential to save big is yet another reason I recommend Shift4Shop. Subscriptions are backed by a 30-day money-back guarantee. Try it free for 15 days.

What I Looked at to Find the Best Ecommerce Website Builder

Before you start searching for different ecommerce site builders, it’s important to understand how to evaluate these options.

Much will depend on where you are starting from and where you want to go.

Someone who wants to add ecommerce functionality to an existing website, for example, has a different set of challenges than a person who is still planning to launch their site.

Here are the major factors to consider as you’re shopping around and narrowing down your top picks.

Technical Skill Level

What is your technical background?

Some ecommerce website builders are designed for beginners, others are made for advanced users and developers, and the rest fall somewhere in between. If you’re a DIY-type person, then your technical abilities will play a significant factor in choosing the right platform.

Beginners should aim for platforms that don’t require coding. These website builders will let you put everything together with simple drag-and-drop functionality.

Advanced users and developers may want the ability to access the site’s backend code for advanced customizations. Businesses should consult with their tech team or whoever will ultimately be working on the site before finalizing a decision.

Business Stage and Size

New business and rapidly scaling startups won’t necessarily have the same needs in an ecommerce website builder. Some of you might even be looking to sell a handful of products online as a small side project or part-time job. 

If you already have an existing website, you might not need a complete site builder. There are other tools out there that can add shopping cart functionality to your current site (more on this shortly).

Do you still need to register your domain name? Have you picked a web hosting plan yet?

There are website builders out there that provide you with all of these capabilities out of the box from a single platform. In other instances, you’ll need to get your domain and hosting plan separately. 

Dropshipping

Dropshipping makes it possible to run an ecommerce website without having to buy, store, or ship inventory to your customers. When someone purchases something from your website, the supplier handles fulfillment and ships the product directly to those customers. 

If you’re interested in running an ecommerce site that follows this business model, you need to make sure that your site builder supports dropshipping. 

While not every website builder will come with dropshipping functionality out of the box, the best ones will seamlessly integrate with dropshipping software and third-party tools.

Design and Templates

Start to think about the visual aesthetics of your ecommerce site. The best ecommerce website builders will make it possible for you to create a beautiful site without having to hire a designer. 

The easiest way to do this is by starting with a pre-built template and customizing it with your content. You should be able to choose a theme or template that fits with your brand image and industry. 

As you start browsing and evaluating different platforms, you’ll quickly realize that the templates and design tools aren’t equal across the board—some are undoubtedly better than others.  

Built-in Functionality

Not every ecommerce website builder comes standard with a long list of functions. In some cases, you’ll have to customize your site’s functionality by adding features from a marketplace or app store. Depending on the functionality you’re looking for, you might even need to integrate your site with a third-party tool or platform. 

With that said, other site builders will provide you with all of the functions you could possibly need out of the box (with some restrictions).

There’s really no right or wrong answer here; it’s all about personal preference. Would you rather have every feature at your disposal as soon as you create an account? Or do you prefer adding functionality as needed?

The answer to these questions will help you narrow down your choices. 

Limitations

Your ecommerce website builder might restrict how many products you can sell on the site. Some platforms will even charge you extra fees based on your traffic volume.

This usually isn’t a concern for new websites, but as your site scales, this can definitely become a problem. 

Look beyond the rock-bottom prices and entry-level plans offered by different platforms. See how much it will cost you if your product list doubles, triples, or quadruples. Will you incur extra fees? 

Some ecommerce site builders are better for selling just a dozen products or so as opposed to managing extensive product catalogs in the hundreds or thousands.

Conclusion

The first step to selling online is finding a viable ecommerce website builder. 

Which one is the best? It really depends on what you’re looking for. Here are my top recommendations:

  1. Wix — Best drag-and-drop ecommerce builder
  2. BigCommerce — Best for large ecommerce sites
  3. Squarespace — Best for beautiful ecommerce designs
  4. Square Online — Best for small businesses with physical retail space
  5. Bluehost — Best turnkey WooCommerce store builder
  6. WooCommerce — Best ecommerce WordPress plugin
  7. Shopify — Best out-of-the-box ecommerce functions
  8. Shift4Shop — Best developer-friendly ecommerce software

For many people, Wix is going to be the absolute easiest option on this list. All the builders I picked are intuitive, but if your not super confident in your technical skills, Wix is a safe bet.

Of course, if you already have a WordPress site, WooCommerce is going to be even easier. For new WordPress sites, go with Bluehost, as they include so much at a great price.

In order to find the best option for your website, refer to the buying guide, reviews, and recommendations outlined in this post. This will definitely help you narrow down your options.


from Blog – Neil Patel https://ift.tt/3jJ2IXw
via IFTTT

How to Buy a Domain Name

Bluehost main page for How to Buy a Domain Name

Disclosure: This content is reader-supported, which means if you click on some of our links that we may earn a commission.

Getting a domain name for your website is easy. If you have never done it before, do not worry–there are only four steps.

Throughout my career, I’ve bought a lot of domains names from different vendors. Some of those experiences were significantly better than others.

This guide will explain my four favorite ways to buy a domain. One of those methods will even get you a free domain name for the first year. I’ll also show you how to buy premium domain names and ones that aren’t for sale.

No matter what domain name you want, by the end of this post you will know how to get it. Keep reading, or jump ahead if you know what you need.

  1. How to Buy a Domain Name With Bluehost (best for launching a new website)
  2. How to Buy a Domain Name with Namecheap (best if you just need a domain name)
  3. How to Buy a Premium Domain (best if you are ready to spend some cash on a domain name)
  4. How to Buy a Domain Name That’s Not For Sale (best if the name you want is already taken)

How to Buy a Domain Name With Bluehost

Bluehost is a web hosting provider. In fact, they are one of the most reputable and reliable web hosts on the market today. More than two million sites across the globe are hosted by Bluehost.

But Bluehost also provides domain registration services. If you use Bluehost for web hosting, you’ll get a free domain name for one year.

Since you need a hosting plan anyways, you can use Bluehost as a one-stop-shop to bundle hosting and domain registration into a single package. This is a great option for beginners starting a new website from scratch. 

The first step is easy. Just make your way over to the Bluehost website.

From here, scan the menu and select “Hosting” at the top of the screen. 

Bluehost main page hosting tab for How to Buy a Domain Name

I’ll say it again; click HOSTING. Do not click on the “Domains” menu option. 

If you click on the latter, you won’t be bundling your hosting plan with domain registration, which defeats the purpose of using Bluehost (and you won’t get the domain for free).

Step #2 – Choose a Hosting Plan

The hosting menu will expand and present you with three different options:

  • Shared Hosting
  • Dedicated Hosting
  • VPS Hosting

Shared hosting will be the best option for 99% of people starting a new website. So go ahead and select that from the expanded drop-down menu. 

Bluehost shared hosting menu tab for How to Buy a Domain Name

You’ll still be able to bundle your hosting plan and domain registration (and get a free domain) if you select dedicated or VPS, but most of you won’t need to worry about that right now. Just stick with shared hosting.  

Bluehost offers four different shared web hosting plans to choose from—Basic, Plus, Choice Plus, and Pro:

Bluehost shared pricing for How to Buy a Domain Name

If you’re launching a small personal site, the Basic entry-level plan starting at $2.95 per month should be fine for you. For those of you launching a site for your business, I’d go with the Choice Plus plan, at a minimum. 

The extra features that come with this plan are worth the few extra bucks per month. 

To continue, just click the “Select” button under the plan that fits your needs.

Step #3 – Register Your Domain

Once you choose a web hosting plan, Bluehost will automatically prompt you to set up your domain. You’ll be presented with two different options here:

  • Create a new domain
  • Use a domain you own

You’ll want to use the “Create a new domain” option to search for available domains.

Bluehost create a new domain for How to Buy a Domain Name

Simply enter the domain you want to buy into the search bar and choose your domain extension (.com, .net, .blog, .biz, .info, .store, .co, .us, etc.). 

In the vast majority of cases, you’re going to want a .com extension. The only reason why I’d consider an alternative domain extension is if the .com domain is taken.

For example, if you try to create a domain using nike.com or apple.com, those will obviously be unavailable. But a different extension might be available for purchase.

So if you’re set on a name, you could always get an alternative extension in the meantime while you figure out how to buy the .com extension. I’ll explain how to buy domains that have already been registered in greater detail later in this guide (although you probably won’t be able to buy Nike or Apple).

Another reason to consider an alternative domain extension is the price. Lots of these extensions will be cheaper than a .com domain.

For a small blog, side project, or personal site, that’s fine if you want to save a few dollars. But businesses should always register a .com domain.

Step #4 – Finalize Your Contract

Once you’ve chosen an available domain name, simply create your Bluehost account and select your plan terms.

Bluehost add-ons for How to Buy a Domain Name

Definitely make sure you get “Domain Privacy + Protection” located in the “Package Extras” section. Otherwise, your name, email, phone number, and address will all become available on a public database. It’s well worth the extra $0.99 per month. 

The other options, like SiteLock Security and Codeguard Basic, are up to you. I’d get them, but there are alternative third-party services out there that you can use for site backups and security. I think it’s just easier to get them now.

That’s it! 

Once you enter your payment details, your hosting plan and new domain purchase will be finalized. Your domain name is free for the first year of your contract. 

How to Buy a Domain Name With Namecheap

The market is flooded with domain registrars. But Namecheap is definitely my favorite. It’s super easy for anyone to buy a domain using this registrar, even if it’s your first time.

This method is a bit more straightforward than using Bluehost, only because you’re not bundling any other services—Namecheap is strictly for buying a domain. 

The entire process can be completed in just three quick steps.

Step #1 – Visit Namecheap.com

Obviously, the first thing you need to do is make your way over the Namecheap website.

From here, you can search for your domain directly from the homepage.

Namecheap main page for How to Buy a Domain Name

Enter your desired domain name into the search bar, which can be found in the center of the screen. 

Make sure that “Register” is toggled above that search bar. The “Transfer” option is made for people who have an existing domain and want to switch registrars—that’s not for you. 

Click the search icon to continue. 

Step #2 – Choose Your Extension

As a domain registrar, Namecheap offers an extensive list of domain extensions. 

You’ll have the option to choose from things like .fun, .vip, .studio, .health, .xyz, .lol, .design, and hundreds of other extensions. But in most cases, choosing a .com extension will be your best bet. 

Namecheap domain extensions for search results for How to Buy a Domain Name

Just click the “Add to cart” button next to the extensions you want and then checkout.

Step #3 – Confirm Your Order

When you’re buying a domain directly from a domain registrar, you can skip all of the extras. You won’t need an SSL certificate, professional email, or anything else. You’ll be able to get that from your web hosting provider.

Definitely make sure you have WhoisGuard enabled. This protects your personal information from being available to the public. Some domain registrars make you pay extra for this, but Namecheap offers it free forever. 

Turn on “auto-renew” for your domain registration as well. Otherwise, you’ll have to renew it manually every year, which puts you at risk for the registration lapsing. 

Namecheap WhoIsGuard add-on for How to Buy a Domain Name

It’s that easy! 

Once you confirm the order, you’ll be asked to create a Namecheap account. After you enter your payment details and finalize the purchase, the domain is yours. 

Ways to Buy a Domain Name

Generally speaking, there are two main ways to buy a domain name. Both of which have been covered above—domain registrars and hosting providers. 

There are pros and cons to each method, and the process for each one is very different.

I’ll quickly explain the differences between these options so you can figure out which one is the best choice for your website. 

Buying a Domain From a Standalone Domain Registrar

In most cases, going directly to a domain registrar like Namecheap will be your best option. As the name implies, these platforms specialize in domain registration. 

Buying domains directly from a standalone registrar will be faster than alternative methods. That’s because you’re not bundling other services, so the process is more direct.

Domain registrars also make it easier to buy domains in bulk. So if you’re in the market for more than a single domain, definitely go with a registrar. 

If you want alternative extensions, domain registrars will offer significantly more options. While I typically don’t recommend anything other than a .com domain, some of you might want to browse through hundreds of alternative extensions. 

Transferring domain names with a registrar is also easier than using a service that doesn’t specialize in domain registration. So if you want to transfer your domain or think you might want to transfer it in the future, use a domain registrar.

It’s usually cheaper to buy domains directly from a registrar. For starters, the domain itself will likely be less expensive. But the best registrars, like Namecheap, include WhoisGuard protection for free with the purchase of a domain. You probably won’t get that from a hosting company. 

The downside of getting your domain from a registrar is that there’s an extra step in the process. You’ll still have to get web hosting elsewhere. 

Buying a Domain From a Web Hosting Company

For the most part, domain registration and web hosting should be kept separately. Bluehost is the exception to this rule. So if you want to bundle your domain name with a hosting plan, Bluehost is really the only option to consider.

There are a couple of main reasons why you’d go this route.

For beginners who are new to the world of web hosting and domain registration, getting everything under one roof is just easier. It’s less steps, and you can manage your hosting plan and domain name from a single account. 

Furthermore, Bluehost gives you a free domain name for one year. You’ll never get a deal like that from a domain registrar. 

But getting a domain from a hosting provider isn’t ideal if you want to buy domains in bulk. It’s fine for a single domain, but beyond that, it gets messy. You also won’t have as many options for alternative extensions (if you want something unique). 

Most web hosting providers will also charge you extra for domain privacy + protection, whereas you can get this for free from a domain registrar. 

How to Buy a Premium Domain

Premium domains are a great way to stand out online. They are great for branding and marketing purposes as well.

What is a premium domain?

A premium domain is typically short, memorable, and easy to spell. High-quality domains have a high search volume and are closely associated with an industry, service, or topic. They also have TLDs (top-level domains) like .com, .org, or .net. 

Premium domains are in high demand. So they’ll typically cost a bit more to register. The process of buying a premium domain can be different as well since it’s not always clear if the domain is actually for sale. Here’s what I mean.

Let’s say you try to register a premium domain from a domain registrar or hosting company. Just because it says “unavailable,” that doesn’t necessarily mean that it can’t be acquired. These are the steps for buying a premium domain:

Step #1 – Determine if the Domain Seems Attainable

If a domain is unavailable from a registrar, try going directly to that website and see what you find. If there’s an active website or business using that domain, it might be tougher to acquire. 

But if you don’t see an active site, there’s a good chance that domain will be for sale.

Here’s an example for management.com:

Domain for sale for How to Buy a Domain Name

Clearly, not much is happening on this site. So if you wanted this premium domain, there is a pretty good indication here that it’s for sale. 

In some cases, you’ll even see text like “buy this domain” or information that says “this domain might be for sale.” All of these are good signs that the domain is attainable.

Step #2 – Find Out Who Owns the Domain

There are two ways to complete this step:

  • Figure it out on your own
  • Hire a domain broker to do it for you

Doing it on your own can be tricky. You could run a quick WHOIS lookup, but most people won’t have their personal information listed. Using Google to your advantage can be helpful. Some domains might be linked to another website or social media profile. You could potentially find the owner that way.

Personally, I’d recommend using a broker. Sedo is one of my favorite domain marketplaces and brokerage sites.

Sedo main page for How to Buy a Domain Name

Brokers can almost always find out who owns the domain because they have such a massive network. They’ll determine if the domain is actually for sale and how much the seller is asking for. Your broker can even handle the negotiations on your behalf.

The downside of using a broker is that you’ll have to pay a brokerage fee. But in most cases, you’ll only have to pay if the sale actually goes through.

Other great places to find a premium domain online include:

If a domain is for sale, you’ll be able to get the ball rolling with Sedo or one of the other options listed above.

Step #3 – Negotiate and Buy

Often times, the listing price of a premium domain can be negotiable. If you think it’s a fair price and fits well within your budget, you can speed up the buying process by offering the asking price in full.

If a domain is in high-demand, this also increases your chances of securing it before someone else makes a better offer.

But in some cases, domains can be outrageously priced. You need to ask yourself if it’s actually worth the cost. Sometimes you might be better off just looking for another domain. Unless a certain domain is crucial to the success of your business, it can be tough to justify a five or six-figure listing price. 

Don’t be afraid to walk away during the negotiation process. If it’s not meant to be, you can move on or try again at a later time. This is also another reason why it’s helpful to have a broker.

Step #4 – Transfer the Domain

Once the domain has been purchased, the final step is transferring it to your domain registrar. Again, I recommend Namecheap.com for this because it’s so easy. 

Make sure you turn on the auto-renewal after the transfer. Otherwise, you’ll have to worry about manually renewing your domain each year. If you forget and the name lapses, your premium domain could be up for grabs on the open market.

The process is officially complete when you see the domain sitting inside of your domain registrar account. Now you can finally rest easy knowing that you’ve secured your premium domain.

How to Buy a Domain Name That’s Not For Sale

Not every premium domain will be available on a brokerage site or domain marketplace. But if you really want to pursue a specific domain, you still might have a chance.

Similar to the steps we took in the last section, you’ll need to figure out who owns the domain. If a domain isn’t for sale, this step should be a bit easier, and you can probably do it on your own. 

Most domains that aren’t for sale will be linked to an active website. That site should have some sort of contact information on it. You can reach out directly to get in contact with the business owner or decision-maker associated with the domain. 

Start with a general inquiry saying that you’re interested in buying the domain; don’t throw an offer out there just yet (or you could end up overpaying). 

See what type of response you get and if the site owner is willing to sell. Unlike a premium domain that’s listed on a domain marketplace, you might have to dig a bit deeper into your pockets to buy a domain that’s not currently for sale. 

If it’s absolutely imperative that you secure this particular domain, consider making the owner an offer that they can’t refuse. 

Just be aware that this won’t always work. It’s like trying to buy a house that’s not for sale. You can knock on the front door and make a cash offer, but the homeowner might decide to stay put.

If they’re willing to sell, use a broker to make sure the purchase goes smoothly. Then immediately transfer that domain to your registrar after you obtain ownership.

Summary

Buying a domain name doesn’t need to be that complicated.

Even beginners and first-time buyers can complete this process in just a few minutes by following the step-by-step instructions explained in this guide.

Buying a premium domain might take a bit longer. But again, you can still make it happen by following the process I’ve outlined above. Good luck and happy buying!


from Blog – Neil Patel https://ift.tt/36vzVkN
via IFTTT

How to Create an SEO-Boosting XML Sitemap in 20 Minutes (or Less)

Hierarchy graphic for How to Create an SEO-Boosting XML Sitemap

When it comes to SEO and marketing, I like quick and easy wins.

Even though I’m committed to the long journey of blogging (10+ years and counting), I’d much rather push a few buttons and pull a few levers to get more traffic.

Low effort. Big wins. That’s where I like to be.

And, thankfully, there are some SEO techniques that deliver high value for low effort.

I want to share with you one of those techniques — creating an XML sitemap.

Now before you run away after reading the term “XML sitemap,” let me give you some good news.

Even though an XML sitemap is on the “technical” side of SEO, it’s not hard to make one. And, really, it’s not that “technical” either.

In fact, in just a few minutes you could create a really good XML sitemap. You don’t have to know how to code. You just have to know how to click.

It’s free. It’s easy. It’s relatively simple, and it can improve your SEO.

Ready to give it a try?

What, Exactly, is an XML Sitemap?

What is an XML sitemap?

In simple terms, it’s a list of a website’s URLs.

That’s why it’s called a sitemap. It maps out how the website is structured and what pages the website includes.

(“XML” stands for “Extensible Markup Language,” a way of displaying information on websites.)

That’s what an XML sitemap is, but why should you even have one? What’s the purpose?

What’s the Purpose of an XML Sitemap?

Search engines use crawlers to organize and index information on the web.

Search engine crawler graphic for How to Create an SEO-Boosting XML Sitemap

These crawlers can read all kinds of information. But an XML sitemap makes it easy for the crawler to see what’s on your website and index it.

Once it does this, your website has a stronger likelihood of improving its rank quickly.

Essentially, an XML sitemap serves as a table of contents for your website, allowing the crawler to get the essentials and index your site accordingly.

A well-structured sitemap can do even more, however.

Sitemaps tell search engines when a page was updated, the frequency of updates to the page, the relative importance of pages within a website, and how to find and index content that may be found deep within the site’s structure.

Here’s what the information looks like in a sitemap:

  • Where the page is located on the website (its URL): <loc>https://ift.tt/3mgJxYm>
  • When the page was last changed: <lastmod>2013-10-10</lastmod>
  • How often the page is changed: <changefreq>monthly</changefreq>
  • What priority the page has in relationship to other pages on the site: <priority>1</priority>

These features are important, especially considering the amount of unauthorized syndication that takes place with content today.

If you aren’t using a sitemap, your website could be seen as containing duplicate content, which isn’t good for SEO.

More importantly, however, a sitemap is a fast way to get indexed by Google.

With a sitemap, you can tell Google, “Look, this is my site, and here are the pages I want you to index.”

Within minutes (usually), Google will crawl your site and index your content.

What Are the Benefits of an XML Sitemap?

If you’re wondering, “Hmm. Do I really need a sitemap? Should I go to all that trouble?” I want to persuade you to, yes, do it. It only takes a few minutes, and the benefits are enormous.

Consider these benefits of an XML sitemap:

  • It tells Google to crawl and index your website.
  • It tells Google what to crawl on your website.
  • The XML sitemap tells Google what kind of information is on your website.
  • The XML sitemap tells Google when your content was updated (which could result in more favorable or “fresh” rankings).
  • It tells Google how often your content is updated and how important it is.
  • The XML sitemap helps your website instantly gain indexation for dynamically-generated pages.
  • It helps you overcome the limitations of a website with weak internal linking.
  • It helps your site overcome the challenge of not yet having a strong external link profile.
  • It helps huge sites gain better and more organized indexation.
  • The XML sitemap helps Google crawl your website more effectively.
  • It shows Google all the pages on your website, even if they are deep within the architecture and might not otherwise be crawled as quickly.

If you’re ready to get started on creating your own XML sitemap, we’ll follow a three-step process:

  1. Create your XML sitemap.
  2. Add your XML sitemap to your website.
  3. Submit your XML sitemap to Google.

(I’ll also show you how to submit your Sitemap to Bing and Yandex as well)

The remainder of this article will address each of those points, along with one final step, using Ubersuggest to find potential sitemap errors.

Create an XML Sitemap Using Screaming Frog (for any Website)

You can use Screaming Frog to create an XML sitemap for any website. It doesn’t matter what CMS you’re using, what size the website is, or your website’s age.

In fact, you don’t even need to own the website or have login access to it to create the sitemap.

Is there a cost associated with this? Screaming Frog, the tool we’ll use, provides free crawling for up to 500 pages. To crawl websites larger than 500 pages, you will need to purchase a Screaming Frog license.

About Screaming Frog

If you do not have Screaming Frog yet, you need to install it first. You can do so here.

Screamingfrog main page for How to Create an SEO-Boosting XML Sitemap

Screaming Frog is a powerful desktop software program that helps with a whole range of SEO activities.

The basic version is free. The full version (with license purchase) costs £149.00 per year (around $180 USD or €170 euro).

Screamingfrog pricing page for How to Create an SEO-Boosting XML Sitemap

In this section, I’ll walk you through how to create an XML sitemap for any website using the free version of Screaming Frog.

First, open Screaming Frog.

Then, type your URL into the field at the top.

Screamingfrog URL entry for How to Create an SEO-Boosting XML Sitemap

Click “Start.”

Screamingfrog start button for How to Create an SEO-Boosting XML Sitemap

Depending on your website’s size, it will take from a few minutes to a few hours to crawl the site.

Screamingfrog site crawling results for How to Create an SEO-Boosting XML Sitemap

For a site like NeilPatel.com (6,600+ pages), it takes a while to crawl, but not too long. I’ve worked on some large e-commerce websites with millions of URLs. These take hours to crawl.

When the site has finished crawling, it will display “100” in the status bar.

Screamingfrog crawl 100% complete for How to Create an SEO-Boosting XML Sitemap

Now, click “Sitemaps” in the menu bar.

Screamingfrog create sitemaps for How to Create an SEO-Boosting XML Sitemap

Click “Create XML Sitemap.”

Screamingfrog sitemaps menu for How to Create an SEO-Boosting XML Sitemap

Next, you’ll need to choose which sections of your website you want to include in the XML sitemap.

Screamingfrog sitemap export config for How to Create an SEO-Boosting XML Sitemap

At first glance, this may seem confusing, especially if you’re not sure what “Noindex” or “canonicalised” means.

Here is a brief explanation of each one:

  • Include Noindex Pages: Noindex pages contain HTML code in the header telling the search engines not to include the page in the search index. If your developer has set certain pages as “Noindex,” it is probably with good cause. When in doubt, do not check this box.
  • Include Canonicalised: There may be more than one URL pointing to the same page of content. If you “include canonicalized,” you are telling the crawl tool to include variations of the URLs that point to the same page. If in doubt, leave this unchecked.
  • Include Paginated URLs: A paginated URL is one that includes rel= attributes (rel=“prev” and “next”) to navigate through a series of content on a website. Unless you’re careful with it, pagination can be a bit dangerous for SEO. I recommend that you do not check this box.
  • Include PDFs: You can choose whether or not you want PDFs included in your XML sitemap. Google indexes all kinds of content, PDFs included. I recommend that you do include PDFs in your XML sitemap, as long as the PDFs on your website are important and relevant to users who might be searching for your content.

Remember this basic idea. A sitemap is for SEO. If you want someone to find the page on your website, you want to include it in the sitemap.

For my purposes, I’m going to include PDFs.

Screamingfrog include PDFs in sitemap for How to Create an SEO-Boosting XML Sitemap

The tabs “Last Modified,” “Priority,” and “Change Frequency” deal with the date and time that website pages were modified and the <priority> settings.

Unless you have a knowledge of these settings, please leave them as they are by default.

I think it’s a good idea to include images in a sitemap, so I’m going to add those to my sitemap.

Click the “Images” tab.

Screamingfrog sitemap image config for How to Create an SEO-Boosting XML Sitemap

Then, click “Include Images.” The third box (“Include only relevant Images with up to 10 inlinks”) will automatically be checked.

Screamingfrog include images in sitemap for How to Create an SEO-Boosting XML Sitemap

Then, click “Next.”

Screamingfrog next button for How to Create an SEO-Boosting XML Sitemap

You’ll be prompted to save your XML sitemap on your computer. Find a good place to save it, and click “Save.”

Screamingfrog save sitemap for How to Create an SEO-Boosting XML Sitemap

Congratulations! You’ve created an XML sitemap!

You’ll now need to upload this file to your website via FTP. You may already know how to do this.

If you don’t know how to upload the XML sitemap to your website, check with a developer to determine what process you should follow for your specific server and/or CMS.

But creating a sitemap is only the first step. A sitemap means nothing unless you submit it to the search engines.

Skip down to the section “Submit your XML sitemap to Google” to learn how to do it.

Create an XML Sitemap Using Yoast (WordPress Only)

Yoast is one of the most popular SEO plugins for WordPress. Yoast makes it easy to create and submit an XML sitemap.

I’ll explain how to do it step-by-step, but first, here’s what you need:

  • You must be using a WordPress.org site.
  • You must have the Yoast plugin installed. (It’s free.)
  • Your website must be connected to Google Search Console.

Most websites already have those three things in place. If you’re ready, let’s jump in.

Login to Your WordPress Admin

Note: In the screenshots below, my WordPress admin might look a little bit different from yours. That shouldn’t keep you from being able to follow each step.

What we’re going to do first is make sure that the Yoast plugin is all ready to create a sitemap for you. To do so, we’ll need to turn on Yoast’s advanced settings.

Click on the Yoast Plugin

It has a “Y” icon, and says “SEO.” It should be located in the left sidebar.

Yoast SEO on WordPress sidebar for How to Create an SEO-Boosting XML Sitemap

Click the “Dashboard” option.

Yoast SEO go to dashboard for How to Create an SEO-Boosting XML Sitemap

From the Dashboard, click “Features.”

Yoast SEO features for How to Create an SEO-Boosting XML Sitemap

From the Features tab, look for “XML sitemaps” and make sure it is toggled to “On.”

Yoast SEO sitemaps tab for How to Create an SEO-Boosting XML Sitemap

Now, scroll to the bottom and click “Save Changes.”\

If you want to customize your sitemap, learn how here. For example, you might want to exclude pages that aren’t public.

In general, however, the sitemap Yoast generates tends to be pretty solid.

Now, it’s time to submit this to Google.

How to Submit Your XML Sitemap to Google

Now it’s time to do something valuable with your sitemap — submit it to Google.

To do this, you’ll need to have Google Search Console connected to your website. Check out this Google guide for instructions on doing so.

First, go to Google Search Console and select your website.

From the dashboard, click “Sitemaps.”

Google Search Console dashboard for How to Create an SEO-Boosting XML Sitemap

Click “Add a new Sitemap.”

Add sitemap in Google Search Console for How to Create an SEO-Boosting XML Sitemap

Enter the URL where you’ve saved your sitemap. It should end with “.xml” since it’s an XML file.

Enter sitemap URL into Google Search Console for How to Create an SEO-Boosting XML Sitemap

Click “Submit.”

Then use the Sitemaps report to make sure there are no errors. (I’ll also cover another method below.)

Once that’s completed, Google takes care of the rest. Your sitemap allows Google to quickly and seamlessly index your site, helping to boost your rankings.

How to Submit Your XML Sitemap to Bing & Yandex

Google is the largest search engine — but it isn’t the only one. To get the most mileage out of your XML sitemap, I suggest submitting it to Bing and Yandex. Here’s how:

Submit Sitemap to Bing

Bing is Microsoft’s answer to Google. It has a much smaller market share (just over 6%). However, more than 900 million unique users visit Bing a month. Submitting a sitemap to Bing is a breeze, so it’s worth the few minutes to reach their audience.

To submit your sitemap to Bing, login to your Dashboard in Webmaster tools. Find the Sitemaps widget and click “Submit a Sitemap.”

Enter the URL location of your file, and click “Submit.” That’s it!

Submit a Sitemap to Yandex

Yandex is Russia’s version of Google. In Russia, Yandex dominates more than 55% of the search market. It also provides email, streaming music, and online payment services. Like Bing, submitting a sitemap only takes a few minutes, so it’s worth the effort to reach a wider audience.

Here’s how to submit your sitemap to Yandex:

Head to to Sitemaps files page, and choose your site from the list.

Add the URL of your sitemap.

Click add.

It will take about two weeks for your sitemap to load. You’ll want to check back and make sure it is uploaded properly; if it says “OK,” then you are good to go. If you see “Redirect,” try uploading the file again.

If you see “error” or “not indexed”, you’ll need to troubleshoot. Use this guide from Yandex to figure out what is going on.

Use Ubersuggest to Check Your XML Sitemap Errors

If you follow the steps above, you shouldn’t have any sitemap errors. But just because you shouldn’t, doesn’t mean you won’t.

Here’s how you can use Ubersuggest to check for sitemap errors:

Step #1: Enter your domain name and click “Search.”

Ubersuggest banner for How to Create an SEO-Boosting XML Sitemap

Step #2: Click site audit in the left sidebar.

Ubersuggest sidebar menu for How to Create an SEO-Boosting XML Sitemap

Step #3: Review the results.

Ubersuggest results for How to Create an SEO-Boosting XML Sitemap

To find issues with your sitemap, review the data associated with the health check, critical errors, warnings, and recommendations.

For example, when you click on Critical Errors, here’s what you see for my website:

Ubersuggest site audit results for How to Create an SEO-Boosting XML Sitemap

There are no issues with my sitemap, but if there were, here’s where you’d find more information. In addition to the issues itself, there’s a learn more button that takes you to:

Ubersuggest additional sitemap information for How to Create an SEO-Boosting XML Sitemap

You can then follow the prompts for more guidance on how to fix the error.

Use Ubersuggest to check the health of your sitemap regularly. Doing so once or twice a month will only take a few minutes out of your schedule, but it can go a long way in improving your website’s SEO.

Conclusion

A lot of small business owners and web entrepreneurs get afraid when they hear the term “XML sitemap.”

It sounds jargony and code-like. If you’re not an SEO nerd or a computer geek, how do you figure out how to create and submit an XML sitemap?

As it turns out, it’s not that hard.

Creating a sitemap using a program like Screaming Frog or Yoast takes ten minutes or less.

If you know nothing about sitemaps, and need to go through the whole process for the first time, no problem. Walking through the entire process from start to finish may take, at most, twenty minutes.

The SEO benefits, however, will be enormous.

If you’ve never created an XML sitemap for your website, my advice is simple: Get one made today.

Then, perform a technical SEO audit to see what other issues might be lurking on your site.

You can do it. I’ve got your back.

What’s your experience creating an XML sitemap? How has it helped your site’s SEO?


from Blog – Neil Patel https://ift.tt/3uuyKxF
via IFTTT