Friday 30 April 2021

How to Make Money by Requiring a Minimum Order Quantity (MOQ)

How to Make Money by Requiring a Minimum Order Quantity (MOQ)

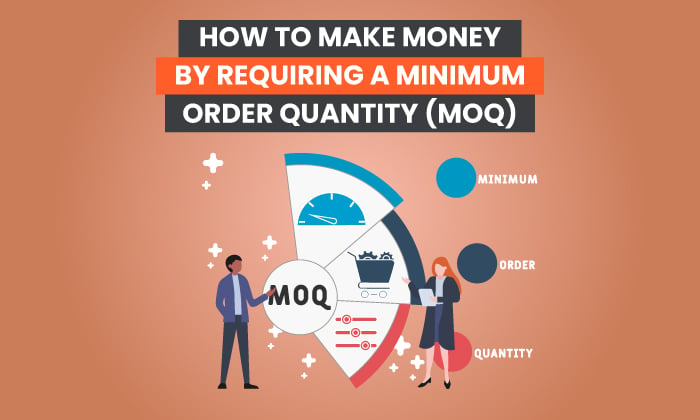
If you run or are starting an e-commerce business, you might have heard the term “minimum order quantity,” or MOQ, floating around. If you have heard of it, chances are you feel conflicted.

There’s advice for and against this method. This makes it difficult to decide whether it’s the right choice for you, especially if you don’t understand how it works and how it can make you money.

In this post, you’ll learn what an MOQ is, how to set one that won’t make your customers run for the hills, and how to use the strategy to increase your profits and reduce your expenses.

What Is Minimum Order Quantity?

Before we jump into the good stuff (like how to make money with an MOQ), let’s dive into the minimum order quantity definition.

An MOQ refers to the minimum amount someone can order from a business.

For example, imagine you’re a wholesaler on Alibaba. You create an MOQ of 100 units, which means your customers need to purchase 100 units or more to do business with you.

You can also make your MOQ a dollar amount. For example, your customers need to spend a minimum of $500.

Why would you want to use an MOQ? Simply put, it protects your business and profit margins. If someone wants to order only five items from you, it’s sometimes uneconomical to start the production process. If you do, you’ll end up losing money.

With an MOQ in place, it ensures you’re covering production costs and making a profit.

Do MOQs only work for manufacturers or wholesalers? No. You can apply MOQ strategies in direct to customer circumstances as well. For example, you can set a minimum spend to qualify for free shipping or product.

MOQ - example from Alibaba

How to Calculate Your MOQ

Calculating your MOQ is tricky.

It’s a key part of maintaining inventory control, but it differs wildly from business to business. There’s no fixed formula to calculate your MOQ, so you’ll need to customize it to your business.

How do you do this?

Follow the steps below to create your unique MOQ formula.

Step 1: Calculate Demand

Forecasting demand is at the core of your MOQ formula.

You need to consider your different products, seasonality, competition, and any other factors that will affect how many units you’ll sell.

The data can help you plan out your next purchasing order from suppliers and your production turnaround to make sure you can match demand.

Other things to take into account include:

  • total time to ship your inventory
  • freight transit times
  • production times
  • other delays that could affect your ability to meet the demand

Example: You sell phone cases and determine you’ll move 10,000 units each quarter. However, your sales are seasonal. During Q4, you sell 15,000 due to the Christmas demand, and your sales drop to 5,000 units in Q2. On average, your phone cases take one week to produce and ship.

Step 2: Calculate Your Break-Even Point

Next, you want to work out your break-even point.

This is the minimum number of products you would need to sell to recover your costs and start making a profit.

It’s the sweet spot where your revenue from sales exceeds your costs.

Example: If you sold five phone cases, how much revenue would that bring in compared to what you spent on production, salaries, and other expenses? You determine you need to sell 100 cases to break even.

Step 3: Calculate Your Holding Costs

Your holding or inventory costs is the price it costs to store your products before shipping to a customer.

It will cost you more money to hold your inventory over extended periods. The quicker you can move items, the lower your holding expenses and the higher your profit margin.

However, not all goods carry the same holding cost.

Some might require refrigeration, which will increase your electricity bill, while other items like phone cases can sit on a shelf for months at room temperature.

Example: You determine it costs you $2,000 per month to store 500 phone cases.

Step 4: Calculate Your MOQ

With all the data collecting out of the way, it’s time for your final calculation.

Let’s say your phone case customers currently purchase on average 200 units.

You need to sell 100 units to start making a profit.

You can make your minimum order quantity 200 units. It will cover your break-even point of 100, and you could drop your MOQ to 150 if you need to and still make a profit.

What Are the Benefits of Requiring an MOQ?

As a manufacturer and seller, there are many benefits to switching to an MOQ business model to boost your bottom line.

The main benefits of MOQ include:

  • Cash flow: Worried about investing too much money in stock and it not selling? A minimum order quantity means you have less cash tied up in raw materials or product that isn’t moving. You can balance your costs and profit with item amounts your customers will accept, thus reducing waste and unnecessary expenses.
  • Low inventory: You don’t want your product inventory to sit on a shelf collecting dust. By implementing an MOQ, you can lower the number of finished items in your warehouse. The less time you store your products, the less money you spend on holding costs and the bigger your profit margin.
  • Increase in profits: The crux of MOQ is demand. You’re not guessing how much product or raw material your customers want. You have a clear idea of how much stock you can realistically move. Using your MOQ to find a balance between supply and demand, you can produce in larger quantities, bring your overall costs down, and increase your profits.
  • Move lingering stock: Another benefit of the MOQ module is its ability to move stock. If you’re sitting with 100 phone cases and selling them one by one, it could take months to empty your inventory. By setting an MOQ of 50 or 100, it would only take one or two customers to clear out your lingering stock.
  • Lower shipping costs: If you’re constantly shipping in raw materials or product to create your items, your freight costs will be high. However, when you set your MOQ at an optimum level, you’ll ship more product in bulk and lower your shipping expenses from suppliers.

5 Tips for Making Money by Requiring an MOQ

Okay, let’s get to the good stuff! We’ve gone over the MOQ definition, the benefits, and how to create an MOQ formula for your business.

Now we’re going to discuss how you can start making more money by requiring an MOQ from your customers.

I know it can seem daunting to set one. What if you scare your customers away and no one opts in? If that thought is swimming around in your head, here are my top tips for implementing an MOQ and increasing (not decreasing) your profits.

1. Eliminate Bargain Hunters

MOQ isn’t only about improving your profit margin. It helps you find a small number of customers who are happy to spend more money with you.

No matter what type of business you’re running, it’s often easier to have a small number of high-paying clients than dozens of low-paying clients. Small or once-off customers mean it will take you much longer to reach your desired income goals while taking up more time and energy along the way.

MOQs help you weed out all the bargain hunters who want the lowest possible price and make room in your garden for repeat clients who are happy to spend larger amounts with your business.

Say hello, recurring revenue, and goodbye to an unstable income flow.

Why should you care about generating recurring revenue?

2. Increase Spend on Your Orders

Want to incentivize your MOQs? Encourage your customers to spend a minimum amount by offering a discount.

You can:

  • Reduce the cost per unit for a higher spend: For example, sell three bottles of shampoo for $60 instead of $30 each if purchased separately.
  • Offer a minimum free shipping minimum threshold: For example, most online retailers will offer free shipping if you spend a minimum amount. It encourages customers to spend more to meet the requirement.
Tips for Making Money by Requiring an MOQ - Increase Spend on Your Orders

3. Make Pricing Attractive to Boost Inventory Turnover

Your MOQ will only work if the price is right.

You need your price per order to be enough to cover your expenses and make a profit, but it still needs to attract customers. If your minimum order amount is too high, you won’t get any orders, and you’ll sit with inventory for longer, driving up your costs.

After you’ve figured out your MOQ formula, do your market research. See what your competitors are offering and confirm a high enough demand before you start spending money on things you can’t recover, like warehousing.

4. Move Old Stock With Flash Sales

What happens if your stock isn’t moving? Maybe there is a lull in the season, or you’ve tried a new product variation, and not enough people are biting.

One of the best ways to recoup your money and free up your inventory is with flash sales.

An excellent example of how well flash sales can work is Black Friday. Activewear giant GymShark frequently uses this strategy during the biggest sales day of the year and has broken in-house sales records by generating $400,000 in 60-minutes.

A well-executed sale can do more than move excess inventory or help you break even on poor-selling items. When done right, it can also increase customer loyalty and customer acquisition, which will boost your profits in the long run.

flash sale moq example

5. Have a Good Inventory Management System in Place

An essential part of any business is automation. It helps you do more with the same number of hours in the day and focus on the actions that move the needle forward.

When using an MOQ strategy, your success relies on having a good inventory management system in place. With a few clicks of your mouse, you can set reorder points for specific items, streamlining your inventory management process.

Other advantages include:

  • Keeping your customers happy by maintaining healthy stock levels and quick turnaround on orders.
  • Track your inventory turnover ratio to make better use of your resources.
  • Save money by avoiding tying too much money in inventory and not having enough inventory to complete sales orders.

How to Calculate Your MOQ

  1. Calculate Demand

    Predict the number of sales you’ll make. To calculate this figure consider the products you’re selling, seasonality, competition, shipping time, and any other factors that may affect your sales figures.

  2. Calculate Your Break-Even Point

    Determine the number of products you have to sell to make a profit.

  3. Calculate Your Holding Costs

    Figure out how much it costs to store your products before sending them to customers.

  4. Calculate Your MOQ

    Figure out how many units you have to sell to turn a profit, how many you predict you’ll sell, and determine your MOQ accordingly.

Conclusion

What’s one of the most off-putting things about starting a business? Capital.

Not all of us have access to a lump sum of money to invest in an idea, and the thought of going into debt for a business that isn’t seeing results yet is terrifying.

With a minimum order quality strategy in place, you can reduce your upfront capital amount, cost per unit, and expenses like storage costs. The MOQ that works for your business is unique, and finding it requires research, planning, and understanding demand in the market.

However, once you have it, an MOQ can help you scale, avoid unnecessary expenses, and run a profitable business.

Capital isn’t the only thing you need to start a successful business; you only need a great digital marketing strategy in place. If you need help with that aspect, reach out to our agency!

Do you think minimum order quantity is a good business strategy? Why or why not?


from Blog – Neil Patel https://ift.tt/2QNFK98
via IFTTT

How to Use First-Party Data for Ad Personalization

how to use first party data

Have you ever felt like someone was watching you online? Those shoes you just searched for on Amazon suddenly show up in ads on Facebook. Maybe you start seeing ads on YouTube for a resort you were researching for an upcoming vacation. 

The truth is, you are being watched. In fact, marketers have used cookies to track the actions of internet users for years—but that may soon change. Google announced they are ending the use of third-party cookies. As a result, most businesses will have to rely on first-party data for things like ad targeting. 

What does that mean for your marketing strategy? It might not be as bad as you think. 

Here’s what you need to know about first-party data and how to use it to create targeted paid ads. (Spoiler alert: It might actually be better for your PPC strategy in the long run!) 

What Is First-Party Data? 

Before we dig into what this change means for your paid ads, let’s talk about the different types of data companies use in marketing. 

First-party data is information companies collect from their own sources about their customers. For example, the data from your website tracking tool, your email subscribers, or surveying your audience.

Second-party data is when two or more organizations come together to mutually share their data. Third-party data is collected by one source, often aggregated, and then sold to a third party who has no connection with the original source. 

To summarize:

  • first-party data: data you collect about your customers or site visitors
  • second-party data: data you and someone else pool together
  • third-party data: data collected by one party and sold or shared with an unrelated third-party 

What Is the Difference Between First-Party Data and Third-Party Data?

Third-party data, the type Google is phasing out, refers to data collected from (as you might have guessed) a third-party, meaning a site or entity without a direct relationship with the original source. 

Third-party data is collected, aggregated, and sold to other parties. The problem is the brands buying the data have little idea where it came from. 

There are other issues, too. For example, you can buy third-party data, but so can your competitors. That makes it hard to be competitive. 

This chart helps illustrate the difference between the different types of data. 

What Is the Difference Between First-Party Data and Third-Party Data

Why Is Third-Party Data Being Phased Out?

The main reason third-party data is being phased out is due to major security and privacy issues. 

David Temkin, Director of Product Management, Ads Privacy, and Trust at Google, shared, 

People shouldn’t have to accept being tracked across the web in order to get the benefits of relevant advertising. And advertisers don’t need to track individual consumers across the web to get the performance benefits of digital advertising. 

Advances in aggregation, anonymization, on-device processing and other privacy-preserving technologies offer a clear path to replacing individual identifiers.

Google isn’t the only one phasing out cookies. Firefox stopped using cookies in 2013, and Microsoft made “Do Not Track” their default setting the same year

In addition to privacy issues, cookies aren’t as accurate as some might think. For example, they can’t always track users across devices. 

If you shop on your phone for a pair of shoes but buy them on your laptop, you might still see ads for those shoes on your mobile device—which is terrible for ad spend, as brands waste money targeting users that have already converted. 

How Will Using First-Party Data Impact Ad Personalization?  

As Google phases out third-party cookies, many brands will begin using first-party data to better personalize ads. What does this mean for your paid marketing strategy? 

Don’t worry; you won’t have to rebuild your marketing strategy from scratch. However, there are a few changes you’ll want to pay attention to:

  • Brands will need to focus on collecting first-party data: If you haven’t been gathering data about your audience, now is the time. Consider hosting contests, using website tracking tools, or sending out surveys to collect more information about your audience. 
  • Competitive analysis will get harder: One of the downfalls of third-party data is that you and your competitors are using the exact same targeting data. With the move to away from third-party cookies, it might become harder to understand why your competitors are taking certain actions. 
  • Ads may get more personalized: First-party data is data from your actual site visitors and customers, making it easier to create a personalized experience. 

Day-to-day, the switch away from third-party data is unlikely to impact the marketing world in a massive way. Most brands will begin to rely on first-party data more; however, Google is also creating what they call a “privacy sandbox” to allow brands to target users without invading their privacy. 

Brands that want to succeed shouldn’t rely entirely on Google’s new data plan because there are a ton of advantages to using this type of data?

Advantages of Only Using First-Party Data for Ad Personalization 

Why should you consider moving to first-party data rather than relying solely on Google’s privacy sandbox? 

For starters, most brands are increasing their reliance on first-party data, which likely means they are seeing positive results. According to Google, 87 percent of APAC brands consider it critical to their marketing efforts.  

Google rate of first party data usage stat

Let’s look at a few other benefits to consider.

First-Party Data Is More Accurate 

First-party data is information you collect about your customers. This makes it more accurate because you know who it is about and where it came from. 

Third-party data is sold and sometimes resold, which means brands have no access to the source data and, sometimes, very little idea about where the data is actually from. 

Boost Marketing Performance 

Some people are really concerned about the end of third-party data, but I’m not. Why? Because first-party data isn’t just more accurate; it’s also much more efficient at driving consumers to take action. 

According to a study by Boston Consulting Group, marketers that use first-party data see a lift in marketing efficiency, generating nearly double the revenue from a single ad or placement.

Your Competitors Don’t Have the Same Data 

Standing out online sometimes feels impossible. With millions of companies, billions of internet users, and more content being churned out every day, brands that want to stand out face a ton of noise. 

With third-party data, you and your competitors can buy the exact same data, which makes it pretty hard to be competitive. However, your competitors don’t have access to the data you collect, making it easier to test new initiatives or uncover opportunities about your own traffic and customers. 

You Can Double Down on Personalization 

According to Forrester, 89 percent of digital companies invest in marketing personalization. It’s easy to see why when 80 percent of customers report they are more likely to purchase from brands that offer a personalized experience. 

Using third-party data for personalization was never a perfect match. You might not know when a customer converts from another device or if the data you’re using is skewed. With first-party data, you can dive into personalization, secure in the knowledge that your data is accurate.  

It Is More Standardized 

Imagine asking five people to create a puzzle piece. You give them all the same parameters for height, length, and shape. Even with the same directions, each of those pieces isn’t quite going to fit together. 

The same thing happens with third-party data. Each platform might gather it just a little bit differently, which can make it almost impossible to pull all that data together. With first-party data, however, you gather the data. This means you can ensure it is standardized and works well with all your tools and systems. 

First-Party Data Is Cheaper 

Third-party data is purchased from another vendor, which means you are shelling out cash for data that is less efficient, less accurate, and harder to use. First-party data, on the other hand, is information from your own audience. 

Which means you don’t have to buy it. You will have to pay a bit to collect and store the data, but it’s likely much cheaper than purchasing the data from another source. 

How to Use First-Party Data for Ad Personalization 

We’ve covered what first-party data is, why Google is ditching third-party data, and a few of the advantages of using it. How do you actually put first-party data to use? Here’s what you need to know to use this data for ad personalization. 

Determine How to Leverage First-Party Data 

Before you start collecting data, take the time to figure out how you will use the data to further your marketing goals. How you plan to use the data will impact what type of data you want to collect and how you gather it. 

You might use it to: 

  • build brand awareness 
  • reduce churn 
  • send timely ads 
  • drive more qualified leads 

For example, if the data will be used to send more personalized email marketing campaigns, you could gather the data through an email survey. 

Make a Plan to Gather First-Party Data 

Unlike third-party data, you can’t just buy first-party data; you’ll have to gather it yourself. Luckily, there’s no shortage of ways to gather it.

For example, you can collect first-party data from:

  • website visitor tracking tools like Crazy Egg 
  • your mobile apps
  • offline surveys
  • social media channels
  • user registration for your website 
  • contests

Before making a plan to gather data, think about how you plan the data to personalize your marketing. For example, retargeting ads, personalized product recommendations, or account-based marketing

Ask Permission to Gather the Data 

One of the major issues with third-party data is some web users don’t even realize they’re being tracked. As first-party data becomes more popular (and as privacy laws limit the data we collect about our audiences), it’s important to be transparent about the data you gather

Ensure your audience clearly understands what data you collect, what you do with it, and how it’s stored. Being transparent about the data you collect and how you use it isn’t just the right thing to do, it’s required by law in some places, like the EU’s GDPR.  

Test, Tweak, and Retest 

With third-party data, you get what you get. There is no way to change the type of data you collect or adjust how you gather it.

With first-party data, you can test to figure out the best way to collect data by adjusting how you gather it or test and tweak how you use the data by A/B testing ads to see what your audience responds to. 

Conclusion

Third-party cookies are coming to an end. What does that mean for marketers? It means it’s time to start leveraging first-party data for personalization. The good news is, it is more accurate and cheaper, and it can even improve marketing efficiency. 

The first step to using first-party data is to find a way to collect it through polls, customer surveys, or website tracking tools. Then make a plan for how to use it. If you need help getting it set up, we can help

Are you planning to use first-party data for ad personalization? What are your marketing goals?


from Blog – Neil Patel https://ift.tt/3nC6u8x
via IFTTT

Thursday 29 April 2021

How to Make Fewer HTTP Requests

How to Make Fewer HTTP Requests

When you browse the internet, do you ever stop to wonder what’s happening in the background? If the answer’s no, don’t worry. You’re not alone. Most marketers, even great ones, don’t give the “tech stuff” much thought. How a website performs is just something for IT specialists to worry about, right?  

No, unfortunately.

If your website’s slow or clunky, it directly affects the user experience. In fact, 40 percent of people won’t hang around if your website takes more than 3 seconds to load. With this in mind, it’s crucial you know how to fix a sluggish website and streamline your page loading times before you lose leads.

Where do you start? Well, one way is to make fewer HTTP requests for your website.

Although an HTTP request sounds like a really technical term best reserved for engineers and IT pros, don’t panic. It’s something any good marketer can understand. Now, let’s take a deep dive into how these requests work and how you can use this knowledge to boost your website’s performance.

What Are HTTP Requests?

Before we get started, it’s crucial you’re clear on what HTTP requests actually are.

HTTP stands for “HyperText Transfer Protocol.” Think of HTTP as the language browsers and web servers use to talk to each other. We (thankfully) don’t need to cover all the intricacies of web code to understand how HTTP affects load time, but here’s a breakdown of the key steps marketers need to know.

When someone wants to visit your website, their browser sends a “request” to your server. This is known as an HTTP request. Your server acknowledges the response and kicks into gear, ready to display the webpage.

Here’s where it gets a little tricky, though. The browser can’t display the page right away. It needs copies of the various different files, such as plug-ins and images, to load the page properly.

How does the browser get these files? By making multiple HTTP requests. If the browser doesn’t make these requests, the page components won’t load.

Depending on how many components your page has, these requests can really add up, which is a problem. Here’s why.

Why You Need Fewer HTTP Requests

There are two simple reasons why every website should aim to reduce the HTTP requests associated with it.

Firstly, let’s start with page load time. The more HTTP requests your site receives, the longer it takes for the requested page to load. For example, a page with 20 HTTP requests will load faster than a page with 70 requests.

The issue? People don’t want to hang around waiting on a website loading.

  • 39 percent of visitors won’t return if your images or videos don’t load properly, as research by SAG IPL shows.
  • 45 percent of respondents won’t buy from a retailer if the website takes too long to load, according to research by Unbounce.

In short, with much competition out there, you’ll lose leads if your website takes too long to load or it doesn’t load properly at all.

Next, let’s think about what impact these lost leads have on your metrics.

According to Google, bounce rate increases by 32 percent when loading time slows from 1-3 seconds, and to make matters worse, poor loading time affects your SEO ranking. Delays in page loading time can cut page views by 11 percent, which tells Google your page isn’t offering value.

Think about it this way: If your website doesn’t impress visitors, they won’t shop with you. They won’t recommend you to their friends. In time, this leads to a lower search ranking, less visitors, and reduced conversion rates overall.

What can we take from all this? Well, too many HTTP requests directly affect your key metrics and your marketability online.

How to Identify Unnecessary HTTP Requests

OK, we’re clear on how HTTP requests work and why you need less of them. How do you identify these excess requests, though? By doing two things: identifying how many requests you’re dealing with, and grading your website performance.

Establish the Number of HTTP Requests Your Website Receives

You can’t eliminate HTTP requests until you know how many your website receives. Luckily, there are tools available to help you identify the number.

For example, HubSpot’s Website Grader give you a free website “health check” so you can instantly see how many requests you’re receiving:

Make Fewer HTTP Requests - Website Grader HubSpot

If you use Chrome, you can also use Chrome’s DevTools to identify the number of HTTP requests. Simply right-click the page you want to check, click “Inspect,” then click the “Network” option. The image you’ll see looks something like this:

Make Fewer HTTP Requests - Chrome’s DevTools

This page receives 112 requests.

Grade Your Website Performance

When was the last time you assessed your website’s performance and, most importantly, page loading time? If you can’t remember, now’s a great time to run an audit.

You can try Ubersuggest for this. It’s really simple to use. Simply open Ubersuggest, type in your URL, and click “Site Audit” from the sidebar when the search results finish loading.

Once you’ve clicked “Site Audit,” you’ll see an overview of your website’s speed. It’ll look something like this:

Make Fewer HTTP Requests -Site Audit with Ubersuggest

A low score indicates you’re suffering from poor loading times. For example, if your mobile website takes 6 seconds to load, but your desktop site loads in 2 seconds, there’s a problem with your mobile site, and so on.

Don’t worry if you’re unhappy with your page loading times or the number of HTTP requests you’re seeing. Now you know there’s a problem, you can begin streamlining those HTTP requests and ensure your page loads as quickly as possible. Let’s look at how to do just that.

8 Steps to Make Fewer HTTP Requests

Although every website is unique, we can usually blame excessive HTTP requests on a few common problems. With this in mind, here are eight simple steps you can take right now to reduce the number of requests passing through your website.

1. Remove Unnecessary Plug-Ins

Plug-ins are great. They add new functionality to your website and make your web pages more engaging. However, too many plug-ins clutter your page and hold up loading times. While there’s no “right” number of plug-ins, a good rule of thumb is to keep them minimal.

First, identify which plug-ins you use. Do they add value to your website? If the answer’s no, they can go. If it’s a plug-in you only use now and then, you can always reinstall it when it’s required then delete it again.

Not sure how to identify your plug-ins? Reach out to me and see how I can help you better understand your website’s performance.

2. Replace Heavy Plug-Ins With Streamlined Ones

OK, so you can’t remove every plug-in. However, if you want to make fewer HTTP requests, you can often replace resource-heavy plug-ins with more streamlined options.

For example, maybe you want to add social media buttons to your page. Great. Social media shares can increase engagement and boost your exposure. However, the plug-ins can be resource-intensive.

To streamline your social media plug-ins, use tools like Novashare. This tool won’t slow your page down, but it will help you reduce the HTTP requests generated by your social sharing plug-ins:

Steps to Make Fewer HTTP Requests - Replace Heavy Plug-Ins With Streamlined Ones

3. Remove Images You Do Not Need

Sure, images can improve your website’s visual appeal and boost the user experience. Unless the image helps your reader understand your content in some way, or it’s a highly useful piece of content in its own right like an infographic, it might be worth deleting it.

Remember, every image creates an HTTP request. While those fun GIFs might have visual appeal, they won’t impress your audience if they affect load time.

Audit every individual web page and don’t be afraid to get a little ruthless. If the image doesn’t add value to your content, delete it.

4. Reduce the File Size for Remaining Images

Once you’ve deleted the unnecessary images, you need to optimize the ones you plan on keeping. In this context, “optimizing” doesn’t mean using alt text or keywords, although you should optimize for SEO, too.

Instead, what I mean is compressing each image. Compression preserves the image quality while reducing the overall file size, which improves load time.

If you don’t have access to image editing tools like Adobe, try free tools like Squoosh instead. You can tinker with the image to find the perfect balance between file size (which should be less than 1 MB, ideally) and image quality:

Steps to Make Fewer HTTP Requests - Reduce the File Size for Remaining Images

5. Drop Unnecessary Videos

Just like not every image adds value to your content, some videos detract from the user experience and increase the page loading time.

To be honest, this tip’s really simple. Just like you should cull any images or plug-ins you don’t need, limit how many videos you’re playing on any webpage.

How do you know which videos to delete? Well, there’s no rule here. However, if it doesn’t educate your audience or add value in some way, cut it or replace it with a shorter, comparable video.

6. Enable Lazy Load

“Lazy loading” means an image or video won’t load until the user begins scrolling down your webpage. How does this reduce HTTP requests?

Since the media doesn’t load right away, it won’t trigger an HTTP request for the initial page load. It doesn’t affect the user experience either, since users won’t know the difference between a regular or lazy load. All they’ll know is that the images or videos are viewable once they scroll down.

To enable lazy load, try out plug-ins like the aptly-named LazyLoad. The script takes up less than 10 KB of space, so it’s not resource-intensive. Just install the plug-in and it gets to work immediately:

Steps to Make Fewer HTTP Requests -Enable Lazy Load

7. Use Content Caching

Caching is a great way to reduce HTTP requests.

Essentially, caching means a visitor’s browser stores copies of the scripts it used to display your webpage, rather than delete them all. When the visitor returns, there’s no need to make all those HTTP requests again, because the scripts they need are already stored in the browser unless they clear their cache.

Let me give you some tips for priming your website for content caching.

  • Don’t use cookies unless they’re essential.
  • Always use the same URL if you serve the content across different pages.
  • Build up a library of images and videos and reuse them.
  • Try out free tools like REDbot to assess your website’s cacheability.
Steps to Make Fewer HTTP Requests - Use Content Caching

8. Reduce Third-Party Requests

If a visitor’s browser needs to request or download data from a third party to display a website properly, like YouTube or Google Analytics, it’s called a third-party request. The issue? How long your page takes to load depends on how quickly the third-party server responds.

This is a huge problem because you’re not in control of your page loading time. To take back control, think about lazy loading third-party content like embedded YouTube videos. You could also try hosting scripts for necessary programs like Google Analytics locally rather than externally.

Finally, if a plug-in you use makes its own third-party requests, switch it for another plug-in where possible.

How to Make Fewer HTTP Requests

  1. Remove Unnecessary Plug-Ins

    Figure out which plug-ins are installed and remove those that you don’t use.

  2. Replace Heavy Plug-Ins With Streamlined Ones

    Audit the plug-ins you keep and replace them with more efficient ones if they’re available.

  3. Remove Unnecessary Images

    Delete images that don’t add value since each one creates an HTTP request.

  4. Reduce the File Size for Remaining Images

    Compress the images you keep to reduce load time.

  5. Drop Unnecessary Videos

    Only keep videos that add value to your page.

  6. Enable Lazy Load

    Use a plug-in that allows images and videos to load once a user scrolls.

  7. Use Content Caching

    To prepare your site for content caching avoid using cookies; use the same URL for content used on different pages; build an image library and re-use them; and audit your site’s ability to be cached.

  8. Reduce Third-Party Requests

    Try not to include content that pulls from a third party, like YouTube, since your page load time depends on theirs. You should also replace plug-ins that rely on third-party requests.

Conclusion

HTTP requests are essential to displaying a website and giving your audience an engaging experience. However, too many HTTP requests can disrupt your website performance and deter would-be customers from doing business with you.

The good news? With a few simple tweaks, you can ensure browsers make fewer HTTP requests to your website. You can boost page loading time, improve a webpage’s visual appeal, and, ultimately, increase conversions in the long run.

If you’re not sure where to get started with improving your website’s performance, check out my consulting services and we’ll see how I can help.

Have you tried reducing the number of HTTP requests on your website? Which strategies are working for you?


from Blog – Neil Patel https://ift.tt/3eAWit2
via IFTTT

Why Entity-Based SEO is a New Way of Thinking About Optimization

Why Entity-Based SEO is a New Way of Thinking About Optimization

Search engine optimization (SEO) used to be defined by the number of keywords and keyword synonyms across your website’s content. 

When Google launched its knowledge graph, SEO shifted away from simply relying on keywords, and search engine crawlers began prioritizing rich snippets and entities on search engine results pages (SERPs).

These days, Google has more systems to identify the true meaning of keyword searches and queries. By categorizing ideas into “entities,” Google revolutionized its search proficiency.

While keywords are still important, SEO experts now also use entity-based SEO to further their ranking efforts. Context and relevance are becoming increasingly important in search engine results, and entities can help improve these factors. 

In this article, we’ll explain what entities are, how to use them, and what the future of SEO might look like.

What Is Entity-Based SEO?

Entity-based SEO uses context, not just keywords, to help users find the information they seek.

While keywords are an essential part of your SEO strategy, they don’t fully reflect how humans search for information. For example, a person who searches for “Paris” may be looking for Paris Jackson, the city of Paris (in France or Texas), the movie Paris Is Burning, or innumerable other options.

Google offers suggestions for searchers regarding additional context, which serves the dual purpose of speeding up their searches by showing popular options and reminding them to add more context if none of those are what they need.

google search for paris showing entity based seo

Entity-based SEO is helpful for searchers but slightly has made things a bit more complicated for content creators. Three ways entity-based SEO has changed the landscape include:

  1. Better mobile capabilities: Entities allowed SEO to improve mobile results. Entities also improved mobile-first indexing, which is more prevalent than desktop searches. 
  2. Translation improvements: Entities can be found regardless of homonyms, synonyms, and foreign language use thanks to context clues. For instance, a search for “red” will include results for “rouge” or “rojo,” if the searcher’s settings allow for this. 
  3. Rich snippets: Rich snippets, which include things like photos and customer ratings as part of their results, generally outperform even number one search results.

Keywords Vs. Entities: What’s the Difference?

Entities might sound similar to keywords. In fact, they are quite different. Here’s how they differ and why those differences are so important.

Keywords

Keywords are words or phrases used in searches. They’re often the focal points of terms users search for and can be questions, sentences, or single words.

For example, users looking for makeup tutorials may search for makeup, tutorial, smokey eye, how to do a smokey eye, and so on.

entity based seo smokey eye example

Keywords still matter because they connect your content to queries. Your goal is to drive organic traffic to your site by ranking for keywords that help customers find your brand on search engines.

Keywords have long been the backbone of SEO, mainly because search engine algorithms needed clear, concise direction to populate relevant search results.

In the early days of SEO, keyword stuffing, which involves adding your chosen keyword far too many times or including largely irrelevant, popular keywords, was used constantly. At the time, search algorithms needed to see specific keywords repeatedly to rank content properly.

These days, algorithms have evolved significantly, and many old SEO tactics are, at best, frowned upon.

Google has always maintained that good copy and content are preferred over keyword stuffing and other black-hat SEO tricks.

Entities

As defined by Google, an entity is “A thing or concept that is singular, unique, well-defined and distinguishable.” This doesn’t need to be a physical object and can include colors, dates, ideas, and so on. 

Entities can be people, places, products, companies, or abstract concepts. They should always be distinct and independent of other entities or keywords.  

Emphasizing entities over keywords has allowed search engines to be more accurate in their results. However, search engines aren’t psychic—they need more information to figure out which entity you’re searching for.

For example, a search for the word “apple” could result in pages about the fruit or pages about the company. As interesting as both topics are, if you’re searching for information about whether apple seeds are indeed poisonous, reading about iPhones probably won’t be too helpful. You need to add some keywords to tell the search engine which entity you mean. 

apple fruit vs Apple company logo entity based SEO

We can think of entities as large topics keywords live within. For entities to be legitimate, they need to link to a search engine knowledge graph representing linked information and data across the internet. Knowledge graphs allow search engines to scan your website effectively

Google’s Knowledge Graph used Wikipedia as its primary trusted seed set. An easy way to think about entities is that they are anything that could have a specific Wikipedia page assigned to it. 

It’s important to note that not every entity has a Wikipedia page. This could just be a helpful way to think of the concept.

How Do Entities and Keywords Work Together?

Keywords with context help entities become defined, but you need to know precisely what your entity is all about before you can create your keyword-rich and well-written content. An SEO strategy recognizing both factors is your best bet for success.

On-page, you can create entities for an internal knowledge graph that uses keywords to link to different pages on your site. You can also connect your content to high E-A-T knowledge graphs such as Wikipedia or LinkedIn. While this won’t directly affect your page rank, it can improve your page authority in search.

Benefits of Entity-Based SEO

Entity-based SEO is more relevant, refined, and granular than keyword SEO alone.

Over time, improvements in automated natural language processing and new search methods like chatbots and digital assistants have made search queries longer and more complicated.

Yet, most search queries still relate to an entity. For example, “Things to do in Brussels” or “What to do in Brussels today” relates to Brussels, Belgium. Even without the quantifier of Belgium, search engines can tailor their results based on previous entity knowledge and context.

For marketers, entity-based SEO offers more concrete discoverability. Ensuring your brand is a concrete entity could help you include a large number of keywords that may not have been previously available. Nike, for example, can be searched through running shoes, tennis shoes, workout clothes, Air Jordans, and more, without users getting lost along the way. 

In e-commerce, entity-based SEO can connect your products under a single entity. For example, if you sell windows in Paris, France, you may be able to contribute keywords to the Paris, France entity, opening up your business to potential new clients. Also, connecting your window selling business to Paris, France, helps ensure customers living in Paris, Texas, won’t see your content and mistakenly order from you.  

How to Shift Your Strategy to Entity-Based SEO

Adding an entity focus to your existing SEO strategies could help you prepare for future algorithm updates.

Understanding which entities your business connects to and establishing your business as an entity in itself will become increasingly important in coming years.

How do you move on from previous, often keyword-focused strategies to an entity-based strategy?

List Your Business on Relevant Directories

One way to leverage entity-based SEO is to list your business on directories across the internet. Google My Business, for example, is used as a data source for the Google Knowledge Graph. 

Other listing services, such as Yelp, can also help create strong, domain-rich backlinks for your brand and help you create a known entity. Yelp appears in the top five search results in 92 percent of Google web searches.

Listing sites may change from location to location, so do your research when deciding where to list. Additionally, be sure to choose sites with high domain authority to improve your search engine standing. 

Using this strategy, businesses listed here can form entities and begin connecting unique keywords.

Prioritize Brand Building

Brand building is another essential tactic in entity-based SEO. Any offline brand presence measures need to be brought online, and you should always be considering new ways to create a well-defined and unique identity for your brand.

Managing your reputation is also increasingly important, as your reputation may factor into entity creation. Be conscious of the keywords you currently rank for and note—and correct for—any possible PR problems that could arise.

Consider Your Use of Interface Management Tools

Interface management is becoming a factor in entity-based SEO, as a silo approach to collaboration may negatively impact search engine visibility. This may happen despite keyword rankings, which could significantly affect some businesses.

Ultimately, focusing on keywords is not going to be enough going forward. Businesses and marketers need to shift their focus to entity-based SEO and start implementing tactics to ensure their content connects to their entities.  

Conclusion

Entity-based SEO can be a great way to communicate the context and relevance of your brand online.

By targeting ideas and context rather than words or phrases alone, entities build a bigger picture of your content, potentially allowing it to out-perform traditional keyword research methods.

We can expect to see more opportunities for marketers to create more depth in their branding strategies by focusing on entity-based SEO. 

In what ways have you experimented with entity-based SEO?


from Blog – Neil Patel https://ift.tt/3nDVbwL
via IFTTT

Wednesday 28 April 2021

How to Become a Shopify Partner

how to become a shopify partner

As one of the largest e-commerce platforms on the internet, Shopify offers budding (and established) entrepreneurs a platform to sell their wares and increase their reach.

In fact, Shopify dominates nearly 20 percent of the e-commerce market share.

That’s not all. With millions of active buyers on the platform, there is plenty of opportunity for brands to grow their revenue.

In addition to a massive audience, Shopify offers users a simple, streamlined experience that allows store set up in record time.

When you join the Shopify platform, you have immediate access to functionality that allows you to:

  • build a website
  • create a domain
  • multiple payment options
  • order receiving and processing

In short, Shopify equips sellers with the tools they need to get their store off the ground.

Shopify benefits don’t only apply to online vendors—through their unique partnership program, individuals can align with Shopify to grow their business and increase revenue through a variety of functions.

Is the Shopify Partner program right for you? Here’s what you need to know. 

What Is the Shopify Partner Program?

The Shopify Partner Program is a set of tools and resources Shopify users can leverage to grow their business. This is done through four main categories:

  • Marketing: For Shopify users in need of a more defined audience, streamlined campaigns, or optimized content, Shopify Marketers can offer their services to help Shopify users increase their reach and employ better marketing strategies.
  • Shopify Developers: Experts in Shopify store development, can build apps that help Shopify’s merchants in a variety of ways, including increased engagement and sales. 
shopify partner store testing
  • Shopify Designers: From graphics to branding, these design experts help stores with design needs, often working collaboratively with developers.
  • Affiliate Marketing on Shopify: Affiliate marketers can offer nearly any service on the platform, from influencer marketing to content creation.

Shopify Partners can also build and sell Shopify apps and themes to generate income. 

In addition to the above different kinds of Partners, there are also different levels of partnership, including: 

  • Shopify Partners: Consider this the entry-level role for Shopify Partners. At this level, you gain access to limitless test stores, allowing you to customize, learn and hone your craft. For each action (client referral, app designed, or graphic completed), you earn a monthly commission.
  • Shopify Plus Partners: This tier is exclusively for Shopify Partners who do excellent work. This level often includes agencies, enterprise consultants, and system integrators, as well as individuals.
  • Shopify Fulfillment Partners: Fulfillment partners make up the Shopify Fulfillment Network and can operate inside or outside of the bounds of the Shopify Partner Program. 

What Are the Advantages of Becoming a Shopify Partner?

Given that one in three Shopify sellers seek services from Shopify Partners, there’s a real opportunity for you to supplement your income when you join the program. In addition to adding some extra padding to your bank account, Partners can access free training resources and perks, including:

  • FAQs 
  • how-to articles
  • live chat
  • the Shopify Academy

The partnership also comes with access to an unlimited number of stores, so you can experiment to your heart’s content.

As a Shopify Partner, you gain exclusive access to offers on tools that can help you run and grow your business. Once you have your dashboard set up (more on that later), select the “Partner Perks” section and select the “Claim perk” button. 

Even better, when you sign up to become a Shopify Partner, you create opportunities to scale your business. Regardless of whether you’re a well-established agency or an individual setting out to grow your skills and client base, enrolling in the Shopify Partner program is a great growth opportunity. 

Sound good?

Let’s break down how you actually become a Shopify Partner.

5 Steps to Become a Shopify Partner

The Shopify partnership comes with plenty of perks we’ve already covered, but there’s one overarching benefit we haven’t covered: Becoming a Shopify Partner is free. 

Now that you have a better understanding of the value associated with a Shopify Partnership, follow these five steps to start growing your business today. 

1. Learn More About Shopify Partners

This blog explores the surface-level of a Shopify Partnership, however, you’ll want to spend more time on the Shopify partner page to read the blog and learn more about partner perks and features. 

2. Join the Shopify Partner Program

This is the easiest step yet! Simply head to the sign-up page and enter your name and email address and wait for your verification.

3. Verify Your Email Address

After creating an account, you’ll receive an email asking you to follow a link to verify your email address. Be sure to do this within 24 hours, as the window for response closes after that timeframe.

After you select the blue button to confirm your account, you’ll land on the Shopify accounts page. From there, choose “Shopify Partners” and then “Create new partner account.”

4. Enter Your Information

Now that you’ve successfully set up an account, you must complete a form that asks for the specifics of your business. Complete all the necessary fields. 

After this step, scroll down to the “Business goals” section and choose the function that best suits your offering. Here you can select:

  • building apps
  • building new Shopify stores for clients
  • providing Services to existing Shopify merchants
  • referring merchants as an affiliate
  • selling products as a Shopify merchant
  • other

After you’ve selected the right category, scroll down the page until you reach the section about platform usage. Here, you’ll identify which platforms you’re currently using, allowing Shopify to equip you with custom tools. 

Categories include:

  • BigCommerce
  • Lightspeed
  • Magento
  • PrestaShop
  • Square
  • Squarespace
  • Wix
  • WooCommerce
  • WordPress
  • None
  • Other

After selecting the relevant category, read the Partner Program Agreement at the bottom of the page and check the corresponding box. 

5. Meet Your Shopify Dashboard

Your dashboard is the hub of your Shopify business. To get started, select the Shopify Partner programs you’d like to apply to from the “Get started” section.

shopify partner dashboard

A short form will ask you to explain your interest in each program.

Even if you’re not accepted into a program immediately, you can still use your dashboard to grow and hone your skills. With endless courses available from the Shopify Partner Academy, you can earn certifications in Business Fundamentals, Theme Development, App Development, and Product Fundamentals. 

You can take the accompanying test as many times as you like, all while using the resources provided through the Shopify Partner Academy to increase your knowledge base. 

After receiving your acceptance to one of the Shopify Programs, you can start earning some cash. Payments occur on a bi-monthly schedule via PayPal.

The Partner Dashboard is also your source for all questions. From the portal, you can contact Shopify support whenever, wherever to get your questions answered.

Measuring the Success of Your Shopify Partnership

You’ve set up your dashboard, been accepted into a few programs, have been working for a few months, and now you want to know how successful your Shopify partnership actually is.

While there are countless metrics you can use to track the success of your endeavors, here are six key figures to assess the strength and success of your partnership.

Lead Conversion Rate

This metric is exactly what it sounds like: a measurement of how many leads converted into customers in a specific period of time, generally within 30-day increments.

Significant due to its ability to highlight how successful your campaigns are at turning attraction into actual leads, your lead conversion rate is a must-track metric. 

How do you calculate lead conversion rate? The formula is pretty simple, as long as you have the numbers.

Lead Conversion Rate = (Number of new customers in the last x days ÷ number of leads in the last x days) x 100

Lead Velocity Rate (LVR)

This figure is representative of real-time sales performance. Given its predictive nature, the metric is perfect for forecasting revenue growth.

How do you calculate lead velocity rate?

Lead velocity rate = (Number of qualified leads this month – number of qualified leads last month) ÷ number of qualified leads last month x 100

Monthly Recurring Revenue (MRR) 

This metric represents revenue, rather than what is actually actively collected. A good indicator of success, MRR lets you know if your leads are converting to actual customers within a finite time span. 

How do you calculate MRR?

MRR = Number of customers x average billed amount

Churn Rate 

This metric refers to the number of customers who stop using your service during a specific time frame. Churn rate is a valuable metric to determine if your marketing strategies and onboarding process is effective. 

How do you calculate churn rate? There are two types of churn rate: 

User churn = (Cancelled users in the last 30 days ÷ active users 30 days ago) x 100

Revenue churn = (MRR lost to downgrades & cancellations in the last 30 days ÷ MRR 30 days ago) x 100

Average Revenue Per User (ARPU)

Use this metric to learn how much revenue you’re creating from each individual user. This statistic is valuable to assess marketing successes and failures and forecast revenue goals.

How do you calculate ARPU?

ARPU = MRR ÷ active users

Lifetime Value (LTV) 

This metric represents the amount a user will spend on your service throughout the course of your relationship. This figure helps you assess whether it is more valuable to maintain existing customers or pursue new ones. 

How do you calculate LTV?

LTV = Average monthly recurring revenue per customer ÷ user churn rate

I recommend monitoring these figures on a daily, weekly, and monthly basis for a comprehensive view of your success. These metrics let you identify patterns and see if improvements succeed so you can adjust your approach as needed. 

Conclusion

Shopify’s continuous growth shows no signs of stopping.

For any digital marketers, developers, or graphic designers, becoming a Shopify Partner offers an opportunity to broaden your portfolio, sharpen your skills, and earn some extra cash.

If you’re looking to increase your client base and your revenue, Shopify might be the place for you.

If you’re considering wading into the world of Shopify partnership, be sure to actively monitor the right metrics and ignore vanity metrics that have little impact on overall success. 

What part of the Shopify Partner program is most useful to you?


from Blog – Neil Patel https://ift.tt/3t9nyEp
via IFTTT